> For the complete documentation index, see [llms.txt](https://docs.tip4serv.com/llms.txt). Markdown versions of documentation pages are available by appending `.md` to page URLs; this page is available as [Markdown](https://docs.tip4serv.com/getting-started.md).
# Getting Started
In this article, we'll discuss how to set up your Tip4Serv store. Within 15 minutes, your store will be ready to welcome your customers.
### 1. Creating an account
Let's start with the basics. We'll have to create an account on Tip4Serv. Creating an account is really simple: go to the [Register](https://tip4serv.com/register) page and fill out the form.
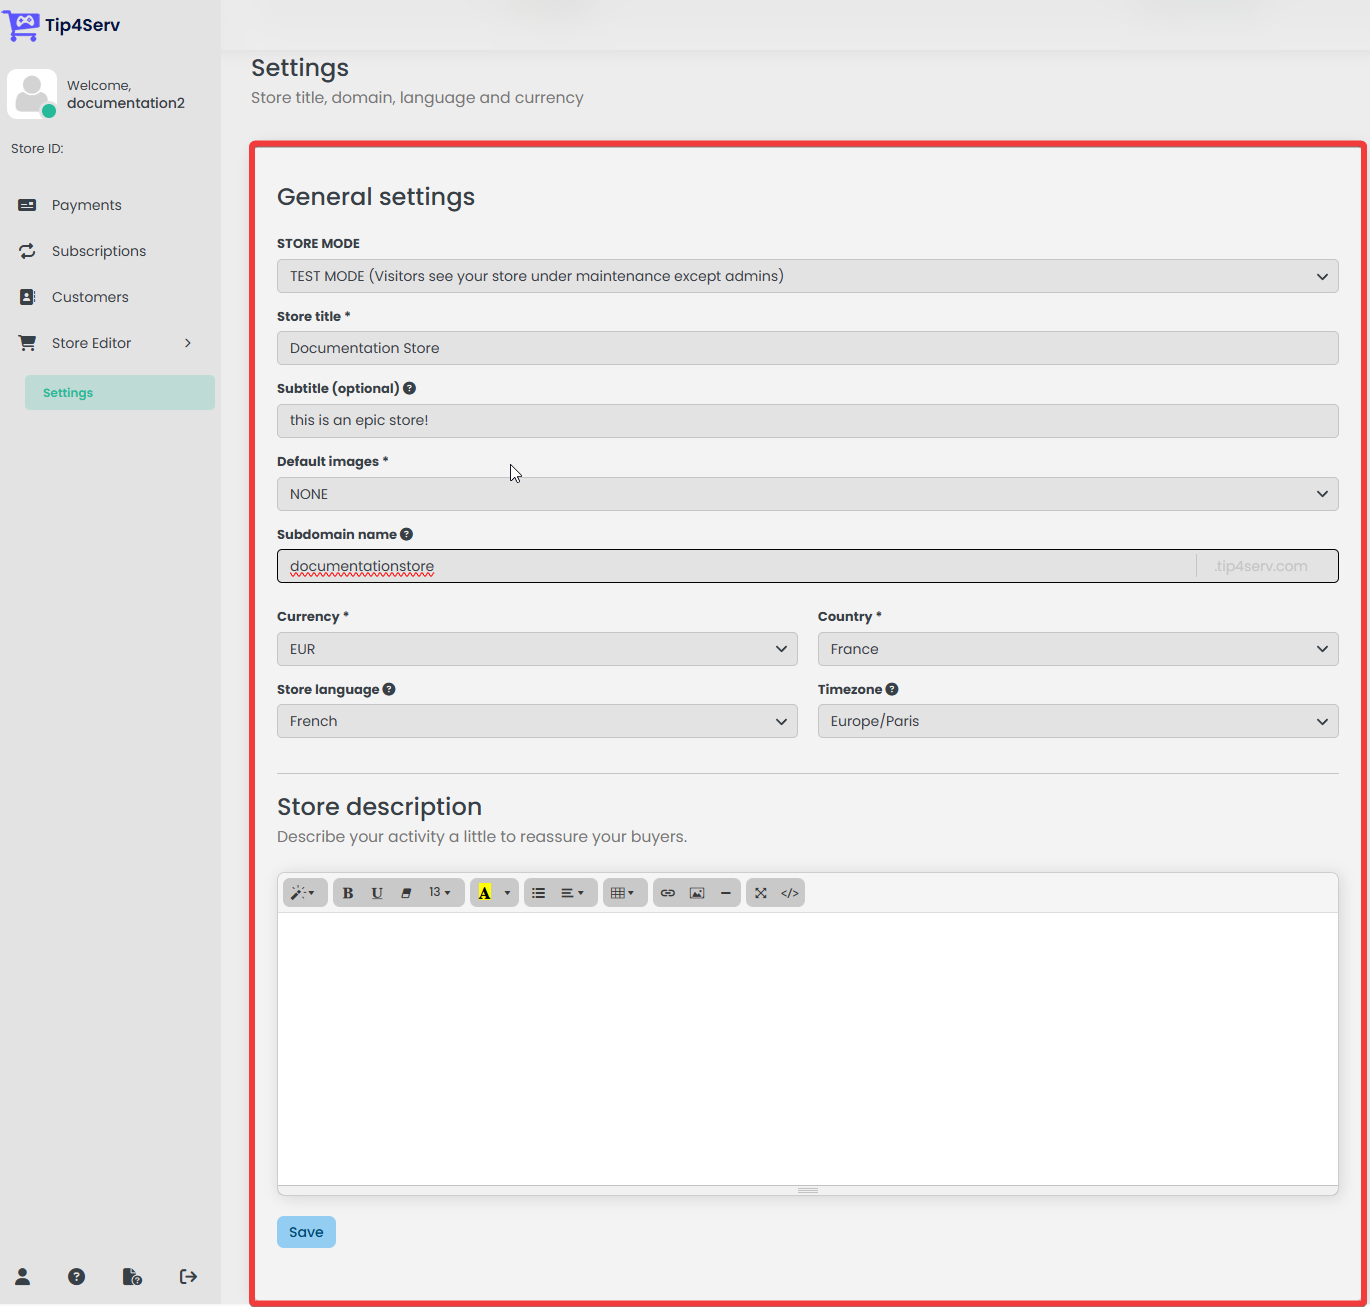
Once you are registered, you will be prompted to fill out the form about your store:
Store creation form
The most important things are to give a store title, define the currency of your store, and finally the domain of your store. This field corresponds to the domain your customers will have to enter in their web browsers to access your store. In this example, my domain is **"documentationstore"**, so users can access the store via: **"documentationstore.tip4serv.com"**.
*(If you wish to set up your own domain you can check this* [*tutorial*](/store-management/custom-domain.md) *about custom domain.)*
### 2. Receiving payments
Once you've filled out the first form, you will be prompted to connect your Tip4Serv store to a payment gateway service. Currently, there are 2 available payment gateway services: [**PayPal** ](/payments/paypal.md)and [**Stripe**](/payments/stripe.md).
Simply select the payment gateway you wish to use (you can use both) and follow the instructions indicated.
Setting up payment gateway on Tip4Serv
### 3. Setting up your game servers
*If you are only looking to receive donations or sell files, you can skip this section.*
Now that you've set up all the necessary financial systems, let's connect Tip4Serv to our game servers. To set up your game servers, simply go to the [Servers](https://tip4serv.com/dashboard/my-servers) section, and you will see two buttons: one to connect game servers and another one for a Discord server. Select the option you wish to set up and follow the instructions you will be prompted to follow. If you are stuck or have any questions, check the Games section and visit the specific game you wish to get more information about.
Setting up your game servers
### 4. Creating your products
One of the last most important steps is creating your products. Simply visit the [Products](https://tip4serv.com/dashboard/my-products) section, and you will see a panel displaying all your existing products. You'll be able to either edit, create, or delete them.
Once you are in the product edition mode, you will be prompted to this page.
This is the page where you set up your products. You can actually customise a lot of stuff. The most important entries to define are the Title, Category, and price. To define what your customers will receive, scroll down below to the **"Server & Discord cmds"** section. You will be able to define all the commands which will be executed when your customers purchase your product.
For those who simply want to receive donations, you can simply either set up a fixed price or enable **"Pay what you want"** to allow your donators to give any amount they wish.
For those who want to sell files, there is a **"Files"** section where you can set which files your customers will receive.
We can't cover here all the different sections of product edition, but feel free to explore the **"Product Setup"** or **"Games"** section in the documentation to learn more about what you can do with Tip4Serv.
### 5. Opening for the public
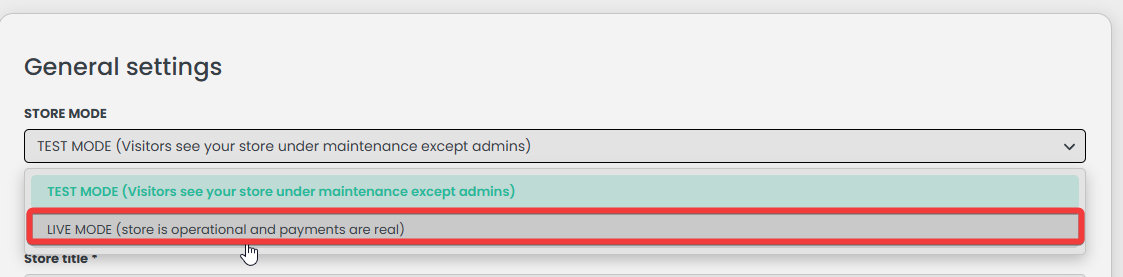
Currently, your store is in test mode. You can visit your store and simulate payments just to make sure that everything works as you intended. Once you are done, return to the settings page and change the mode to live, and voilà! Your store is now fully set up, and you can share your store with your community!