# Introduction to Tip4Serv

Tip4Serv is a platform that allows the gaming communities to create their virtual store and sell digital goods.

Community manager and content creator is heavy work, **we want to help them save time** to manage donations and reward players automatically.

Our mission is to offer a **user-friendly** platform that is as simple as possible for the creator and the buyer.


# Getting Started

In this article, we'll discuss how to set up your Tip4Serv store. Within 15 minutes, your store will be ready to welcome your customers.

### 1. Creating an account

Let's start with the basics. We'll have to create an account on Tip4Serv. Creating an account is really simple: go to the [Register](https://tip4serv.com/register) page and fill out the form.

Once you are registered, you will be prompted to fill out the form about your store:

<figure><img src="https://2187496599-files.gitbook.io/~/files/v0/b/gitbook-x-prod.appspot.com/o/spaces%2FrJFlpzFF4M0XjvFfIMsk%2Fuploads%2FW9f4KleJyffCDHFiVvYT%2FIGPjiNf0pA.png?alt=media&amp;token=68c5b1a8-c29e-4e68-95e2-e57a78c68f64" alt="Store creation form"><figcaption><p>Store creation form</p></figcaption></figure>

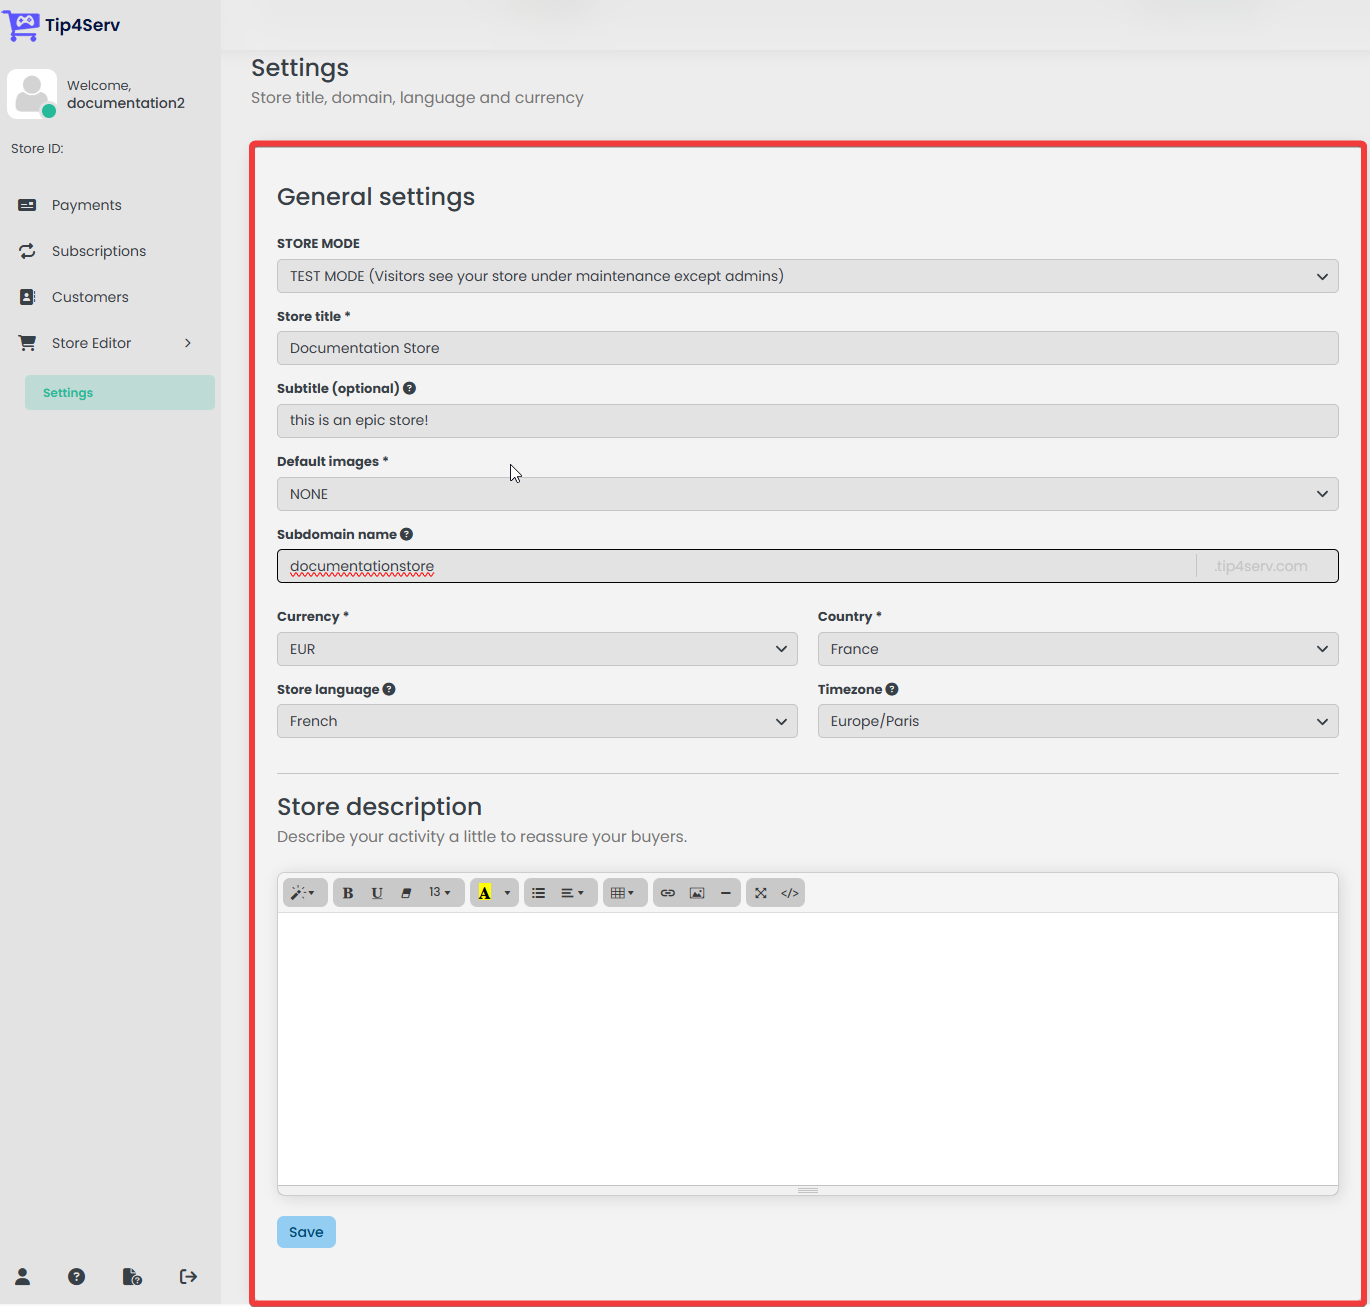
The most important things are to give a store title, define the currency of your store, and finally the domain of your store. This field corresponds to the domain your customers will have to enter in their web browsers to access your store. In this example, my domain is **"documentationstore"**, so users can access the store via: **"documentationstore.tip4serv.com"**.&#x20;

*(If you wish to set up your own domain you can check this* [*tutorial*](/store-management/custom-domain) *about custom domain.)*

### 2. Receiving payments

Once you've filled out the first form, you will be prompted to connect your Tip4Serv store to a payment gateway service. Currently, there are 2 available payment gateway services: [**PayPal** ](/payments/paypal)and [**Stripe**](/payments/stripe).

Simply select the payment gateway you wish to use (you can use both) and follow the instructions indicated.

<figure><img src="https://2187496599-files.gitbook.io/~/files/v0/b/gitbook-x-prod.appspot.com/o/spaces%2FrJFlpzFF4M0XjvFfIMsk%2Fuploads%2Fjuow5U7VUVYg53t7HF59%2Fbrave_E7SZniCCi5.png?alt=media&amp;token=f434691d-f0ab-4c23-8b76-0f56a5000702" alt="Setting up payment gateway on Tip4Serv"><figcaption><p>Setting up payment gateway on Tip4Serv</p></figcaption></figure>

### 3. Setting up your game servers

*If you are only looking to receive donations or sell files, you can skip this section.*

Now that you've set up all the necessary financial systems, let's connect Tip4Serv to our game servers. To set up your game servers, simply go to the [Servers](https://tip4serv.com/dashboard/my-servers) section, and you will see two buttons: one to connect game servers and another one for a Discord server. Select the option you wish to set up and follow the instructions you will be prompted to follow. If you are stuck or have any questions, check the Games section and visit the specific game you wish to get more information about.

<figure><img src="https://2187496599-files.gitbook.io/~/files/v0/b/gitbook-x-prod.appspot.com/o/spaces%2FrJFlpzFF4M0XjvFfIMsk%2Fuploads%2FYTjR15g1bFmohKzdcSBu%2FVrhDMKhHMd.png?alt=media&amp;token=9a795306-16a0-4d83-9b0e-6a5c5952ca92" alt="Setting up your game servers"><figcaption><p>Setting up your game servers</p></figcaption></figure>

### 4. Creating your products

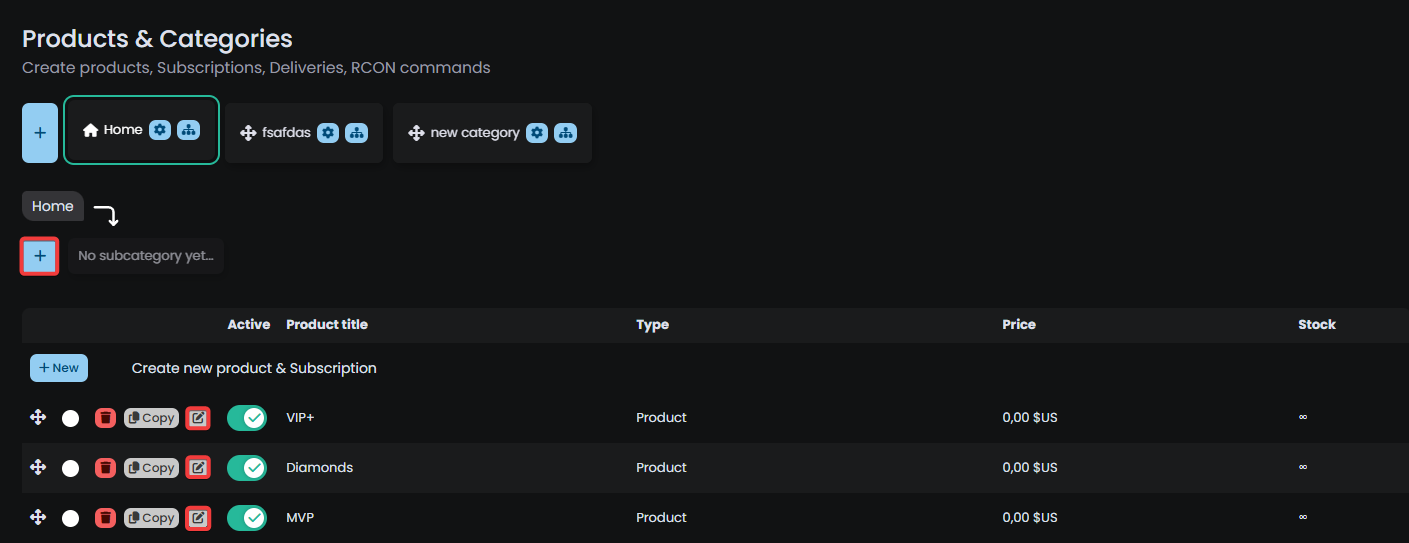
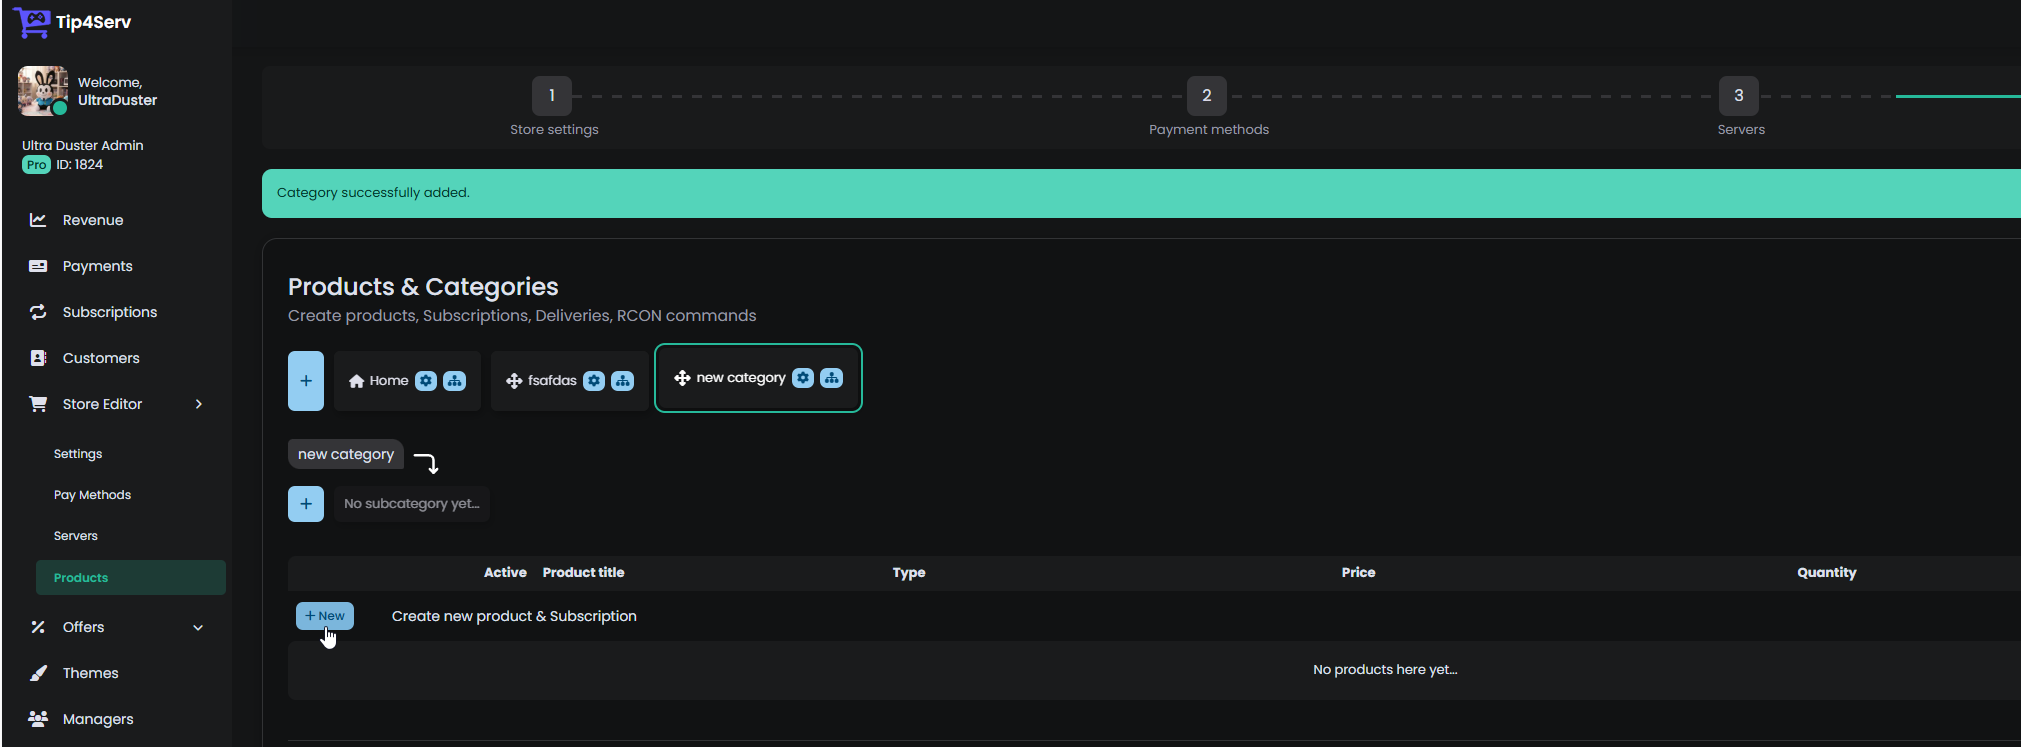
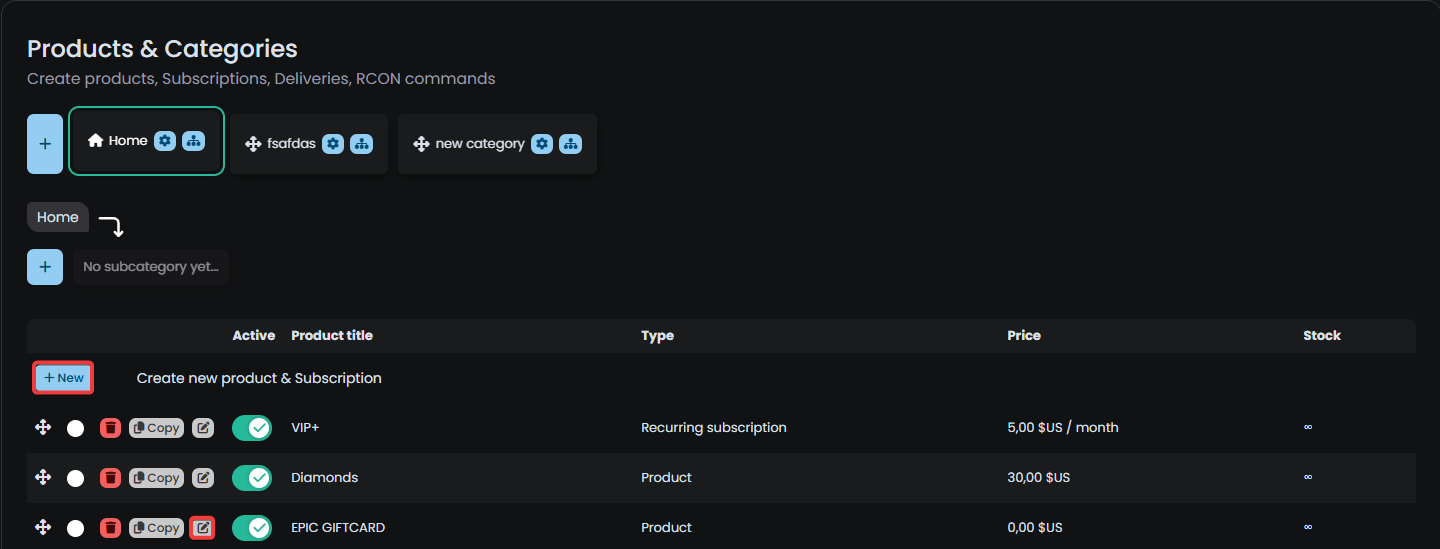
One of the last most important steps is creating your products. Simply visit the [Products](https://tip4serv.com/dashboard/my-products) section, and you will see a panel displaying all your existing products. You'll be able to either edit, create, or delete them.

Once you are in the product edition mode, you will be prompted to this page.

<div><figure><img src="https://2187496599-files.gitbook.io/~/files/v0/b/gitbook-x-prod.appspot.com/o/spaces%2FrJFlpzFF4M0XjvFfIMsk%2Fuploads%2Fxo0MMmBZyfkKkf9zzveh%2Fbrave_wgk08N4uM0.png?alt=media&amp;token=442b7306-5d21-4382-a6b7-cd32ece46354" alt=""><figcaption></figcaption></figure> <figure><img src="https://2187496599-files.gitbook.io/~/files/v0/b/gitbook-x-prod.appspot.com/o/spaces%2FrJFlpzFF4M0XjvFfIMsk%2Fuploads%2FjZDY5QM6Fjv8RXtg0lTb%2Fbrave_0zH7jem3IL.png?alt=media&amp;token=8f92a751-b660-4d14-bc59-40423b19b63c" alt=""><figcaption></figcaption></figure></div>

This is the page where you set up your products. You can actually customise a lot of stuff. The most important entries to define are the Title, Category, and price. To define what your customers will receive, scroll down below to the **"Server & Discord cmds"** section. You will be able to define all the commands which will be executed when your customers purchase your product.

For those who simply want to receive donations, you can simply either set up a fixed price or enable **"Pay what you want"** to allow your donators to give any amount they wish.&#x20;

For those who want to sell files, there is a **"Files"** section where you can set which files your customers will receive.

We can't cover here all the different sections of product edition, but feel free to explore the **"Product Setup"** or **"Games"** section in the documentation to learn more about what you can do with Tip4Serv.

### 5. Opening for the public

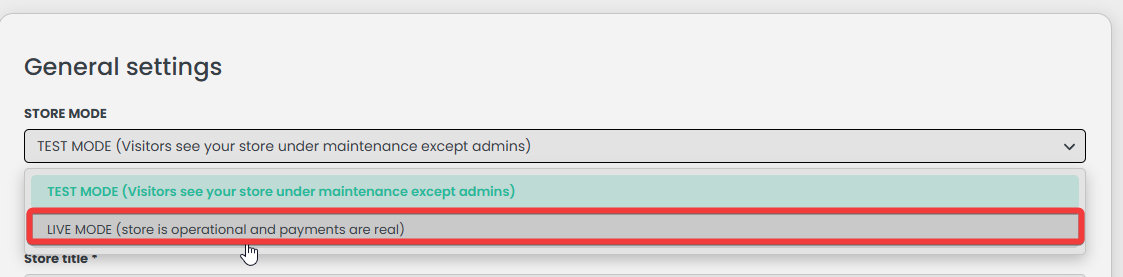
Currently, your store is in test mode. You can visit your store and simulate payments just to make sure that everything works as you intended. Once you are done, return to the settings page and change the mode to live, and voilà! Your store is now fully set up, and you can share your store with your community!

<figure><img src="https://2187496599-files.gitbook.io/~/files/v0/b/gitbook-x-prod.appspot.com/o/spaces%2FrJFlpzFF4M0XjvFfIMsk%2Fuploads%2FB4XGzoHOczFSZtIBT6Oi%2FHmHZ3hVaHj.png?alt=media&amp;token=550fda0e-7319-46c3-8aff-7e01030563ff" alt=""><figcaption></figcaption></figure>


# How we charge

Tip4Serv takes a percentage of your earnings, but the exact process varies depending on the payment provider.

{% tabs %}
{% tab title="Paypal" %}
When a customer buys a product in your store, **you will receive vast majority of your payments directly in your Paypal account (free of charge)**.

The system will calculate when to collect the **5% fees (or 3.8% for the** [**PRO plan**](https://tip4serv.com/pricing)**), by cashing a full payment** corresponding to the due amount on the Tip4Serv Paypal account.&#x20;

*Only when the payment is inferior or equal to the due amount.*

[**Tip4Serv fees do not include Paypal fees**](#user-content-fn-1)[^1]**.**

<figure><img src="https://2187496599-files.gitbook.io/~/files/v0/b/gitbook-x-prod.appspot.com/o/spaces%2FrJFlpzFF4M0XjvFfIMsk%2Fuploads%2FKnfjhC4UeN7lwv36xCAo%2Fbrave_HXR007I3vT.png?alt=media&amp;token=60b07776-1a32-4cb6-a8b6-6c26691f93c2" alt="Example image from a store"><figcaption><p>Example image from a store</p></figcaption></figure>

**In the example above**, the store owner collected 8 payments for a total of 145€ on his Paypal account.

Then a 5€ transaction took place on November 11th, the system automatically collected it to partly pay the 5%. (5% of 145€ = 7,25€)

It will then requires another tiny transaction to complete the 7,25€ fees, namely €2.25 etc...

**Conclusion**: Tip4Serv collects some transactions to pay the 5% commission. Sometimes the buyer will pay on your Paypal address and sometimes he will pay on Tip4Serv's Paypal.

> This system is temporary and will be simplified in the near future, and intended to work as Stripe does.
> {% endtab %}

{% tab title="Stripe" %}
Tip4Serv takes 5% (or 3.8% for the [PRO plan](https://tip4serv.com/pricing)) on every payment you receive on your Stripe account.

[**Tip4Serv fees do not include Stripe fees**](#user-content-fn-2)[^2]**.**
{% endtab %}
{% endtabs %}

[^1]: Learn more about [Paypal fees](https://www.paypal.com/digital-wallet/paypal-consumer-fees)

[^2]: Learn more about [Stripe fees](https://stripe.com/pricing)


# Frequently Asked Questions

Explanations on Paypal Tip4Serv fees

This FAQ is designed to provide clear and concise answers to common questions about Tip4Serv's fee structure and how it integrates with PayPal.

<details>

<summary>What are Tip4Serv fees, and how are they charged?</summary>

Tip4Serv charges a 5% fee on all sales made through the platform. This fee is deducted from your sales to cover the costs of providing and maintaining the service. For example, if you earn £1,000, Tip4Serv will collect up to £50 in fees.

</details>

<details>

<summary>Why did I receive no funds for a recent transaction?</summary>

When a payment is intercepted for fees, you may not see it in your PayPal account. This is part of the process to ensure outstanding fees are cleared. However, you are still responsible for delivering the purchased product to the buyer.

Indeed, if the payment has been collected by Tip4Serv you will not be notified by Paypal, we therefore advise you to follow these tips:

* Enable Discord notifications via the [notification settings](https://tip4serv.com/dashboard/notifications) to stay informed about all purchases.
* Tip4Serv sends you an email with each purchase so keep an eye on them.

</details>

<details>

<summary>I see a payment on Tip4Serv but why I don't see it on my Paypal account?</summary>

Tip4Serv occasionally intercepts payments to collect outstanding fees because PayPal does not allow us to take a commission directly from your transactions. This ensures that the platform can operate without requiring a subscription fee. **Once the fee is settled, subsequent payments will be sent to your PayPal account as usual.**

These payments are indicated in the list of payments on the Tip4Serv dashboard with the yellow badge <mark style="color:yellow;">**Tip4Serv fee**</mark> as in the image below:

<img src="https://2187496599-files.gitbook.io/~/files/v0/b/gitbook-x-prod.appspot.com/o/spaces%2FrJFlpzFF4M0XjvFfIMsk%2Fuploads%2FNQrp3lrha8FgVBpR48HV%2F12.png?alt=media&amp;token=5fd31caf-1f42-459f-821c-14367ae4866a" alt="" data-size="original">

</details>

<details>

<summary>How can I check my outstanding balance for Tip4Serv fees?</summary>

To check the amount currently owed for Tip4Serv fees, you can see it in the [payments list](https://tip4serv.com/dashboard/payments).

</details>

<details>

<summary>How does this system benefit me as a seller?</summary>

This system eliminates the need for a monthly subscription and reduces transfer fees, making it more cost-effective for sellers who experience variable sales volumes.

</details>

<details>

<summary>Can I get a breakdown of the fees taken?</summary>

Yes you just have to type "Tip4Serv fee" in the search in the [list of payments](https://tip4serv.com/dashboard/payments).

</details>

<details>

<summary>What should I do if I still have questions about fees or payments?</summary>

If you have further questions:

* Refer to the [documentation](https://docs.tip4serv.com/tip4serv-fees/how-we-charge) for more details.
* Contact Tip4Serv support through email or open a ticket on Discord for personalized assistance.

</details>

<details>

<summary>Who collects the payments?</summary>

You. We only collect Paypal payments that pay Tip4Serv fees. When you receive a payment, it goes directly to your **Paypal or Stripe account**. You must therefore transfer your money from of these platforms to your bank account.

</details>

If you need help, feel free to [contact us](https://tip4serv.com/contact).


# Test mode

The TEST mode allows you to buy your products by passing the checkout

The TEST mode allows you to work on your store without visitors being able to see its content, they will see a page under maintenance.

It's also useful if you want to simulate a purchase and the successful delivery of server commands or Discord actions you've set up.

To switch to TEST MODE, go to [MY SETTINGS](https://tip4serv.com/dashboard/my-settings) and set **State** to **TEST MODE**

<figure><img src="https://2187496599-files.gitbook.io/~/files/v0/b/gitbook-x-prod.appspot.com/o/spaces%2FrJFlpzFF4M0XjvFfIMsk%2Fuploads%2FVlUzepg7OvxXhIwMqNqX%2F9OGYMUlFyC.png?alt=media&amp;token=ba5c3d20-85ed-475c-bea8-06c7d614fd19" alt="" width="563"><figcaption></figcaption></figure>

### Add an order manually

To do this put your store in TEST MODE then follow these steps:&#x20;

1. Go to your store
2. Add the product to your basket
3. Enter player ID
4. Click on Payment


# Managing multiple stores

This documentation explains how to create and manage multiple Tip4Serv stores while controlling them from a single master account.

## 1. Create a New Store

* **Create a New Email Address:**\
  Each additional store requires a unique email address. This email will be used to create a dedicated account for the store.
* **Create a Tip4Serv Account for the New Store:**\
  Log out of your current account and go to [Tip4Serv](https://tip4serv.com) and create a new account using the newly created email address. Then Fill in the required information in **MY SETTINGS**.

## 2. Add the Master Account as an Administrator

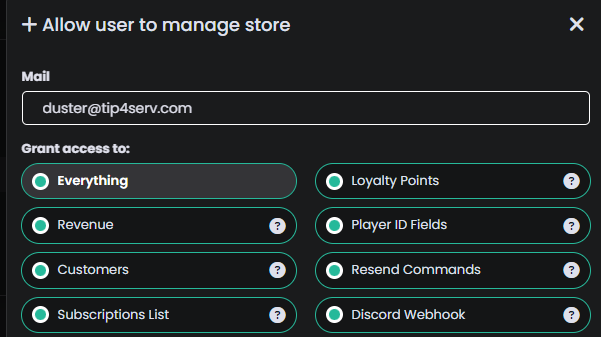
* **Navigate to the** [**Manage Team**](https://tip4serv.com/dashboard/accounts) **section in the dashboard.**
* **Add the Master Account’s Email Address:**
  * Enter the email address of the master account you wish to use to manage the store.
  * Select all the permissions you wish to give to this account.
  * Confirm the addition.

<figure><img src="https://2187496599-files.gitbook.io/~/files/v0/b/gitbook-x-prod.appspot.com/o/spaces%2FrJFlpzFF4M0XjvFfIMsk%2Fuploads%2FFvRx5DwTnZHTE7QnNc5t%2Fbrave_Hmmh4rWBhc.png?alt=media&amp;token=dfe9e3cf-64b8-4da8-a0a5-74ed03cd93df" alt=""><figcaption></figcaption></figure>

## 3. Manage Multiple Stores from a Master Account

* **Log in to the Master Account.**
* **Switch Between Stores:**
  * In the dashboard, click on your profile picture located at the top right corner.
  * Select the store you wish to manage.

<figure><img src="https://2187496599-files.gitbook.io/~/files/v0/b/gitbook-x-prod.appspot.com/o/spaces%2FrJFlpzFF4M0XjvFfIMsk%2Fuploads%2FvAelPX1O3El9oAPl7JX7%2Fbrave_t4N4sspCcH.png?alt=media&amp;token=1d047b47-26fa-487d-8932-0e56f3eff2a2" alt=""><figcaption></figcaption></figure>


# Custom domain

Learn how to set a custom domain for your store for free.

By default, your store are accessible on a `[something].tip4serv.com` domain. However, you can customize this by setting a custom domain.

If you don't have a domain name, order one from a registrar like [Godaddy.com](https://www.godaddy.com/) or [Domain.com](https://www.domain.com/) or other.

If you have any trouble while following the steps in this section, please first [review our troubleshooting information](/store-management/custom-domain/troubleshooting), and then [contact support](https://tip4serv.com/contact) if you're still not sure what to do next.


# Choosing a subdomain

{% hint style="info" %}
Please follow the steps to set a custom domain in this order:

1. [Choosing a custom domain](/store-management/custom-domain/choosing-a-subdomain)
2. [Initiating the custom domain setup](/store-management/custom-domain/initiate-customdomain)
3. [Configuring DNS](/store-management/custom-domain/configuring-dns)
4. [Check DNS](/store-management/custom-domain/check-dns)
   {% endhint %}

*Only* subdomains can be used to serve your store. It's not possible to use an apex domain.

Here are some examples of what you could and could not choose — just replace `example.com` with your own domain:

| Domain type      | Example                                                                                                       | Supported? |
| ---------------- | ------------------------------------------------------------------------------------------------------------- | :--------: |
| Apex domain      | `example.com`                                                                                                 |      ❌     |
| `www` subdomain  | `www.example.com`                                                                                             |      ✅     |
| Custom subdomain | <p><code>docs.example.com</code></p><p><code>help.example.com</code><br><code>anything.example.com</code></p> |      ✅     |

Once you have chosen your custom domain, you're ready to move onto the next step: [Initiating the custom domain setup](/store-management/custom-domain/initiate-customdomain)


# Initiate customdomain

{% hint style="info" %}
Please follow the steps to set a custom domain in this order:

1. [Choosing a custom domain](/store-management/custom-domain/choosing-a-subdomain)
2. [Initiating the custom domain setup](/store-management/custom-domain/initiate-customdomain)
3. [Configuring DNS](/store-management/custom-domain/configuring-dns)
4. [Check DNS](/store-management/custom-domain/check-dns)
   {% endhint %}

Go to the dashboard and click on [Custom domain](https://tip4serv.com/dashboard/domain) in the left menu.

<figure><img src="https://2187496599-files.gitbook.io/~/files/v0/b/gitbook-x-prod.appspot.com/o/spaces%2FrJFlpzFF4M0XjvFfIMsk%2Fuploads%2F5IYSH37FsxDDQMhKSCKp%2Fbrave_ZdYxE7neQy.png?alt=media&amp;token=62359c86-528e-4741-8db0-f02956eed205" alt=""><figcaption></figcaption></figure>

Click on **Enable** then **enter your custom domain** and click **Save.**

Now you're ready to move onto the next step: [Configuring DNS](/store-management/custom-domain/configuring-dns)


# Configuring DNS

{% hint style="info" %}
Please follow the steps to set a custom domain in this order:

1. [Choosing a custom domain](/store-management/custom-domain/choosing-a-subdomain)
2. [Initiating the custom domain setup](/store-management/custom-domain/initiate-customdomain)
3. [Configuring DNS](/store-management/custom-domain/configuring-dns)
4. [Check DNS](/store-management/custom-domain/check-dns)
   {% endhint %}

You must create a DNS record to point your domain to your Tip4serv store. Here is an example if you use Cloudflare but the configuration is almost the same for all domain registrars.

1. Go to your domain registrar and log in
2. Click on the **DNS menu** then on Records
3. Click the **Add record** button
4. Select the **CNAME** type
5. In **NAME**, enter **shop** or **www** or the subdomain you want (**shop**.mydomain.com)
6. In **TARGET**, enter EXACTLY this (do not replace webstore): **webstore.tip4serv.com**
7. Disable proxy and leave TTL as it is
8. Click SAVE
9. Wait a few minutes (can take up to 48 hours) then try to access your shop with your domain

<figure><img src="https://2187496599-files.gitbook.io/~/files/v0/b/gitbook-x-prod.appspot.com/o/spaces%2FrJFlpzFF4M0XjvFfIMsk%2Fuploads%2FXDjjERtxU5R9T5WYirOU%2Fdns_explication.png?alt=media&amp;token=cd6c0b4d-a37e-4207-8936-0218d802d773" alt=""><figcaption><p>Example from Cloudflare.com</p></figcaption></figure>

Click on the **DNS CHECK** button on [Custom domain](https://tip4serv.com/dashboard/domain) page to check if your DNS record is correct.

**Congratulations you are done !**


# Check DNS

What to do if the redirection doesn’t work after an hour?

{% hint style="info" %}
Please follow the steps to set a custom domain in this order:

1. [Choosing a custom domain](/store-management/custom-domain/choosing-a-subdomain)
2. [Initiating the custom domain setup](/store-management/custom-domain/initiate-customdomain)
3. [Configuring DNS](/store-management/custom-domain/configuring-dns)
4. [Check DNS](/store-management/custom-domain/check-dns)
   {% endhint %}

If the redirection is still not working after an hour, you should verify that your DNS configuration is correct.&#x20;

### Follow these steps

1. Go to [Networks Tools](https://mxtoolbox.com/SuperTool.aspx?action=cname%3a\&run=toolpage) website, this tool will help you check your domain's DNS configuration.
2. Provide the URL of your store, for example: `shop.example.com` or `www.example.com`&#x20;
3. Click on the "CNAME Lookup" button

### Check the result

1. **Domain Name** must be your shop URL, example: `shop.example.com` or `www.example.com`
2. Canonical Name must be exactly: **webstore.tip4serv.com**

<figure><img src="https://2187496599-files.gitbook.io/~/files/v0/b/gitbook-x-prod.appspot.com/o/spaces%2FrJFlpzFF4M0XjvFfIMsk%2Fuploads%2FXiT4Rbr3fUHOZRbPFL6V%2F3738a3fc2c9292af18b26cbbea8d2435.png?alt=media&amp;token=da8650f1-c343-47f9-afa3-0c1e4ea7ae2c" alt=""><figcaption></figcaption></figure>

This is what you need to get for your redirect to work properly.


# Troubleshooting

Custom domain troubleshooting

On this page we'll walk through some of the most common issues that folks run into when setting a custom domain, and explain how to solve them.

<details>

<summary>Why  I have this error: ERR_SSL_VERSION_OR_CIPHER_MISMATCH?</summary>

This error appears because the certificate does not have authorization to be issued.&#x20;

At certain hosting providers you must add **2 additional CAA records** in your DNS:&#x20;

`0 issue "pki.goog"`&#x20;

`0 issuewild "pki.goog"`

*Example from Hostinger.com*

<img src="https://2187496599-files.gitbook.io/~/files/v0/b/gitbook-x-prod.appspot.com/o/spaces%2FrJFlpzFF4M0XjvFfIMsk%2Fuploads%2F23CUsweI2FVG1vyFRQaj%2Fissue.jpg?alt=media&amp;token=b554d500-f710-4dc9-827c-e3f7debf2cdf" alt="Hostinger.com example" data-size="original"><img src="https://2187496599-files.gitbook.io/~/files/v0/b/gitbook-x-prod.appspot.com/o/spaces%2FrJFlpzFF4M0XjvFfIMsk%2Fuploads%2FTrz1VWF6sksXeaxitEgu%2Fissuewild.jpg?alt=media&amp;token=61af6ee4-9ae3-4627-a567-a5f1a740d4a1" alt="Hostinger.com example" data-size="original">

Once done, **deactivate then reactivate** your custom domain in [CUSTOM DOMAIN](https://tip4serv.com/dashboard/domain).

If you still have the error 24 hours later **deactivate then reactivate** again. DNS can take time to propagate.
</details>

<details>

<summary>Why i have this error: Error 1014 CNAME Cross-User Banned</summary>

This issue may occur after several configuration errors during the setup of a DNS CNAME record. To resolve this, please follow these steps:

* Deactivate your domain in [Custom Domain](https://tip4serv.com/dashboard/domain) settings.
* Click Save.
* Reactivate your domain.

If the problem persists, please [contact our support](https://tip4serv.com/contact) team for further assistance.

</details>

<details>

<summary>Why I have an invalid SSL error when I go to my store?</summary>

Note that you must wait at least 1 hour for your SSL certificate to be created.\
If you still have the error, you have misconfigured your DNS CNAME.

To test your DNS click on the **DNS CHECK** button in [CUSTOM DOMAIN](https://tip4serv.com/dashboard/domain).

</details>

<details>

<summary>Why my custom domain not redirect correctly?</summary>

You have misconfigured your DNS see [Configuring DNS](/store-management/custom-domain/configuring-dns)

</details>


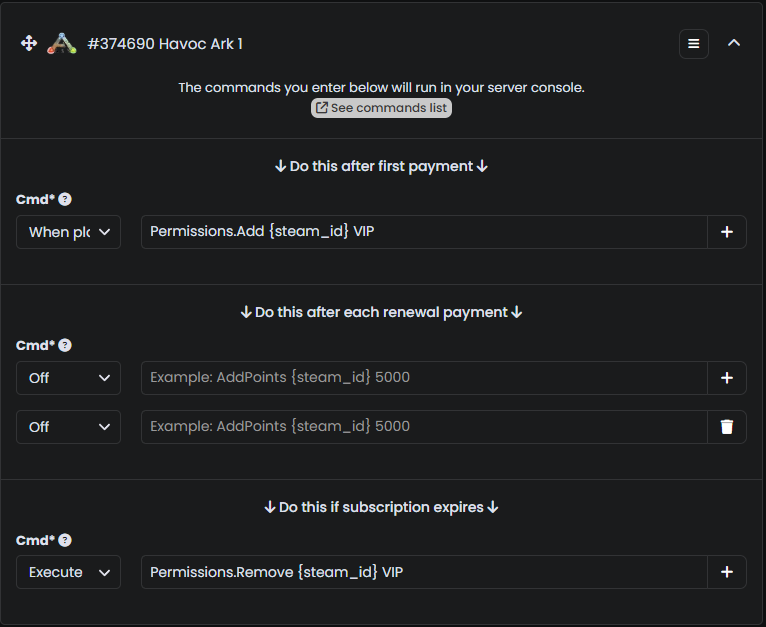
# Editing your store design

Making a store that suits your esthetic is really important, in this tutorial we'll show you how you can align your store to your design vision.

### 1 - Choosing your theme

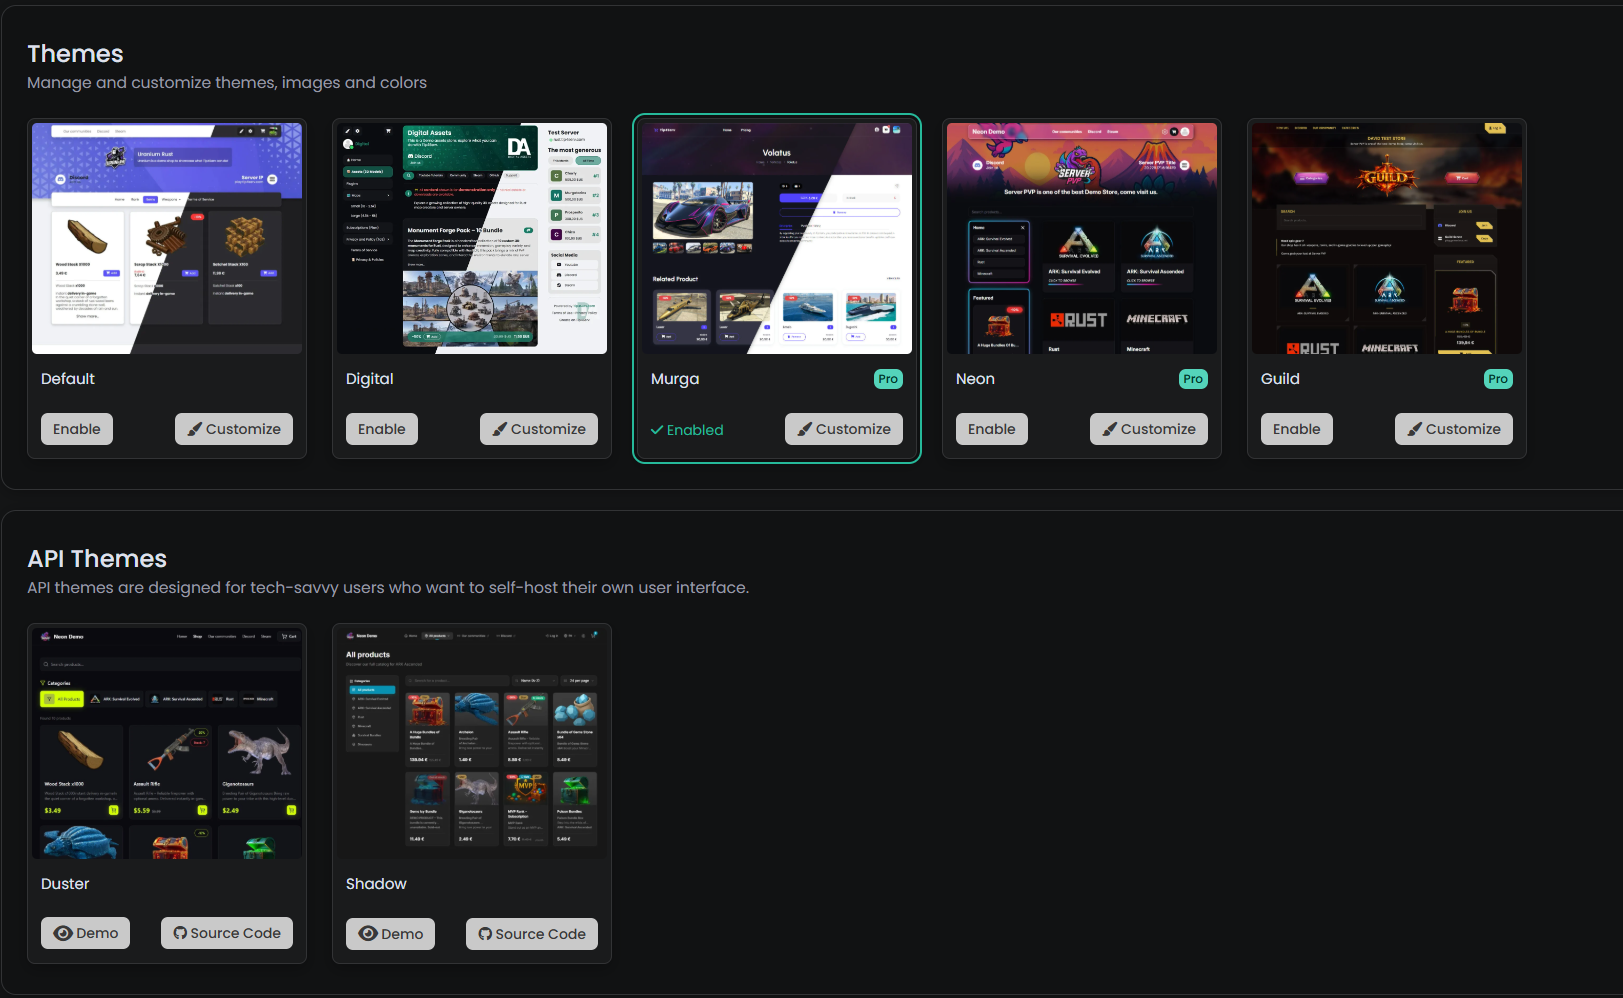
The first step before editing your theme is to choose a theme which will be the template of your store. There are two types which are important to distinguish to avoid any confusion.

* **Native Themes:** These are the ones you can see directly from your store; they are the ones we will focus on.
* **API Themes:** These themes are made for tech-savvy users who wish to customise every single detail of their store.

We'll keep our focus today on native themes. Some of them might require a Tip4Serv Pro plan, but we also offer free themes. To start, enable the theme you wish to use for your store and press Customize.

<figure><img src="https://2187496599-files.gitbook.io/~/files/v0/b/gitbook-x-prod.appspot.com/o/spaces%2FrJFlpzFF4M0XjvFfIMsk%2Fuploads%2FBfG7Tcrv63vAqpmvQisB%2Fbrave_W6lqkk8hpe.png?alt=media&amp;token=c7343db5-1b57-41cf-9f22-6f34c76600a2" alt=""><figcaption></figcaption></figure>

### **2 - Editing the theme**&#x20;

Once you've accessed the editor, you will be prompted with this screen, which is divided into two parts. The left part is reserved for the editing of general settings, while the right part is reserved for the rendering of your store and also visual edits, like changing images, editing text, or providing style edits on text.

<figure><img src="https://2187496599-files.gitbook.io/~/files/v0/b/gitbook-x-prod.appspot.com/o/spaces%2FrJFlpzFF4M0XjvFfIMsk%2Fuploads%2FHLhIl4rDRehMWVfqceS4%2Fbrave_LBLNEK4Q1u.png?alt=media&amp;token=306376c1-cf57-4ab1-8442-631d961dae17" alt=""><figcaption></figcaption></figure>

To edit text, it's quite simple: you will see some text with a purple dotted border. If you see this, it means that this element is editable. Some text might even allow you to do rich text editing. Simply try to select an text zone and you'll see a toolbar allowing you to do further customization.

<figure><img src="https://2187496599-files.gitbook.io/~/files/v0/b/gitbook-x-prod.appspot.com/o/spaces%2FrJFlpzFF4M0XjvFfIMsk%2Fuploads%2FZhhNkg2yQvyRBw9rAjPK%2Fbrave_hrNhP0a5Ef.png?alt=media&amp;token=8e8a65c4-cf9a-4fb0-add4-a8b069ec75bc" alt=""><figcaption></figcaption></figure>

Once you've made all your changes, make sure to press the save icon button. If you edited general settings, you'll have to press the save button which is present on the left side.

<figure><img src="https://2187496599-files.gitbook.io/~/files/v0/b/gitbook-x-prod.appspot.com/o/spaces%2FrJFlpzFF4M0XjvFfIMsk%2Fuploads%2FHi5YQMTRoiOqViu4fTqm%2Fbrave_HLLtgnswW9.png?alt=media&amp;token=c164599b-3560-4304-92e6-ec15293997b2" alt=""><figcaption></figcaption></figure>

Now that you've fully gotten a grasp of the Tip4Serv editor, you are now fully equipped to design the store aligned with your vision.


# Multi-currency

If your community starts becoming international, it's important that your users see your stores in their own currency. We'll see in this article how to enable auto-currency.

***

### 1 - Enabling Multi-currency

First, visit the [Multi-currency dashboard](https://tip4serv.com/dashboard/multi-currency). Once you're in, you will be prompted to enable/disable multi-currency, but also to select which currencies you wish to accept.

<figure><img src="https://2187496599-files.gitbook.io/~/files/v0/b/gitbook-x-prod.appspot.com/o/spaces%2FrJFlpzFF4M0XjvFfIMsk%2Fuploads%2FrUMCxi7jy34I6lubtqyS%2Fbrave_TloIJHE4wt.png?alt=media&amp;token=864ac23d-12f6-43c4-9b5a-49e647108033" alt=""><figcaption></figcaption></figure>

***

### **2 - What will your customers see**&#x20;

Once you've enabled multi-currency, there are not a lot of things left to do. Everything is now fully set up.

<div><figure><img src="https://2187496599-files.gitbook.io/~/files/v0/b/gitbook-x-prod.appspot.com/o/spaces%2FrJFlpzFF4M0XjvFfIMsk%2Fuploads%2FrX2RSTEhdml4nVPhwpdg%2Ffirefox_Mx5sFqojGZ.png?alt=media&amp;token=7024df41-1cba-4edd-97e6-7475e1a162a1" alt="The store from an american point of view"><figcaption><p>The store from an american point of view</p></figcaption></figure> <figure><img src="https://2187496599-files.gitbook.io/~/files/v0/b/gitbook-x-prod.appspot.com/o/spaces%2FrJFlpzFF4M0XjvFfIMsk%2Fuploads%2FlwIdjcP1dheQ5hozrZGK%2Fbrave_fCwlSkH8HB.png?alt=media&amp;token=4aa9b95d-dcd3-44ab-b686-3581ce526ade" alt="The store from an european point of view"><figcaption><p>The store from an european point of view</p></figcaption></figure></div>

As you can see, two customers from different countries see the same store but with their local currencies.

***

### 3 - What will you receive ?&#x20;

You will receive the payment in your store currency with the exact same amount you've set up.

\
Tip4Serv automatically rounds the price to a psychological price. For example, if your price is set at $14.99 and the conversion gives you €13.11, it will automatically round it up to €13.99 in order first to increase your sales via the psychological price, but also to have enough money left to pay the conversion fees.


# Server commands

Configure the commands that will be executed on your servers or Discord after each purchase

## 1. My products

Go to [MY PRODUCTS](https://tip4serv.com/dashboard/my-products) and **ADD** or **EDIT** a product

<figure><img src="https://2187496599-files.gitbook.io/~/files/v0/b/gitbook-x-prod.appspot.com/o/spaces%2FrJFlpzFF4M0XjvFfIMsk%2Fuploads%2Fudzs6a60H3SnEp0IS45Y%2FaQ2wY2DEID.png?alt=media&amp;token=0dfaf37d-38c1-4f79-8494-a5d23a1ff6ca" alt="Screenshot from My Products"><figcaption><p>Screenshot from My Products</p></figcaption></figure>

## 2. Product editor

Scroll down the product editor and click on **Add Discord or game server** button and click on a server

<figure><img src="https://2187496599-files.gitbook.io/~/files/v0/b/gitbook-x-prod.appspot.com/o/spaces%2FrJFlpzFF4M0XjvFfIMsk%2Fuploads%2FflGUb7zNdDWzP3HL0gql%2FLWkVyTDTUc.png?alt=media&amp;token=17eeff04-84bc-488e-89da-1efe9394cb0d" alt="" width="563"><figcaption></figcaption></figure>

## 3. Commands editor

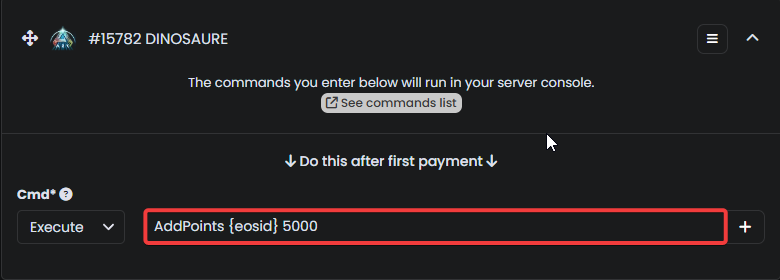
**For a game server:** Enter the commands that should run on your server.

<figure><img src="https://2187496599-files.gitbook.io/~/files/v0/b/gitbook-x-prod.appspot.com/o/spaces%2FrJFlpzFF4M0XjvFfIMsk%2Fuploads%2FuwGrEu1D3DteIniOlKND%2FhZmMSE5Apn.png?alt=media&amp;token=5199176e-194f-4ffe-89bc-7dd945fe5d38" alt=""><figcaption></figcaption></figure>

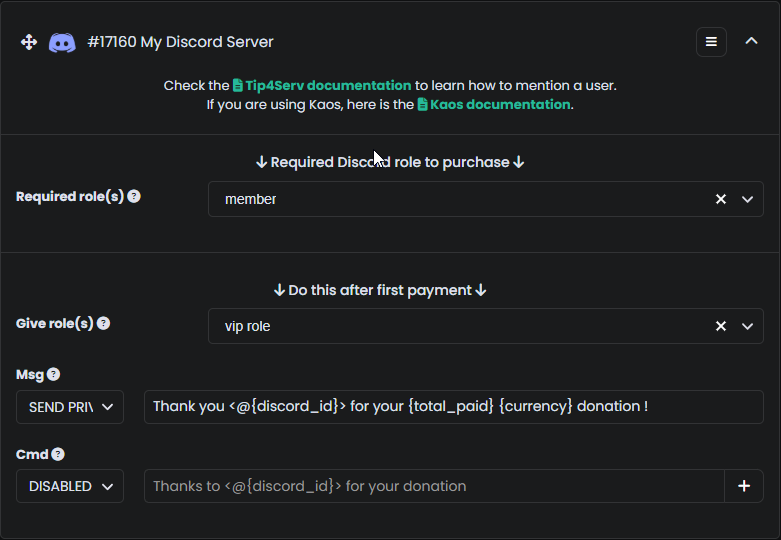
**For a Discord server:** Choose the roles to give and enter a private message or disable it. You can also add a channel message. You can also require a certain discord role, to allow a purchase.

<figure><img src="https://2187496599-files.gitbook.io/~/files/v0/b/gitbook-x-prod.appspot.com/o/spaces%2FrJFlpzFF4M0XjvFfIMsk%2Fuploads%2FKmOeVXz7nZbxwROXU6yF%2Fbrave_iL629tyEJG.png?alt=media&amp;token=3f687957-d0ce-459c-b39a-9c5fa342a5d3" alt="Give a role and send a private message."><figcaption><p>Give a role and send a private message.</p></figcaption></figure>

<figure><img src="https://2187496599-files.gitbook.io/~/files/v0/b/gitbook-x-prod.appspot.com/o/spaces%2FrJFlpzFF4M0XjvFfIMsk%2Fuploads%2FgFnkXrhUDViH3mWq85Ov%2Fbrave_a7KIX8RV9k.png?alt=media&amp;token=5a14fb73-4751-4f03-bb83-a9f74e7c44ce" alt="Setting a required role to proceed to the purchase."><figcaption><p>Setting a required role to proceed to the purchase.</p></figcaption></figure>

{% hint style="info" %}
Learn more about [how to mention a member in a channel ?](/discord-setup/mention-members)
{% endhint %}


# Player's ID markers

How to request Steam ID, Minecraft UUID and Discord ID from my customers?

For the store to request the player's identifier, you must [add a server and configure commands](/server-commands) in your products in [MY PRODUCTS](https://tip4serv.com/dashboard/my-products).

{% hint style="info" %}
You can also use the [Player ID fields page](https://tip4serv.com/dashboard/custom-fields) in the administration panel.
{% endhint %}

### Available markers for each game

Insert these markers in your commands, they will be replaced by the player ID when it will be executed on your server.

| Discord             | FiveM                | Minecraft               |
| ------------------- | -------------------- | ----------------------- |
| {discord\_id}       | {fivem\_live\_id}    | {minecraft\_uuid}       |
| {discord\_username} | {fivem\_licence}     | {minecraft\_full\_uuid} |
| {steam\_username}   | {fivem\_citizen\_id} | {minecraft\_username}   |
|                     | {steam\_username}    |                         |

| ARK Survival Evolved         | ARK Survival Ascended      | Hytale             |
| ---------------------------- | -------------------------- | ------------------ |
| {ue4\_id} (Unreal player ID) | {ue5id} (Unreal player ID) | {hytale\_username} |
| {arkse\_username}            | {eosid}                    | {hytale\_uuid}     |
|                              | {arksa\_username}          |                    |

{% hint style="info" %}
It doesn't matter in which server you add the marker, you can very well add {steam\_id} in a Minecraft server command.
{% endhint %}

<table><thead><tr><th>Other markers</th><th data-hidden></th><th data-hidden></th></tr></thead><tbody><tr><td>{email} </td><td></td><td></td></tr><tr><td>{7dtd_username} </td><td></td><td></td></tr><tr><td>{zomboid_username} </td><td></td><td></td></tr><tr><td>{unturned_username} </td><td></td><td></td></tr><tr><td>{gmod_username} </td><td></td><td></td></tr><tr><td>{rust_username}</td><td></td><td></td></tr><tr><td>{PlayerName} (Rust Console Edition) </td><td></td><td></td></tr><tr><td>{csgo_username}</td><td></td><td></td></tr><tr><td>{steam_id}</td><td></td><td></td></tr><tr><td>{steam_id2}</td><td></td><td></td></tr><tr><td>{steam_id64}</td><td></td><td></td></tr></tbody></table>


# Other markers & quantity

Display payment information in commands

{% tabs %}
{% tab title="{total\_paid}" %}
Show payment amount in commands.

**Example for FiveM:**

```
say Thank you {discord_username} for your donation of {total_paid} {currency}
```

**Example for Rust:**

```
say Thank you {rust_username} for your donation of {total_paid} {currency}
```

**Example for Minecraft:**

```
say Thank you {minecraft_username} for your donation of {total_paid} {currency}
```

{% endtab %}

{% tab title="{currency}" %}
Show payment currency in commands.

**Example for FiveM:**

```
say Thank you {discord_username} for your donation of {total_paid} {currency}
```

**Example for Rust:**

```
say Thank you {rust_username} for your donation of {total_paid} {currency}
```

**Example for Minecraft:**

```
say Thank you {minecraft_username} for your donation of {total_paid} {currency}
```

{% endtab %}

{% tab title="{expire\_date}" %}
Show subscription expiration date in commands.

**Example for FiveM:**

```
msg {discord_username} Your subscription has been renewed until {expire_date}
```

**Example for Rust:**

```
msg {rust_username} Your subscription has been renewed until {expire_date}
```

**Example for Minecraft:**

```
msg {minecraft_username} Your subscription has been renewed until {expire_date}
```

{% endtab %}

{% tab title="{quantity}" %}
**{quantity}** will be **replaced** by the **quantity chosen by the buyer** in his cart.

{% hint style="info" %}
You must first activate the **Allow quantity choice** option in your product.
{% endhint %}

**Example for FiveM:**

```
give {discord_username} {quantity} apple
```

**Example for Rust:**

```
give {rust_username} {quantity} apple
```

**Example for Minecraft:**

```
give {minecraft_username} {quantity} apple
```

### Quantity multiplier

{% hint style="info" %}
To execute your commands as many times as the quantity selected by the buyer, you can enable the \[**Repeat commands by quantity]** option in the *General Options* section of the product editor.
{% endhint %}

You can also multiply the quantity choosen by the customer like this example: {quantity\*64}

**Example for FiveM:**

Use this command on Tip4serv to give a **bundle of 100$:**

```
giveaccountmoney {fivem_live_id} bank {quantity*100}
```

This will run in your server console after a purchase if the player buys product **4 times**:

```
giveaccountmoney 12 bank 400
```

**Example for Rust:**

Use this command on Tip4serv to give a **bundle of 100$:**

```
deposit {steam_id} {quantity*100}
```

This will run in your server console after a purchase if the player buys product **4 times**:

```
deposit 76561298030563984 400
```

**Example for Minecraft:**

Use this command on Tip4serv to give a **stacks of 10 diamond:**

```
give {minecraft_username} {quantity*10} diamond
```

This will run in your server console after a purchase if the player buys product **4 times**:

```
give Murgator 40 diamond
```

{% endtab %}

{% tab title="{transaction\_id}" %}
Show transaction ID in commands. This marker will be replaced by the Paypal or Stripe transaction ID. It depends on which payment processor the customer used.

**Discord command example:**

```
{discord_username} bought a VIP rank and transaction ID is {transaction_id}
```

**This will run in your server after a purchase:**

Stripe example

```
Yanis#1548 bought a VIP rank and transaction ID is 93D13303W7916582M
```

Paypal example

```
Yanis#1548 bought a VIP rank and transaction ID is pi_3MbaQs34VaitLUXR177YnyCk
```

{% endtab %}

{% tab title="{order\_id}" %}
Show order ID in commands. This marker will be replaced by the Tip4Serv payment ID or subscription ID.

**Discord command example:**

```
{discord_username} bought a VIP rank and order ID is {order_id}
```

**This will run in your server after a purchase:**

```
Yanis#1548 bought a VIP rank and order ID is 112325
```

{% endtab %}

{% tab title="{product\_id}" %}
Show product ID in commands. This marker will be replaced by the Tip4Serv product ID.

**Discord command example:**

```
{discord_username} bought a VIP rank and product ID is {product_id}
```

**This will run in your server after a purchase:**

```
Yanis#1548 bought a VIP rank and product ID is 12
```

{% endtab %}
{% endtabs %}


# Troubleshooting

Server commands troubleshooting

On this page we'll walk through some of the most common issues that folks run into when setting commands, and explain how to solve them.

<details>

<summary>Why are commands not working on my server?</summary>

Make sure the commands you use work in your server's console. Type them into your RCON console and see if you receive the items or money.\
\
**If it does not work:** or if you get an error, the command is not compatible with the console, in this case check if this plugin or script offers console compatible commands.\
\
**If it works:** you have misconfigured your orders in [MY PRODUCTS](https://tip4serv.com/dashboard/my-products)\
\
**Here are examples of correct commands**

Give money for Fivem

`giveaccountmoney {fivem_live_id} bank 5000`

Give a group on Rust

`oxide.usergroup add {steam_id} vip`

Give a group on Minecraft

`lp user {minecraft_uuid} group add VIP`

**Please read the documentation of the Tip4Serv plugin carefully.**

</details>

<details>

<summary>Why sometimes players don't receive their products in game?</summary>

Some commands do not work if the **player is offline**. If the command requires the player to be online select **"Do only if player is online"** in your commands editor.

</details>

<details>

<summary>Why Tip4Serv plugin says Unauthorized IP?</summary>

You receive this message because your server has changed ip since the first connection of your server to Tip4serv.

You can update your IP in [MY SERVERS](https://tip4serv.com/dashboard/my-servers) by clicking on the **edit** button.

If you host your server yourself and you have a dynamic IP, we advise you to rent a server from a professional.

Server IP is checked when your server communicates with Tip4serv API for security reasons.

</details>

If you need help, feel free to [contact us](https://tip4serv.com/contact).


# Adding server in multiple products

Instead of adding a server to every product one by one, Tip4Serv gives you a small shortcut to add the server directly to multiple products within 2 clicks.

## 1. Selecting the server to add

Go to [MY SERVERS](https://tip4serv.com/dashboard/my-servers) and press the settings button of the server you wish to add in multiple products.

<figure><img src="https://2187496599-files.gitbook.io/~/files/v0/b/gitbook-x-prod.appspot.com/o/spaces%2FrJFlpzFF4M0XjvFfIMsk%2Fuploads%2FsksGPP9TpcFSzNTBfy2i%2FRswmIzO0n5.png?alt=media&amp;token=37f4082b-4543-40e1-8eaa-1e7e590cf28d" alt=""><figcaption></figcaption></figure>

## 2. Copying the server commands

You will be prompted into a modal which will give you the possibility to copy server commands from a specific product to other products. To make this work, make sure that at least one server has server commands related to the server you wish to copy in multiple products. Once that's the case, you can proceed to select the destination by category and by products. Once you've made your choice, simply press Save and voila! The magic is done.

<figure><img src="https://2187496599-files.gitbook.io/~/files/v0/b/gitbook-x-prod.appspot.com/o/spaces%2FrJFlpzFF4M0XjvFfIMsk%2Fuploads%2FOOK86hPYRqN4Fhz6dYzN%2Fe837d680b426ed617fe944fdb1d09b12.png?alt=media&amp;token=d090e736-92e4-484c-85db-cc1771940e62" alt=""><figcaption></figcaption></figure>


# Sell your files

If you are a UGC creator, you can use Tip4Serv to sell your mods, assets, or any type of documents.

Tip4Serv is a great service to monetise your files really easily. In this article, we'll see how to create your products and monetise your files.

## 1. My products

Go to [MY PRODUCTS](https://tip4serv.com/dashboard/my-products) and **ADD** or **EDIT** a product

<figure><img src="https://2187496599-files.gitbook.io/~/files/v0/b/gitbook-x-prod.appspot.com/o/spaces%2FrJFlpzFF4M0XjvFfIMsk%2Fuploads%2FH0TWyPpSIs8AVxVGNtiS%2Fbrave_ngRdnKhoO5.png?alt=media&amp;token=bf69d31b-363a-4ff0-83c2-16d169cc1321" alt=""><figcaption></figcaption></figure>

## 2. Product editor

Click on the **Downloadable Files tab** and enable the option. After you've enabled the files for this product, click on the **Add Files button.**

<figure><img src="https://2187496599-files.gitbook.io/~/files/v0/b/gitbook-x-prod.appspot.com/o/spaces%2FrJFlpzFF4M0XjvFfIMsk%2Fuploads%2FVbvHc8uRjzWfMNymKWdz%2Fbrave_ZUHj3t5qJT.png?alt=media&amp;token=850ad153-081e-405b-845f-56b764ca6110" alt=""><figcaption></figcaption></figure>

## 3. Add files and configure expiration

You can now add the files you wish to sell and any expiration you wish to set after a customer purchases your product

<figure><img src="https://2187496599-files.gitbook.io/~/files/v0/b/gitbook-x-prod.appspot.com/o/spaces%2FrJFlpzFF4M0XjvFfIMsk%2Fuploads%2FCRb74EiVHOVQdGvuijFE%2Fbrave_ehHSBrlFgV.png?alt=media&amp;token=106c074e-7105-4541-9f10-bd335f8d598d" alt=""><figcaption></figcaption></figure>

When someone purchases a product that contains files, the user will be redirected to a download page and will receive an email to access the download page.

<figure><img src="https://2187496599-files.gitbook.io/~/files/v0/b/gitbook-x-prod.appspot.com/o/spaces%2FrJFlpzFF4M0XjvFfIMsk%2Fuploads%2FgJly4JuHBkQ5WzGCkM6J%2Fbrave_wnb4fa76zE.png?alt=media&amp;token=75edc67a-c035-4402-a96f-8fe5c7b503d4" alt=""><figcaption></figcaption></figure>


# Custom Fields

Use additional information for your product. In this tutorial, you will create a product that uses custom fields.

{% hint style="info" %}
Custom fields are only available for PRO users. To learn more about the PRO plan, visit this page: <https://tip4serv.com/pricing>
{% endhint %}

Custom fields are pretty useful for complex products or highly customisable products. For example, if you want to allow your customers to change the color of their Ark dinosaurs, you can create a color custom field.

### **Types of custom fields**

There are numerous different types of custom fields you can use for your store. These are the following ones you can use:

* Checkbox
* Selection list&#x20;
* Number
* Text&#x20;

The types of custom fields are self-explanatory. But each type, except Text, shares those properties:

* You can add an additional price for a selected option
* You can use the custom fields as custom markers in your product. Server commands or API calls

### Adding custom fields in your product

Start by creating or editing a product in which you wish to add custom fields.

<figure><img src="https://2187496599-files.gitbook.io/~/files/v0/b/gitbook-x-prod.appspot.com/o/spaces%2FrJFlpzFF4M0XjvFfIMsk%2Fuploads%2FpaykIxK8ywnl7SvBBiuO%2Fbrave_1GsP24pp0f.png?alt=media&amp;token=20c9f0f8-fa6d-440f-8a03-e70dcce9e1f4" alt="On your edit product page, look for the custom fields tab and click Configure custom fields"><figcaption><p>On your edit product page, look for the custom fields tab and click Configure custom fields</p></figcaption></figure>

You will be prompted into a custom field modal. Press the Add button to create a new custom field.

<figure><img src="https://2187496599-files.gitbook.io/~/files/v0/b/gitbook-x-prod.appspot.com/o/spaces%2FrJFlpzFF4M0XjvFfIMsk%2Fuploads%2FWKNXV5Le7hpAUhkPm1B7%2Fbrave_jaGDULjgBD.png?alt=media&amp;token=7bcd2d11-56e1-445c-85cc-c24bcfa91709" alt="Different options for a custom field" width="299"><figcaption><p>Edit the different details of your custom field.</p></figcaption></figure>

You can choose different options, as mentioned previously, like the type, the extra price, the name and description of this extra field, but we'll now move on to the custom fields settings, which is an important tab if you want to use those extra fields in the commands of your product.

<figure><img src="https://2187496599-files.gitbook.io/~/files/v0/b/gitbook-x-prod.appspot.com/o/spaces%2FrJFlpzFF4M0XjvFfIMsk%2Fuploads%2FDDrmNM8rN6PbSj3YqXQl%2Fbrave_3veteDKlLz.png?alt=media&amp;token=4df84af9-30a6-43ab-8439-237bb901a59c" alt="Additional options of the custom fields" width="296"><figcaption><p>Additional option of the custom field.</p></figcaption></figure>

One of the most important fields here is the Marker name. Define this parameter in order to use the extra fields in your commands.

### Using the custom fields

Now that we have created our custom fields, let's see how we can use them.

<figure><img src="https://2187496599-files.gitbook.io/~/files/v0/b/gitbook-x-prod.appspot.com/o/spaces%2FrJFlpzFF4M0XjvFfIMsk%2Fuploads%2FuVRSFGsGbRcFID5HDZTi%2Fbrave_LndUwf7U4m.png?alt=media&amp;token=fc3c40a3-43a0-4834-8102-6dc00979d758" alt="Server Commands using custom fields"><figcaption><p>Server commands using custom fields</p></figcaption></figure>

One of the most obvious usages of those custom fields is in the server commands. You can use the custom fields in your server commands with this marker: `{custom:custom_field_name}`

On your product page, your users will now see your custom fields.

<figure><img src="https://2187496599-files.gitbook.io/~/files/v0/b/gitbook-x-prod.appspot.com/o/spaces%2FrJFlpzFF4M0XjvFfIMsk%2Fuploads%2F5k6sg2IfKhB30ROwBd0S%2Fbrave_GS7RmtWAFQ.png?alt=media&amp;token=4f7ffba1-6404-482f-b329-9c622c8e0e80" alt="Custom fields displayed on the store"><figcaption><p>Custom fields displayed on the store</p></figcaption></figure>

### Extra customisation

Lastly, you can add common rules to manage your custom fields. For example, you can add a minimum amount between different custom fields or a maximum amount.

<figure><img src="https://2187496599-files.gitbook.io/~/files/v0/b/gitbook-x-prod.appspot.com/o/spaces%2FrJFlpzFF4M0XjvFfIMsk%2Fuploads%2FKS4FjwQOFTViiFyvC2q9%2Fbrave_sBhBq3y2qC.png?alt=media&amp;token=8160806c-f929-44d6-8fc6-cfaff8b8f06f" alt="Custom rules for custom fields"><figcaption><p>Custom rules for custom fields</p></figcaption></figure>


# Product expiration

Create a product that expires after several days

Enable **Subscription** and select **Expires after** on the product editor. Then you can add expiry commands in your servers.<br>

<figure><img src="https://2187496599-files.gitbook.io/~/files/v0/b/gitbook-x-prod.appspot.com/o/spaces%2FrJFlpzFF4M0XjvFfIMsk%2Fuploads%2Fz3GnFnRVxqW3r4GFnY1T%2Fbrave_KICFo1iDlp.png?alt=media&amp;token=ec2d378c-add8-4edc-80fb-9de4d175663e" alt=""><figcaption></figcaption></figure>

{% hint style="info" %}
The subscription is then deactivated and becomes a one-time payment with more payment methods available. If the customer buys a second time before expiration, the expiration date will be extended.
{% endhint %}


# Subscriptions

Create auto-renewing or one-time subscriptions with expiration commands

## 1. My products

Go to [MY PRODUCTS](https://tip4serv.com/dashboard/my-products) and **ADD** or **EDIT** a product

<figure><img src="https://2187496599-files.gitbook.io/~/files/v0/b/gitbook-x-prod.appspot.com/o/spaces%2FrJFlpzFF4M0XjvFfIMsk%2Fuploads%2Fz2DYrxOk1MZRchVrz5PQ%2FeSxffIpq0k.png?alt=media&amp;token=b69b8257-c661-4123-8eb5-2b6db1ccd6a6" alt="Products page"><figcaption><p>Products page</p></figcaption></figure>

## 2. Enable subscription&#x20;

Click on **Subscription** then choose **Charge every** or **Expire after**.

Choose the duration of the cycle between each payment, for example every 3 days, every 3 months, every 1 month.

<figure><img src="https://2187496599-files.gitbook.io/~/files/v0/b/gitbook-x-prod.appspot.com/o/spaces%2FrJFlpzFF4M0XjvFfIMsk%2Fuploads%2FWMQthgnQwTgwAeSBWj3X%2Fbrave_Q6IwPe0utL.png?alt=media&amp;token=00a0f3d2-e7eb-4fc3-909b-0979812c7184" alt="Subscriptions category"><figcaption><p>Subscriptions category</p></figcaption></figure>

### Subscription type

{% tabs %}
{% tab title="Charge every" %}
The subscription will automatically renew according to the cycle you have configured.

**Example:** If you have chosen a 3 month cycle and the customer subscribes and makes their first payment on April 5th, his next payment will be on June 5th.
{% endtab %}

{% tab title="Expire after" %}
It is no longer a subscription but a one-time payment. This option allows you to set up expiration commands without the customer being charged each cycle.&#x20;

Expiration commands will be executed at the end of the first cycle.

[Learn more](/product-setup/product-expiration)
{% endtab %}
{% endtabs %}

## 2. Product editor

Click on **Add Discord or game server** button and click on a server

<figure><img src="https://2187496599-files.gitbook.io/~/files/v0/b/gitbook-x-prod.appspot.com/o/spaces%2FrJFlpzFF4M0XjvFfIMsk%2Fuploads%2FoWWjykKzSuKGj46V9JKe%2FOUKkZETSx6.png?alt=media&amp;token=40a11f74-653b-4ffc-92cc-b7a70668348e" alt="Adding a discord/game server"><figcaption><p>Adding a discord/game server</p></figcaption></figure>

## 3. Commands editor

**For a game server:**&#x20;

Enter the commands that should run on your server after first payment, after each renewal payment and when subscription expire.

<figure><img src="https://2187496599-files.gitbook.io/~/files/v0/b/gitbook-x-prod.appspot.com/o/spaces%2FrJFlpzFF4M0XjvFfIMsk%2Fuploads%2FaSqNacPFaNLXRKPsTzL4%2Fbrave_OjxEgJooll.png?alt=media&amp;token=41f68676-9a8b-4f8c-8c04-5e813f5e3db3" alt="Product editor for game server"><figcaption><p>Product editor for game server</p></figcaption></figure>

**For a Discord server:** Choose the roles to give after first payment. Enter a private message or disable it. You can also add a channel message.

Then you can add a channel message after each renewal payment.

Finally, you can delete the role when subscription expire.

<figure><img src="https://2187496599-files.gitbook.io/~/files/v0/b/gitbook-x-prod.appspot.com/o/spaces%2FrJFlpzFF4M0XjvFfIMsk%2Fuploads%2FEl9SZO7R5AjYpTtDC1JK%2Fbrave_XD9WRq3r2l.png?alt=media&amp;token=112e5e89-ed35-413d-9aaa-f2cddd1d4a9e" alt="Product editor for discord"><figcaption><p>Product editor for game server</p></figcaption></figure>


# How it works?

There are two types of subscription on Tip4Serv

### Subscription without auto-renewal

If you select the [EXPIRE AFTER](/product-setup/product-expiration) option in the product editor, then **subscriptions are not auto-renewed**.

**Customer must manually pay** for subscription expiration date to be extended.

If the expiration date is exceeded, the expiration actions you configured will be executed.

### Recurring subscription

Your subscribers will be automatically charged each cycle.

**Example:** If the customer subscribes on January 15 and you have configured the cycle for 1 month, then it will be debited on January 15, then February 15, then March 15, etc.

<details>

<summary><strong>What happens if I delete or disable a package with active subscribers?</strong></summary>

Existing subscribers will continue exactly as before. Their subscription won't be cancelled and billing will continue normally.&#x20;

If you try to **delete** a product that still has active subscriptions, Tip4Serv will prevent the deletion and automatically **disable** the product instead, so it no longer appears in your store while existing subscriptions keep running.

</details>

<details>

<summary><strong>Can I hide a package while keeping existing subscriptions active?</strong></summary>

Yes. Simply uncheck **"Enabled"** in the product settings. The product will be hidden from new customers, but all existing subscriptions will continue normally at their current price.

</details>

<details>

<summary><strong>What happens if I change the price of a subscription product?</strong></summary>

Existing subscribers keep the price they originally subscribed at. Changing the product price only affects **new** subscriptions.

</details>

<details>

<summary>What happens if a recurring payment fails?</summary>

If the payment fails, it is retried a few days later. If it fails again, then the subscription is canceled and the expiration commands are executed. You can configure it from [My Gateway](https://tip4serv.com/dashboard/my-gateway).

</details>

<details>

<summary>What happens if the customer unsubscribes?</summary>

If the customer cancels his subscription, the expiration actions you have configured in the product editor will be executed at the end of the current cycle.

**Example for a subscription with a 1-month cycle:** the customer subscribes on January 15 and then cancels his subscription, expiry commands will be executed on February 15.

</details>


# Events & commands

There are 4 events in the life of a subscription, after payment, after renewal, after expiration and also refunds.

### **Enabling These Events**

Before showing you how to configure them, we will explain how you can enable these events for your server commands.

* **After Payment:** This event is enabled by default and cannot be disabled. When you add new commands, they will always correspond to this event by default.
* **After Renewal:** You must enable subscriptions to use this event. To enable subscriptions, look for the **“Subscription & Expiration”** tab and enable this mode.
* **After Expiration:** You must also enable subscriptions to use this event. To enable subscriptions, look for the **“Subscription & Expiration”** tab and enable this mode.
* **After Refund:** To enable this event, scroll down to the commands section and enable **“Add Refund Commands.”**

<figure><img src="https://2187496599-files.gitbook.io/~/files/v0/b/gitbook-x-prod.appspot.com/o/spaces%2FrJFlpzFF4M0XjvFfIMsk%2Fuploads%2FPwFQSzVdzzxpZxUE6HUw%2FrVFBXt1dcC.png?alt=media&amp;token=7f8959ec-3dce-4d1d-bbd7-0e1ed25d3b13" alt="Enabling subscriptions events"><figcaption><p>Enabling subscription events.</p></figcaption></figure>

<figure><img src="https://2187496599-files.gitbook.io/~/files/v0/b/gitbook-x-prod.appspot.com/o/spaces%2FrJFlpzFF4M0XjvFfIMsk%2Fuploads%2Fuw4Rtz8HI5kOuGvZe5Xb%2F9bKG206UxZ.png?alt=media&amp;token=3b40222a-4bf7-4892-a305-9fa6d2154bca" alt="Enabling refund event."><figcaption><p>Enabling refund event</p></figcaption></figure>

*You can configure commands to be executed on your servers or give and remove roles on Discord according to these events.*

<details>

<summary>After payment</summary>

Commands or roles that you enter in this event will be executed **once on the first payment occurs**, when the subscription is created.

<mark style="color:orange;">Commands will be executed on your server only when payment is completed and received in your account.</mark>&#x20;

<mark style="color:orange;">The Tip4serv payment status should be PAID and not PENDING.</mark>

</details>

<details>

<summary>After each renewal payment (optional)</summary>

Commands that you enter in this event will be executed **after each renewal payment**. So every week or every month depending on the cycle you have configured.

Useful if, for example, you want to give 500 of virtual currency each month to your subscribers.

<mark style="color:orange;">This event does not occur on the first payment.</mark>

<mark style="color:orange;">With each renewal payment the expiration date of the subscription is extended.</mark>

</details>

<details>

<summary>After expiration</summary>

The commands you enter in this event will be executed when the subscription expires.&#x20;

If no more payment is received or if the customer has canceled his subscription.

<mark style="color:orange;">The subscription will expire when the expiration date is exceeded.</mark>

</details>

<details>

<summary>After Refund (optional)</summary>

The commands you enter in this event will be executed when a refund will occurs.&#x20;

</details>

### Example

In the example below, the player is given the VIP role after payment and then receives 200 points each month. The VIP role is removed when the subscription expires. The VIP role and the 5,000 points are also removed if a refund occurs.

<figure><img src="https://2187496599-files.gitbook.io/~/files/v0/b/gitbook-x-prod.appspot.com/o/spaces%2FrJFlpzFF4M0XjvFfIMsk%2Fuploads%2FskeDY81m0vzm8N0IPWDE%2Fbrave_u0MyO0Pknc.png?alt=media&amp;token=d6839b88-2a52-4b76-b2e6-e2fe979dcb42" alt=""><figcaption></figcaption></figure>


# Trial days

Allow your subscribers to take advantage of trial days

To activate this option, simply enter the number of trial days you want to offer to your subscribers in your product editor as below.

{% hint style="info" %}
The trial days only work for recurring payments, for this you must activate Stripe or Paypal V2 in [MY GATEWAY](https://tip4serv.com/dashboard/my-gateway).
{% endhint %}

<figure><img src="https://2187496599-files.gitbook.io/~/files/v0/b/gitbook-x-prod.appspot.com/o/spaces%2FrJFlpzFF4M0XjvFfIMsk%2Fuploads%2FldPL7fiBCw9O8ciEQjty%2FjoSaqK1BKG.png?alt=media&amp;token=c1b23f85-e16c-4cff-9610-c707c07d42fb" alt="Screenshot from product editor"><figcaption><p>Screenshot from product editor</p></figcaption></figure>

### How trial days work ?

* The customer enters credit card numbers in the checkout which is not debited.&#x20;
* He then has access to all the advantages of the subscription.
* Once the trial days have elapsed, it is debited for the first time.&#x20;
* The normal subscription cycle continues and the subscriber is billed each cycle.

<figure><img src="https://2187496599-files.gitbook.io/~/files/v0/b/gitbook-x-prod.appspot.com/o/spaces%2FrJFlpzFF4M0XjvFfIMsk%2Fuploads%2FcwllD0YSwRXPuaRMrIjp%2Fbrave_TM22pxGQkP.png?alt=media&amp;token=7293d147-02f6-45d8-b478-e4c27fd11e4e" alt="Screenshot taken from the checkout page of a subscription, showing the 7 days of trial."><figcaption><p>Screenshot taken from the checkout page of a subscription, showing the 7 days of trial.</p></figcaption></figure>

### What if the customer cancels his subscription during the trial period ?

If the subscriber cancels their subscription during the trial period, their benefits will be withdrawn at the end of the trial period.


# Discord bot

The Tip4Serv bot allows you to give roles to your donors, send them a private message and send a message in a channel.

To **add your Discord server**, follow the steps in [MY SERVERS](https://tip4serv.com/dashboard/my-servers)

{% hint style="info" %}
To configure the roles and the messages to send to customers see [this section](/server-commands)&#x20;
{% endhint %}

## Bot troubleshooting

If the bot does not work please read the information below.

### Why members not receiving their Discord role after purchase?

Tip4Serv bot need permission to give a role to a member, it must be above the role to be given.

Go to your **Discord server settings** and simply **drag the Tip4Serv bot role above the other roles** as below:

<figure><img src="https://2187496599-files.gitbook.io/~/files/v0/b/gitbook-x-prod.appspot.com/o/spaces%2FrJFlpzFF4M0XjvFfIMsk%2Fuploads%2Fn7Jppzr96ntK452toe2t%2Fezgif-1-1fb9e43ae9.gif?alt=media&amp;token=1db5033a-ab62-4d7b-9bb0-e733d80d08eb" alt=""><figcaption><p>Roles settings</p></figcaption></figure>

### Why are the messages not sent in the chanel?

Tip4serv bot must have permission to post messages to a channel on your server.

Edit channel, go to Permissions and **add Tip4serv.com bot in the ROLES/MEMBERS list**

<figure><img src="https://2187496599-files.gitbook.io/~/files/v0/b/gitbook-x-prod.appspot.com/o/spaces%2FrJFlpzFF4M0XjvFfIMsk%2Fuploads%2FKLmNt55ciemLtcQMiBuD%2Fezgif-5-9b24a420e3.gif?alt=media&amp;token=3c48073b-e4ec-4073-b819-3f365e34d0cc" alt=""><figcaption><p>Channel permissions</p></figcaption></figure>

### Check bot permissions

Be sure to give the following permissions to the Tip4Serv bot:&#x20;

* Manage Role
* Manage Server
* Send Message
* Embed Links

<figure><img src="https://2187496599-files.gitbook.io/~/files/v0/b/gitbook-x-prod.appspot.com/o/spaces%2FrJFlpzFF4M0XjvFfIMsk%2Fuploads%2FK8MH0X2fd2yhjwNYTpTp%2Fezgif-5-1506963e66.gif?alt=media&amp;token=0971f617-443d-4a8b-9c5d-7abf25b81730" alt=""><figcaption></figcaption></figure>


# Mention members

How to mention member in a Discord channel after a purchase?

{% tabs %}
{% tab title="Mention member" %}
You can mention a member in a channel like this example:

`Thank you` [`<@{discord_id}>`](#user-content-fn-1)[^1] `for your donation of {total_paid} {currency}`

<figure><img src="https://2187496599-files.gitbook.io/~/files/v0/b/gitbook-x-prod.appspot.com/o/spaces%2FrJFlpzFF4M0XjvFfIMsk%2Fuploads%2F25Oer9wnlblWHacnjlpz%2F134ccd557a7b077b6a95ba27a6df03ee.png?alt=media&amp;token=a46f6510-2669-4552-aae7-ede55c861023" alt=""><figcaption><p>Result on a Discord channel</p></figcaption></figure>
{% endtab %}

{% tab title="Mention role" %}
You can mention all members in a role, usefull if you want to notify all moderators after each purchase:

`Hi staff` [`<@&role_id>`](#user-content-fn-2)[^2]`, {discord_username} bought the VIP rank`

**Example:**

`Hi staff <@&1057661444298133584>, {discord_username} bought the VIP rank`

<figure><img src="https://2187496599-files.gitbook.io/~/files/v0/b/gitbook-x-prod.appspot.com/o/spaces%2FrJFlpzFF4M0XjvFfIMsk%2Fuploads%2FrPtktiDQoMRfDBFCBCS6%2F7f16209bacb42fd61e5a2ede522763de.png?alt=media&amp;token=ce3ff085-a260-4920-9ee2-49d3c22ac119" alt=""><figcaption><p>Result on a Discord channel</p></figcaption></figure>
{% endtab %}
{% endtabs %}

{% hint style="info" %}
Learn more about Discord commands [HERE](https://docs.tip4serv.com/store-setup/server-commands#3.-commands-editor).
{% endhint %}

[^1]: Use the **{discord\_id}** option between two square brackets

[^2]: Just replace **role\_id** by the role ID on your Discord server


# Coupons code

Generate codes to offer discounts to your customers

You can generate promo codes with a percentage or a fixed reduction valid on all or part of the products in your store.

To do this, go to the [COUPON ](https://tip4serv.com/dashboard/my-coupons)administration page and click on the **Create coupon code** button.

### Configure coupon rules

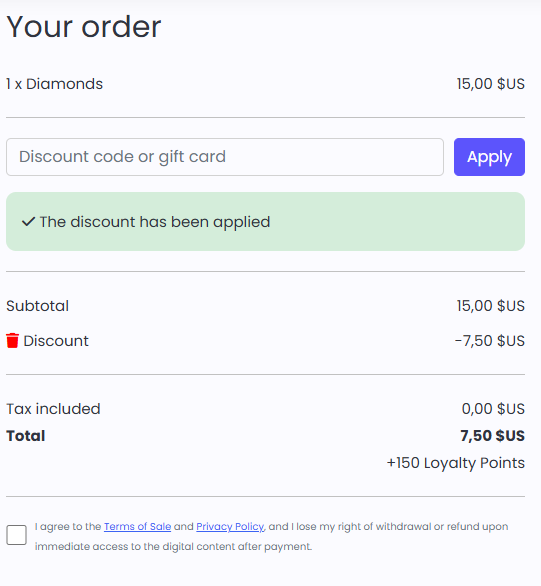
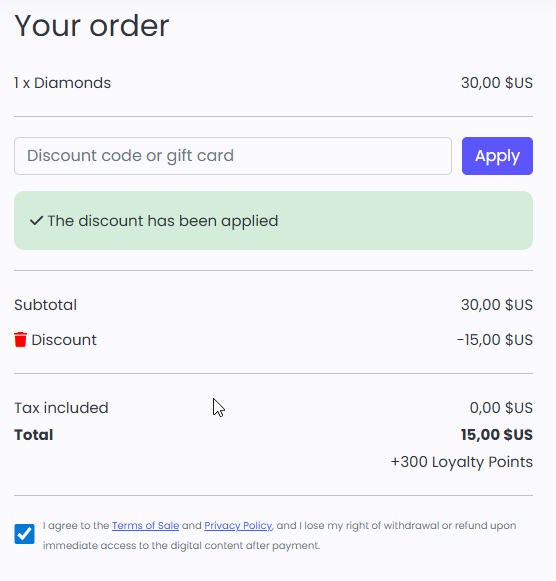
In this example we are creating a **50%** coupon code only valid on theses products: **VIP+ and Diamonds**. And the discount will **end on June 06, 2026**.

<figure><img src="https://2187496599-files.gitbook.io/~/files/v0/b/gitbook-x-prod.appspot.com/o/spaces%2FrJFlpzFF4M0XjvFfIMsk%2Fuploads%2F5tiT4jScIxFj4ImyaZWO%2Fbrave_XLDpYUmEjS.png?alt=media&amp;token=0385bb80-f5ac-420d-8d9d-14cf03013e76" alt=""><figcaption></figcaption></figure>

### Result on the checkout

The customer applies the code in the checkout page.

<figure><img src="https://2187496599-files.gitbook.io/~/files/v0/b/gitbook-x-prod.appspot.com/o/spaces%2FrJFlpzFF4M0XjvFfIMsk%2Fuploads%2Fc7wtnTF3hDqPwGZYmod0%2Fbrave_dc6Dtj8cnS.png?alt=media&amp;token=87a4f765-897a-4e09-8b68-a4fba6fa6c59" alt=""><figcaption></figcaption></figure>

### Configure limit options

{% hint style="info" %}
Once the limit is reached, the customer will receive a message on the payment page indicating that the usage limit has been reached.
{% endhint %}

<details>

<summary>Expiration date</summary>

Select the date on which the coupon becomes invalid.

</details>

<details>

<summary>Global usage limit</summary>

Specify how many times this coupon can be used in your store.

</details>

<details>

<summary>Minimum spend</summary>

Specify what is the minimum amount of the basket for the customer to use this coupon.

</details>

<details>

<summary>Maximum spend</summary>

Specify what is the maximum amount of the basket for the customer to use this coupon.

</details>

<details>

<summary>Limit per user</summary>

Specify how many times a player can use this coupon.&#x20;

This limit works according to the [player's ID](/server-commands/players-id-markers) you use in your products: steam\_id, minecraft\_uuid, username, discord\_id...

</details>

<figure><img src="https://2187496599-files.gitbook.io/~/files/v0/b/gitbook-x-prod.appspot.com/o/spaces%2FrJFlpzFF4M0XjvFfIMsk%2Fuploads%2FZJFOgxedcl32MaLQu8by%2Fbrave_lWB6ao93nG.png?alt=media&amp;token=7af36416-1fc7-4515-99c1-c0fc853fabf1" alt=""><figcaption></figcaption></figure>


# Discount

Create temporary discounts

You can create discounts with a percentage reduction on all or some of the products in your store.&#x20;

To do this, go to the [DISCOUNT ](https://tip4serv.com/dashboard/discount)administration page and click on the **Create discount** button.

### Configure discount rules

In this example we are creating a **50%** discount on a set of  selected products. And the discount will end on **June 06, 2026.**

<figure><img src="https://2187496599-files.gitbook.io/~/files/v0/b/gitbook-x-prod.appspot.com/o/spaces%2FrJFlpzFF4M0XjvFfIMsk%2Fuploads%2FekbM7gveC3P6I6zenBRm%2Fbrave_LDmSdeLpWg.png?alt=media&amp;token=b6531942-5613-446e-bfd9-b12dc8c07087" alt=""><figcaption></figcaption></figure>

### Result on the product

<figure><img src="https://2187496599-files.gitbook.io/~/files/v0/b/gitbook-x-prod.appspot.com/o/spaces%2FrJFlpzFF4M0XjvFfIMsk%2Fuploads%2FQT1JfYGyVnMBT87cMGtl%2Fbrave_Ct4i3pHdfz.png?alt=media&amp;token=1ec081f8-6252-4cdd-955e-2dc6e041387a" alt=""><figcaption></figcaption></figure>


# Loyalty Points

Fidelise your customers with loyalty points

Loyalty points are an extremely powerful tool to fidelise your customers. That's why we encourage you to set up a loyalty points system.

To do this, go to the [LOYALTY POINTS ](https://ultradusteradmin.tip4serv.com/dashboard/loyalty-points)administration page.

### 1. Create your loyalty points

We'll start by creating the loyalty points. They won't do anything yet, but we will set up the basic settings about our loyalty points, like the name of the loyalty points, the minimum amount and points expiration. Click **Save loyalty settings** in order to save your loyalty points

<figure><img src="https://2187496599-files.gitbook.io/~/files/v0/b/gitbook-x-prod.appspot.com/o/spaces%2FrJFlpzFF4M0XjvFfIMsk%2Fuploads%2FzITfiW0Lh4RhnRRBz0iB%2Fbrave_I9gs5WbtEJ.png?alt=media&amp;token=261aaf1e-3575-4d50-a946-e1e4da8b250d" alt="Screenshot of the loyalty point administration page"><figcaption><p>Screenshot of the loyalty point administration page</p></figcaption></figure>

### 2. Setting up the rules

Now that we have created our loyalty points, we'll have to define their usages. Start by clicking the **Create loyalty rule** button.A modal will appear which will allow you to define all the necessary rules related to your loyalty points.

<figure><img src="https://2187496599-files.gitbook.io/~/files/v0/b/gitbook-x-prod.appspot.com/o/spaces%2FrJFlpzFF4M0XjvFfIMsk%2Fuploads%2FdP07NTBxCiBooR56623x%2Fbrave_tLhzXs3AuB.png?alt=media&amp;token=70b38b5b-8863-42fd-af07-f2af0f0002c6" alt=""><figcaption></figcaption></figure>

We'll go through each option. The first one is the name, which is self-explanatory. The second and the third are the trickiest. The Reward Ratio defines how many loyalty points you get per purchased currency. By currency, we mean the selected currency. For example, if you selected US Dollar as your currency and you've set up your reward ratio to 20, every $ spent on your store will give 20 loyalty points to your customers. As for the purchase ratio, this one describes the situation the other way around. For example, in this example, if I've set up the purchase ratio to 100, the customer can spend 100 loyalty points instead of $1. As for the last options, they describe which products/categories are concerned by this loyalty rule. Press **Create** to save the loyalty rule.

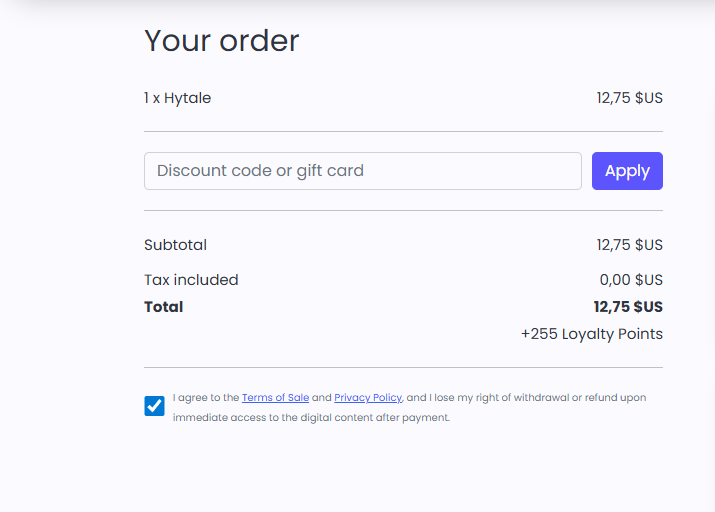
When purchasing a product eligible for your loyalty rule, in the checkout they will see the number of loyalty points they receive for this purchase.

If your customers possess a certain amount which allows them to pay their cart with their loyalty points, a message will appear allowing them to pursue the transaction with loyalty points.

<div><figure><img src="https://2187496599-files.gitbook.io/~/files/v0/b/gitbook-x-prod.appspot.com/o/spaces%2FrJFlpzFF4M0XjvFfIMsk%2Fuploads%2FBmZrYdCJveUJpEz5irc2%2Fbrave_dbf5tY7EQo.png?alt=media&amp;token=9b92a744-4603-4f00-94ec-8da08e514634" alt=""><figcaption></figcaption></figure> <figure><img src="https://2187496599-files.gitbook.io/~/files/v0/b/gitbook-x-prod.appspot.com/o/spaces%2FrJFlpzFF4M0XjvFfIMsk%2Fuploads%2FPOSCmGSVyAujAQz0rBOw%2Fbrave_rsWx7UJsit.png?alt=media&amp;token=0ba22732-09bc-40e8-80cd-bb40457193a9" alt=""><figcaption></figcaption></figure></div>

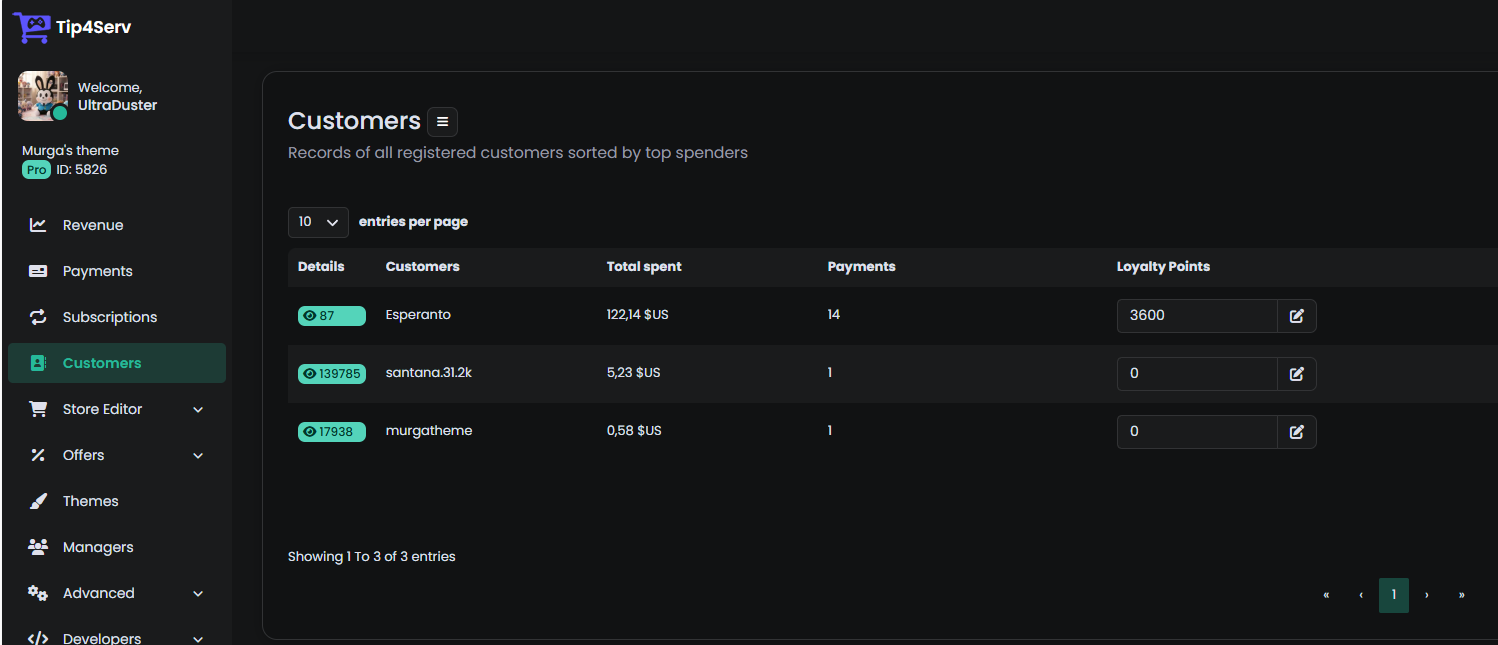
### Manage Loyalty Points

You can also manage the loyalty points of your users. You can remove or add loyalty points for any of your users directly from the [Customers](https://tip4serv.com/dashboard/customers) page.

<figure><img src="https://2187496599-files.gitbook.io/~/files/v0/b/gitbook-x-prod.appspot.com/o/spaces%2FrJFlpzFF4M0XjvFfIMsk%2Fuploads%2FpoOvVbrdbHdnndI9nvHd%2Fbrave_mzErNHGygl.png?alt=media&amp;token=619edbde-03a7-437f-9d6b-33d9b073b8df" alt=""><figcaption></figcaption></figure>

&#x20;


# Gift cards

How it works?

## Gift Card Purchase

The customer selects their **desired gift card** and provides the **recipient's email address**.

<figure><img src="https://2187496599-files.gitbook.io/~/files/v0/b/gitbook-x-prod.appspot.com/o/spaces%2FrJFlpzFF4M0XjvFfIMsk%2Fuploads%2FEettabJMx4YqIiS98IH2%2F84b67270060bc43c63089f12975a0e62.png?alt=media&amp;token=a53b7678-75a6-4dde-9ff2-981e081ac516" alt=""><figcaption><p>Image taken from the Murga example theme.</p></figcaption></figure>

## Receipt of the Email Containing the Gift Card Code

After payment confirmation, the recipient will receive the code via email.&#x20;

<figure><img src="https://2187496599-files.gitbook.io/~/files/v0/b/gitbook-x-prod.appspot.com/o/spaces%2FrJFlpzFF4M0XjvFfIMsk%2Fuploads%2FLLDYOUqEZSh5gtgoiXUL%2Fd238fcb98742d9a4bcf488d7b261e07f.png?alt=media&amp;token=cc2a9d96-4720-438b-9dc5-aa2e21b0e95f" alt=""><figcaption><p>Confirmation Email Screenshot</p></figcaption></figure>

## Using the Gift Card

\
The customer enters their code at checkout. If the gift card credit is lower than the cart total, the remaining credit is deducted from the cart, and the customer must pay the remaining balance.&#x20;

If the gift card balance fully covers the cart total, the order will be validated without any additional payment.

<figure><img src="https://2187496599-files.gitbook.io/~/files/v0/b/gitbook-x-prod.appspot.com/o/spaces%2FrJFlpzFF4M0XjvFfIMsk%2Fuploads%2F59CgpxRv2Cfky7FvMY99%2Fbrave_vqoYaePhGf.png?alt=media&amp;token=a8c80075-298c-498b-adeb-3be072af9992" alt=""><figcaption></figcaption></figure>


# Sell gift cards

How to sell gift cards in your store?

Go to [MY PRODUCTS](https://tip4serv.com/dashboard/my-products) and **ADD** or **EDIT** a product

<figure><img src="https://2187496599-files.gitbook.io/~/files/v0/b/gitbook-x-prod.appspot.com/o/spaces%2FrJFlpzFF4M0XjvFfIMsk%2Fuploads%2FqC5dlzs8dm5E9NW0bdJy%2FoSTlnC5I06.png?alt=media&amp;token=4ce811cf-f9de-4ef0-afa7-ae9d6f4d32be" alt="Screenshot from product editor."><figcaption><p>Screenshot from product editor.</p></figcaption></figure>

Check **Enable** on the gift card accordion and don't forget to enable the product in the General option&#x20;

<figure><img src="https://2187496599-files.gitbook.io/~/files/v0/b/gitbook-x-prod.appspot.com/o/spaces%2FrJFlpzFF4M0XjvFfIMsk%2Fuploads%2Fbd9LglQyz507DtrccfTo%2FOKTVK8J2Ak.png?alt=media&amp;token=0ac2757a-34a9-4b00-a2ca-abb1ccab2d3f" alt="Screenshot from product editor"><figcaption><p>Screenshot from product editor</p></figcaption></figure>

That concludes the process! Your gift card is now available in your store, and the customer will be prompted to provide the recipient's email address during the purchase.


# Generate gift cards

How can I generate a gift card or manage existing ones?

Go to [GIFT CARDS](https://tip4serv.com/dashboard/giftcard) and click on the **Create a gift card** button.

<figure><img src="https://2187496599-files.gitbook.io/~/files/v0/b/gitbook-x-prod.appspot.com/o/spaces%2FrJFlpzFF4M0XjvFfIMsk%2Fuploads%2FIWwwgB0W6DLvF4O1ZkHZ%2FzojJKPwR2J.png?alt=media&amp;token=d34bf1fb-afaa-43a5-b69b-e6f9be051a2a" alt="Screenshot from gift card dashboard"><figcaption><p>Screenshot from gift card dashboard</p></figcaption></figure>

Next, please complete the gift card details by entering a name and the desired amount and click on the **Create** button.

<figure><img src="https://2187496599-files.gitbook.io/~/files/v0/b/gitbook-x-prod.appspot.com/o/spaces%2FrJFlpzFF4M0XjvFfIMsk%2Fuploads%2FRbIx66wcMdSqLem3sd9l%2Fbrave_Z0B4Fgx9rL.png?alt=media&amp;token=a2f59bdc-48ad-4c8a-8a9b-23c7337a53ef" alt="Screenshot of the gift card creation form"><figcaption><p>Screenshot of the gift card creation form</p></figcaption></figure>

Following this, **a unique code is generated**, which can be used  by the customer during checkout.

{% hint style="info" %}
It's worth noting that you have the flexibility to modify the gift card amount at any given time, regardless of whether it was generated by you or purchased directly from the store.
{% endhint %}


# Sales Tax & VAT

## Sales Tax & VAT

#### Overview

If you sell products or services to customers in certain countries or states, you may be required to collect taxes such as VAT or Sales Tax. These obligations may depend on factors such as your business location, tax registrations, physical presence, sales volume, and local registration thresholds.

Tip4Serv helps you automate tax collection by allowing you to configure the countries, states, or tax schemes where your business is registered or required to collect tax.

When tax collection is configured:

* Applicable taxes are calculated automatically at checkout.
* Taxes are shown on customer invoices.
* Tax reports can be exported by country, state, or nexus.
* You can track the revenue and taxes collected for accounting purposes.

> A tax nexus is a country or state where your business has a legal obligation to register, collect, and report tax. It is not determined simply by where most of your customers are located.

***

#### Sales Thresholds – When Are You Required to Register?

Tax registration requirements vary by country and state.

Some jurisdictions require registration as soon as your business begins making taxable sales, while others apply a sales volume, transaction count, or revenue threshold.

If you use Stripe, you can monitor your progress toward certain tax thresholds from your [Stripe Tax Overview](https://dashboard.stripe.com/tax/overview).

> Tax rules depend on your business location, the type of products or services sold, and whether your customers are businesses or consumers. Consult a qualified tax adviser if you are unsure where you must register.

***

#### VAT for EU-Established Businesses

Special rules apply to businesses established in the European Union that sell eligible goods or electronic services to consumers in other EU countries.

**Below the €10,000 EU threshold**

If your business is established in only one EU Member State and your combined eligible cross-border B2C sales remain below the EU-wide €10,000 threshold, you may generally apply the VAT rate of the country where your business is established.

For example, a VAT-registered business established only in Bulgaria may apply 20% Bulgarian VAT to eligible sales made to private customers throughout the EU while remaining below the threshold.

The €10,000 threshold applies to the combined eligible cross-border B2C sales made across the EU. Both the current and previous calendar year must be considered.

**Above the €10,000 EU threshold**

Once the threshold is exceeded, VAT must generally be charged using the rate applicable in each customer’s EU country.

You can register for the European Union One-Stop Shop (OSS) to report and remit VAT collected from customers in different EU countries through a single VAT return.

Once your OSS registration is active, select **OSS** instead of configuring only your business’s home country.

> Businesses may choose to apply the customer’s local VAT rate before exceeding the €10,000 threshold. Ask your tax adviser whether this option is appropriate for your business.

***

#### How to Enable Tax Collection

If your business is registered or legally required to collect VAT or Sales Tax:

1. Go to your [Tax Nexus Dashboard](https://tip4serv.com/dashboard/tax-nexus).
2. Click **Add a tax nexus**.
3. Select the appropriate tax registration:
   * A **country**
   * A **state or province**, where applicable
   * **OSS**, if your business is registered under the European Union One-Stop Shop scheme

Only add locations or schemes where your business is registered or legally required to collect tax.

> Adding a country nexus applies tax according to the configuration supported for that country. Selecting OSS allows Tip4Serv to apply the appropriate VAT rate based on the EU customer’s country.

***

#### The “Sales Tax ID or VAT Registration ID” Field

When adding a nexus, you will see a field labelled **Sales Tax ID or VAT Registration ID**.

* This field is required but is not automatically validated by Tip4Serv.
* You may enter:
  * Your official Sales Tax ID or VAT registration number
  * A reference memo, such as “Monitor only” or “France Nexus”

This field is for your reference and does not affect the tax rate calculation.

> Entering a tax number in Tip4Serv does not register your business with a tax authority. You must complete any required registrations separately.

***

#### How Tax Is Calculated

Once you have configured one or more nexus locations, Tip4Serv determines whether tax should be applied based on:

* The buyer’s location
* The countries, states, or schemes you configured
* The applicable tax rules and rates supported by Tip4Serv

If tax applies, the appropriate amount is calculated and included in the final price displayed at checkout.

**Important:** Taxes are included in the price shown to the customer before checkout. They are not added on top of the displayed price or charged as a separate fee.

***

#### My Bills – Accounting & Tax Overview

The [My Bills](https://tip4serv.com/dashboard/my-bills) page provides a consolidated monthly overview of the accounting documents generated by Tip4Serv.

From this page, you can access your official platform fee invoices and download supporting CSV files, including:

* Detailed payment lists
* Revenue summaries
* Tax collection summaries

These documents can help you reconcile your Tip4Serv activity with your accounting records and prepare your VAT or Sales Tax returns.

The monthly reports can also be shared with your accountant.

***

#### Exporting Tax Reports by Date Range

To export information for your tax declarations:

1. Go to your [Payments Dashboard](https://tip4serv.com/dashboard/payments).
2. Select the required date range.
3. Download the report containing:
   * Total revenue by country, state, or nexus
   * Total tax collected by country, state, or nexus

***

#### Key Points

* You are responsible for determining where your business must register for tax.
* You are responsible for reporting and remitting the taxes collected.
* Tip4Serv helps calculate and collect taxes but does not register your business or remit taxes to tax authorities on your behalf.
* Adding a nexus in Tip4Serv does not constitute an official tax registration.
* Taxes are included in the prices displayed to customers.
* Tax rules may differ depending on the customer’s location, B2B or B2C status, and the products or services being sold.
* Consult a qualified accountant or tax adviser if you are unsure which nexus or VAT scheme to configure.

***

#### Useful Links

* [Add or manage a tax nexus](https://tip4serv.com/dashboard/tax-nexus)
* [Access platform fee invoices and accounting CSVs](https://tip4serv.com/dashboard/my-bills)
* [Export tax and revenue reports](https://tip4serv.com/dashboard/payments)
* [Monitor your Stripe tax obligations](https://dashboard.stripe.com/tax/overview)
* [European Commission – VAT One-Stop Shop](https://vat-one-stop-shop.ec.europa.eu/index_en)


# Paypal

The easiest way to get paid

Your customers pay you directly on your Paypal account, you simply have to mention your Paypal address in [MY GATEWAY](https://tip4serv.com/dashboard/my-gateway).

If you only mention your Paypal address without activating Paypal V2, only a Paypal button will be displayed in your checkout page as in the picture below.

<figure><img src="https://2187496599-files.gitbook.io/~/files/v0/b/gitbook-x-prod.appspot.com/o/spaces%2FrJFlpzFF4M0XjvFfIMsk%2Fuploads%2FA5QeUd5CFowGJlfg8DNj%2Fbrave_qHVDp7TGP8.png?alt=media&amp;token=ba13d2f1-5f0e-4b5e-8f3a-13ef211d06d7" alt="Checkout screenshot"><figcaption><p>Checkout screenshot</p></figcaption></figure>


# Paypal V2

Offer several payment methods to your customers

Switch to Paypal V2 display a credit card payment form as well as several payment methods.

<figure><img src="https://2187496599-files.gitbook.io/~/files/v0/b/gitbook-x-prod.appspot.com/o/spaces%2FrJFlpzFF4M0XjvFfIMsk%2Fuploads%2F7eJt2XTScDJdIZvsPNt0%2Fbrave_GGUjuyTFeu.png?alt=media&amp;token=ba3dabcd-e95f-4142-88ec-7158fc67be52" alt="Checkout Screenshot"><figcaption><p>Checkout screenshot</p></figcaption></figure>

### Paypal Business account required

To be able to use Paypal Checkout V2, you must have a Paypal Business account,  you must switch your individual Paypal account to Business.

The change is done in a few minutes and does not charge any additional fees.&#x20;

To switch your account to Business, just follow the steps in [MY GATEWAY](https://tip4serv.com/dashboard/my-gateway).

{% hint style="info" %}
You will be asked to provide your c**ompany registration number** depending on the country you live in.
{% endhint %}

### Several payments method

Here are the payment methods offered by Paypal Checkout V2:&#x20;

Credit card, Paypal, BLIK, Mercado Pago, MyBank, Venmo, iDEAL, Bancontact, EPS, Giropay, Przelewy24, Sofort.

{% hint style="info" %}
Payment methods will appear automatically based on the visitor's location.
{% endhint %}

<figure><img src="https://2187496599-files.gitbook.io/~/files/v0/b/gitbook-x-prod.appspot.com/o/spaces%2FrJFlpzFF4M0XjvFfIMsk%2Fuploads%2FV0oBXtwjcoBGLo5VIPFC%2F229541977147bbbda5e16461b35dd0f0.png?alt=media&amp;token=71d9612c-492e-4b18-8624-098ac14b293d" alt=""><figcaption><p>This example shows what a Dutch visitor sees</p></figcaption></figure>

### Credit card form

Your customers do not leave the checkout page and are not directed to Paypal, they enter their credit card information directly into a form.

<figure><img src="https://2187496599-files.gitbook.io/~/files/v0/b/gitbook-x-prod.appspot.com/o/spaces%2FrJFlpzFF4M0XjvFfIMsk%2Fuploads%2FXDoIbD3MXoqb87seNi3G%2Fbrave_KOK9EAy4ky.png?alt=media&amp;token=498101af-a51d-4eb9-a80b-0dc1845d8e19" alt="PayPal bank card form"><figcaption><p>PayPal bank card form</p></figcaption></figure>


# Stripe

Offer more payment methods

Stripe displays a card payment form as well as several payment methods.&#x20;

Go to [MY GATEWAY](https://tip4serv.com/dashboard/my-gateway) to connect your Stripe account to Tip4Serv.

<figure><img src="https://2187496599-files.gitbook.io/~/files/v0/b/gitbook-x-prod.appspot.com/o/spaces%2FrJFlpzFF4M0XjvFfIMsk%2Fuploads%2FrRoTYoxzWf73kHicERFn%2Fmsrdc_sj0iKYJY2S.png?alt=media&amp;token=784f88d7-72f3-4999-8c23-7efec6657925" alt="Stripe Checkout Screenshot"><figcaption><p>Stripe Checkout Screenshot</p></figcaption></figure>

### How do i collect my money?

You receive payments directly to your Stripe account and you can choose how often you want to receive transfers to your bank account (**every day, every week or every month**). You can configure these preferences from your Stripe account in the [Payout section](https://dashboard.stripe.com/settings/payouts).

### Several payments method

Here are the payment methods offered by Stripe:&#x20;

Credit card, Google Pay, iDEAL, Bancontact, EPS, Giropay, OXXO, Boleto, Przelewy24, P24, BECS, BACS, SEPA, Sofort, Multibanco.

### ⚠️Avoid Stripe account suspension

Before using Stripe, ensure that your store complies with their rules:

{% content-ref url="/pages/xkFW4Iluee3oEjmNwGrr" %}
[Prohibited Business](/policies-and-compliance/prohibited-business)
{% endcontent-ref %}


# Troubleshooting

Paypal and Stripe troubleshooting

On this page, we'll go over some of the most common issues users have when setting up payment methods and explain how to fix them.

<details>

<summary>Paypal: Why are my payments PENDING or ON HOLD and the order is not delivered?</summary>

This happens when you have a young Paypal account or you have been receiving regular payments for a short time. Or after a period of inactivity.

Log in to your Paypal account and provide all the information requested to verify your account.&#x20;

For Paypal to work properly, please **verify your bank account**. If you have a Paypal Business account, Paypal may ask you for your business registration, a **tax number etc...**

Sometimes you also have to manually accept payments for a certain amount of time when your account is young.&#x20;

First transactions may be **ON HOLD** by Paypal for 21 days.

**To avoid making your players wait, check the Force delivery boxes in** [**MY GATEWAY**](https://tip4serv.com/dashboard/my-gateway)

</details>

<details>

<summary>Paypal: Why do buyers see the message "Things don't appear to be working at the moment"?</summary>

This error is usually caused by an issue with the seller's PayPal account rather than Tip4Serv.

In most cases, PayPal requires the seller to verify or complete additional information on their PayPal Business account before they can accept payments.

To resolve the issue:

1. Log in to your **PayPal** account and check if PayPal is requesting any additional information or verification.
2. Complete any pending verification steps or, if nothing is requested, contact **PayPal Support** to ensure your account is able to accept payments.
3. We also recommend using **PayPal V2** in **Tip4Serv →** [**MY GATEWAY**](https://tip4serv.com/dashboard/my-gateway). PayPal V2 uses PayPal's latest API and is generally more reliable than the legacy email-based PayPal integration.

Once your PayPal account is fully verified, buyers should be able to complete their payments normally.

</details>

<details>

<summary>Paypal: Why does Paypal give me an error when I try to pay?</summary>

If you try to pay by entering the same email address that you use on your Paypal seller account then Paypal will make an error because you cannot pay yourself.

To perform a live payment test, **simply specify another email address** and pay as a guest by entering your credit card numbers.

</details>

<details>

<summary>Paypal: Why the payments I receive on Paypal do not appear on Tip4serv?</summary>

Here are two possible reasons for the issue you might be encountering:

**1) Bank Transfer Payments**: Sometimes, buyers make payments via bank transfer. Check the payment status directly on your PayPal account. If it is marked as **PENDING**, it is likely that the buyer used a bank transfer. In this case, the payment may **take several days** to appear on your Tip4Serv account.

**2) PayPal Configuration (ignore this if you use Paypal V2 Business)**: If you're using PayPal V1 and payments are being received in your PayPal account but are not showing up in your Tip4Serv dashboard, this means the system is unable to process the payment. As a result, your players will not receive their products. You have certainly changed the IPN address in your Paypal account:

[Follow these steps](https://developer.paypal.com/api/nvp-soap/ipn/IPNSetup/#link-settingupipnnotificationsonpaypal) and paste this url in **Notification URL** on your Paypal account:

```php
https://tip4serv.com/processing/ipn_payment_paypal_v2.php
```

</details>

<details>

<summary>Paypal V2: Why do I get a Paypal error message in my checkout?</summary>

If you get these errors:

*We couldn't process your PayPal payment. Please try again. If the problem persists, try a different payment method or contact the store owner for assistance.*

Check that your application accepts debit card payments:

<https://developer.paypal.com/dashboard/applications/live>

**Advanced Credit and Debit Card Payments** must be checked otherwise contact Paypal:

<img src="https://2187496599-files.gitbook.io/~/files/v0/b/gitbook-x-prod.appspot.com/o/spaces%2FrJFlpzFF4M0XjvFfIMsk%2Fuploads%2FX3rq42l3OFor18pmCDmK%2F9fd5493cc56f1ea0b386412310cabab1-png.webp?alt=media&amp;token=c633afbc-7283-4c11-b4c2-33f57858ac44" alt="" data-size="original">

Also check if you need to provide information to Paypal such as **verifying your bank account**.
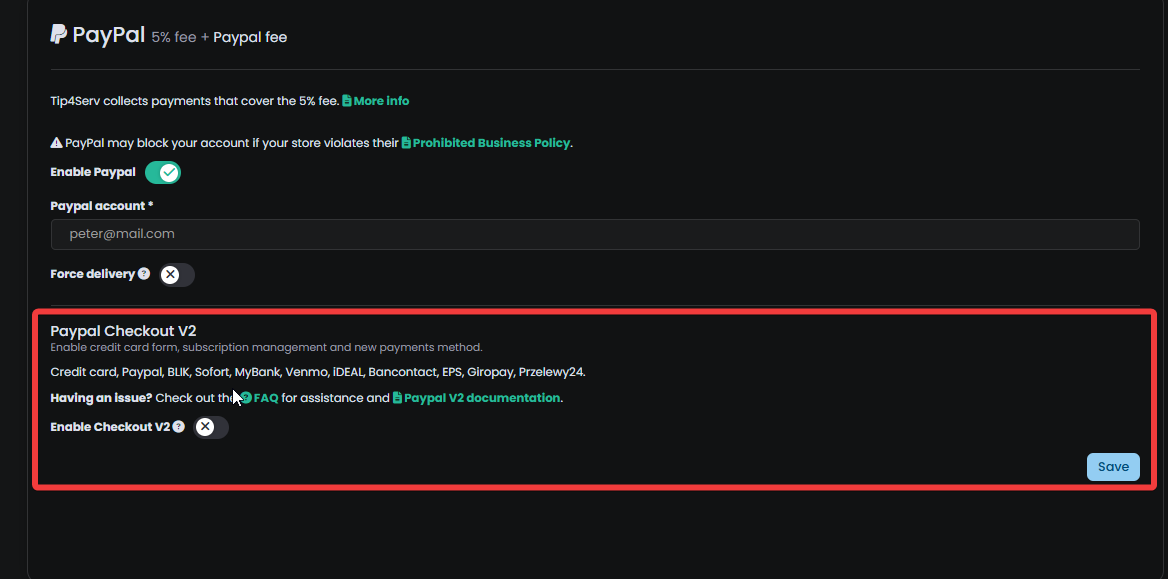
</details>

<details>

<summary>PayPal V2: Why aren't iDEAL or other payment methods appearing?</summary>

Some alternative payment methods (such as iDEAL) need to be manually activated in your PayPal business account.

To enable them, please visit the following page while logged into your PayPal Business account: <https://www.paypal.com/businessmanage/account/payments>

Once activated, these options should appear automatically during checkout when supported.

</details>

<details>

<summary>Paypal / Stripe: Why is the payment form not showing in the checkout?</summary>

You certainly haven't completed the registration process on Stripe or Paypal.&#x20;

These accounts sometimes **need to be verified**, log in to your Paypal or Stripe account and provide all the elements requested to become a verified user.&#x20;

These documents can be an identity card or proof of address.&#x20;

The payment form should appear once these elements have been validated by the company.

</details>

<details>

<summary>Stripe: How do I change my Stripe account?</summary>

**You can only connect one Stripe account to Tip4Serv. If you want to switch to another account, follow these steps:**

1. Go to [**MY GATEWAY**](https://tip4serv.com/dashboard/my-gateway)**,** disable Stripe and click Save.
2. (Optional) Delete your old Stripe account by following [these steps](https://support.stripe.com/questions/close-a-stripe-account).
3. Re-enable Stripe in **MY GATEWAY**. If the Stripe ID box is filled, clear it.
4. Click **Save**.&#x20;

You’ll then be prompted to create a new Stripe account.

If you already have a created Stripe account, you can enter your **acct\_...** ID in the Stripe ID box and click **Save**.

</details>

<details>

<summary>Where is my money and how can i withdraw it?</summary>

When you receive payments, the money is sent directly to the **PayPal or Stripe account** you connected in [**MY GATEWAY**](https://fivem.tip4serv.com/dashboard/my-gateway).

We do **not hold or store your funds** on our platform.

To access your money, simply log in to your [**PayPal**](https://www.paypal.com/) **and/or** [**Stripe**](https://dashboard.stripe.com/) account using the email address you provided.

From there:

* **With PayPal**, you can manually request a **bank transfer** to your personal account.
* **With Stripe**, payouts are processed **automatically every week** to the **bank account you provided during the Stripe Connect sign-up process**.

**Not seeing your payments on Stripe?** You might have more than one Stripe account: [Check and switch accounts](https://support.stripe.com/questions/create-and-manage-multiple-stripe-accounts).

</details>

If you need help, feel free to [contact us](https://tip4serv.com/contact).


# Chargeback Protection

Automatic chargeback protection against fraudsters.

In this article, we will explore the Tip4Serv Chargeback Protection Program, to understand how it works and how it protects you every day against fraudsters.

***

### 1. How to enable it ?

This one is quite simple, you don't need to do a lot of stuff, you can fall into two cases.

#### A. If you use Stripe :&#x20;

If you are using Stripe, you don't need to do anything, the Chargeback Protection Program is already enabled by default, and will respond automatically to every Stripe dispute for you.

#### B. If you use PayPal :&#x20;

If you are using PayPal, you want to make sure that you are using PayPal v2 and not just the e-mail integration. This is very important, otherwise Tip4Serv won't be able to respond automatically to your disputes.

<figure><img src="https://2187496599-files.gitbook.io/~/files/v0/b/gitbook-x-prod.appspot.com/o/spaces%2FrJFlpzFF4M0XjvFfIMsk%2Fuploads%2FxiBLCt8LJd9d2NBFfdO8%2FJC2B20f2Gc.png?alt=media&amp;token=aee335be-28d9-4ac4-919c-42cc5241b61a" alt=""><figcaption></figcaption></figure>

***

### 2. How does it work ?

Tip4Serv will actively scan your disputes and if a new dispute is opened against you, Tip4Serv will automatically try to respond to it for you. We'll see how Tip4Serv does that by analysing the two main types of disputes.

#### A. Product was not delivered dispute

If the dispute is about a product not being fully delivered, Tip4Serv will collect all the proof of the disputed payments and will check if every server command was executed, if the user clicked on the download button of a file you sold to him, and other elements. All of these elements provide solid proof that your client actually received his product and is straight up lying to the bank and the payment provider.

*If one of your server commands was not executed, or you didn't sell anything tangible to the customer, Tip4Serv will send you an e-mail notifying you that it couldn't find any proof and you will be prompted to resolve this case manually.*

#### B. The payment was fraudulent

This case is a trickier one, the customer is alerting the bank that he wasn't the originator of this payment, but in most cases this is of course a lie. Tip4Serv will first check if 3D-Secure was executed. *(3D-Secure is some sort of 2FA but for bank transactions, this is considered really solid proof that the payment was not fraudulent for most banks.)*&#x20;

If no 3D-Secure process was executed, Tip4Serv will start connecting the dots between different payments. For example, if we manage to link different payments to the same identity tied to the fraudulent payment, we share the other information as proof that the customer is lying because he already made several other payments to the same store, and therefore, if he claims that this payment is fraudulent, why did he not report the previous payments as fraudulent?

If Tip4Serv couldn't manage to provide any proof, Tip4Serv will alert you by e-mail that this case needs a manual solution.

***

### 3. What to do if automatic resolution failed ?

There's two thing you can do, you can either re-try the automatic resolution or solve this case manually.

#### A. Re-trying the automatic resolution

First visit the [Dispute dashboard](https://tip4serv.com/dashboard/disputes), you will be able to see all the disputes that occured against your store.

<figure><img src="https://2187496599-files.gitbook.io/~/files/v0/b/gitbook-x-prod.appspot.com/o/spaces%2FrJFlpzFF4M0XjvFfIMsk%2Fuploads%2FpInSVKVclLKdS82iBc5s%2Fbrave_0MdSBFOW99.png?alt=media&amp;token=a776c866-75f5-44c4-8f60-0b2c6a585634" alt=""><figcaption></figcaption></figure>

And simply press the retry button, to retry the automatic dispute. If it fails, Tip4Serv will either provide you with concrete instructions you can execute to successfully retry an automatic dispute or will encourage you to solve this case manually.

#### B. Solving the case manually

You will rarely need to solve cases manually, but the probability that you might encounter one manual case is not 0, so we provided you with another document which shows you how to resolve cases manually here:

{% content-ref url="/pages/XmRHR5qUH8Jb8ca5BEeU" %}
[Manage disputes](/payments/manage-disputes)
{% endcontent-ref %}


# Manage disputes

Managing and Preventing PayPal Disputes for Digital Products

This documentation outlines best practices and tips to reduce disputes and improve transparency. Always try to resolve the issue directly with the customer and encourage them to withdraw the dispute.&#x20;

However, if you encounter a dishonest customer, you can maximize your chances of winning the dispute by providing strong evidence.

***

### 1. Dispute Prevention: Key Steps

#### A. Switch your Paypal account to Business

If you haven’t already, consider [upgrading your PayPal account to a Business](/payments/paypal-v2) account for enhanced protection in case of disputes.

#### B. Detailed Product Descriptions

* Clearly explain what the client is purchasing (e.g., "1,000 game credits").
* Specify the delivery method (e.g., "Automatic delivery within 5 minutes after payment").
* Mention if it is a subscription.

#### C. Non-Refund Policy

* While the non-refund policy is already present during checkout, add another message on your store's homepage in the "About" section in [MY SETTINGS](https://tip4serv.com/dashboard/my-settings). Extend your non-refund policy to cover cases such as bans for cheating. Example:

  > "By purchasing a product from this store, you agree that this digital product will be delivered immediately and waive your right to withdrawal. Refunds will not be granted if you violate server rules."

#### D. Post-Purchase Steps

* Provide clear instructions on what the client should do after payment (e.g., "Type /claim on Discord to get your credits").

#### E. Visible Contact Links

* Add a link to contact you in your store in case of any problem, you can add this in [MY SETTINGS](https://tip4serv.com/dashboard/my-settings).

***

### 2. Responding to Disputes: Steps and Evidence Required

#### A. Identifying the Dispute Type

Disputes are typically classified as:

1. **Item Not Received**
2. **Item Not as Described**
3. **Unauthorized Activity**

***

#### B. How to Respond to Each Type of Dispute

**1. Item Not Received**

* **Evidence to provide:**
  1. Delivery proof: A screenshot from Tip4Serv showing payment details and executed commands.
  2. Non-Refund Policy: A screenshot of the checkout page.
  3. Server Logs: If possible, server logs proving the receipt of the product.
* **Sample Response:**

  > "Hello, this is a digital product that was purchased on \[purchase date] and delivered the same day, as shown in the attached proof.
  >
  > Additionally, the customer waived their right to withdrawal and refund by purchasing this product (see attached checkout screenshot), as it is a digital good that has already been consumed. We cannot issue refunds.
  >
  > Kind regards,\
  > \[your community name]"

***

**2. Item Not as Described**

* **Evidence to provide:**
  1. Delivery proof: A screenshot from Tip4Serv showing payment details, the product name, and executed commands.
  2. Non-Refund Policy: A screenshot of the checkout page.
  3. Server Logs: If possible, server logs proving the product’s usage.
* **Sample Response:**

  > "Hello, the purchased product is a digital item \[product name] ordered on \[date] and delivered on \[date].&#x20;
  >
  > The product matches the description on our store: \[store or product URL].\
  > Attached are the delivery and usage proofs.
  >
  > Kind regards,\
  > \[your community name]"

***

**3. Unauthorized Activity**

The customer may dispute the payment with their bank. You need to provide PayPal with evidence that the customer initiated the payment.

* **Evidence to provide:**
  1. Proof of delivery: Provide a screenshot from Tip4Serv that includes the customer's IP address, the product name, and the executed commands. Ensure your mouse hovers over the checkmark icon to display the date clearly in the screenshot.
  2. Non-Refund Policy: A screenshot of the checkout page.
  3. Purchase History: If the customer made multiple purchases, provide their purchase history to demonstrate consistent consumption behavior.
  4. Server Logs: If possible, server logs with the customer’s IP address can also help you win the dispute.
* **Sample Response:**

  > "Hello, this is a digital product that was purchased on \[purchase date] and delivered the same day. The IP address collected during payment confirms that the customer initiated the payment (see attached proof).
  >
  > Additionally, the customer waived their right to withdrawal and refund by purchasing this product (see attached checkout screenshot), as it is a digital good that has already been consumed. We cannot issue refunds.
  >
  > Kind regards,\
  > \[your community name]"

***

#### C. Select "Digital Goods" on PayPal

When responding to a dispute, ensure you select the option indicating the order concerns a **digital good**. This helps PayPal understand the product cannot be returned and was consumed instantly.

***

### 3. Summary of Evidence to Prepare for Disputes

| **Type of Evidence**    | **Description**                                                         | **Example File**                                                                                  |
| ----------------------- | ----------------------------------------------------------------------- | ------------------------------------------------------------------------------------------------- |
| Delivery Proof          | Details showing that the product was delivered immediately post-payment | [`Delivery_Proof_Screenshot.png`](https://tip4serv.com/img/proof/Delivery_Proof_Screenshot.png)   |
| Non-Refund Policy Proof | Screenshot of the non-refund policy visible during checkout             | [`Non_Refund_Policy_Checkout.png`](https://tip4serv.com/img/proof/Non_Refund_Policy_Checkout.png) |
| Server Logs             | Logs showing the product’s usage by the customer                        | [`Server_Usage_Logs.png`](https://tip4serv.com/img/proof/Server_Usage_Logs.png)                   |
| Purchase History        | Purchase history demonstrating consistent behavior                      | [`Purchase_History_Customer.png`](https://tip4serv.com/img/proof/Purchase_History_Custom.png)     |

***

### 4. Activating PayPal Chargeback Protection

#### A. What is Chargeback Protection?

This service protects eligible merchants against chargebacks for:

* Unauthorized transactions.
* Items not received.

#### B. Eligibility Criteria

1. Have a valid PayPal Business account.
2. Comply with PayPal's delivery and general policies.
3. PayPal may offer this protection after a certain period of account use.

#### C. How to Activate

1. Log in to your PayPal account.
2. Go to `Settings > Payment Preferences > Risk and Fraud Management`.
3. Activate "Chargeback Protection."

{% hint style="info" %}
**Chargeback protection** ensures that you won’t be held financially responsible in the event of a dispute. Losing a dispute can often be very costly, but with this protection, you’re covered. You can find more details in this [PayPal article](< https://www.paypal.com/us/cshelp/article/what-is-chargeback-protection-help608>).
{% endhint %}

***

### 5. Best Practices

#### A. Stay Professional

* Respond calmly and factually to disputes.

#### B. Provide Clear Evidence

* Annotate your screenshots to guide PayPal or Stripe.

#### C. Prevent Disputes Upfront

* Display reminders about non-refund policies and provide easy access to contact options.

#### D. Respond Quickly

* Submit your evidence promptly to increase your chances of success.

***

By following this documentation, you will be better prepared to prevent PayPal and Stripe disputes and effectively defend your position in case of an issue.

> Tip4Serv will never charge you any fees on a payment that has been refunded due to a dispute, even if you choose to initiate the refund yourself.


# Ark Survival Evolved

This documentation explains how to configure the Tip4Serv plugin to manage donations, item sales, experience, and subscriptions on your ARK Survival Evolved server.

### Prerequisites

* An ARK: Survival Evolved server with [ARK Server API](https://ark-server-api.com/resources/ase-server-api.32/) installed (for plugin connection).
* RCON access if using Tip4Serv via RCON.
* [ArkShop](https://gameservershub.com/forums/resources/ark-survival-evolved-arkshop.22/) and [Permissions](https://gameservershub.com/forums/resources/ark-permissions.20/) plugins if required.

***

### Installation

1. **Add Your Server:**\
   Go to [My Servers](https://tip4serv.com/dashboard/my-servers) and add your ARK server.
2. **Choose a Connection Method:**\
   Select either **Plugin** or **RCON**.
3. **Configure Plugins:**\
   Follow the step-by-step setup instructions provided.

***

### Commands

Each command can be added to a product via the Tip4Serv product editor.

#### 📣 Broadcast

Send a public thank-you message to the server.

**Example:**

```bash
Broadcast Thank you {arkse_username} for your {total_paid} {currency} donation
```

***

#### 🎁 Sell Items and Experience

Deliver items or XP directly to players.

**Prerequisites:**

* Plugin must be installed on the target server.
* Enable “Allow server choice” and “When player is connected” in the product settings.
* Plugin allows use of commands like `GiveItem` (not possible via RCON).

<figure><img src="https://2187496599-files.gitbook.io/~/files/v0/b/gitbook-x-prod.appspot.com/o/spaces%2FrJFlpzFF4M0XjvFfIMsk%2Fuploads%2Fr8W6LYC7sA4GJm0FS0Cx%2F5LXK1VLqB5.png?alt=media&amp;token=357cf56f-460b-48ca-89aa-5d3e7c9df885" alt="Game Options"><figcaption><p>Options</p></figcaption></figure>

**Examples:**

```bash
GiveItemToPlayer {ue4_id} "Blueprint'/Game/PrimalEarth/CoreBlueprints/Resources/PrimalItemResource_ElementShard.PrimalItemResource_ElementShard'" 2 65 0
```

```
GiveExpToPlayer {ue4_id} 50 false false
```

Use this generator: [ARK COMMANDS](https://arkids.net/commands)

***

#### 💰 Sell Points

Give players points to spend in-game.

**Prerequisite:**\
[ArkShop plugin](https://gameservershub.com/forums/resources/ark-survival-evolved-arkshop.22/)

**Example:**

```bash
AddPoints {steam_id} 51
```

***

#### 🛡️ Sell Permissions (Subscriptions)

Grant or revoke player permissions.

**Prerequisites:**

* [Permissions plugin](https://gameservershub.com/forums/resources/ark-permissions.20/)
* If you use a shared database across maps, add only one server to your product.

**Examples:**

```bash
Permissions.Add {steam_id} VIP
Permissions.Remove {steam_id} VIP
```

**Steps:**

1. Go to the [Product Editor](https://docs.tip4serv.com/store-setup/server-commands)
2. Enable **subscriptions**
3. Set the **start command** (Do this after first payment)
4. Set the **end command** (Do this if subscription expires)

<div><figure><img src="https://2187496599-files.gitbook.io/~/files/v0/b/gitbook-x-prod.appspot.com/o/spaces%2FrJFlpzFF4M0XjvFfIMsk%2Fuploads%2FQdLTJggqrbyM2vF9q30A%2Fbrave_E2S4pnx6ib.png?alt=media&amp;token=13afbcb2-e466-443a-9acb-7b766c6548ac" alt="Step 1 : Enable the subscription mode"><figcaption><p>Step 1 : Enable the subscription mode</p></figcaption></figure> <figure><img src="https://2187496599-files.gitbook.io/~/files/v0/b/gitbook-x-prod.appspot.com/o/spaces%2FrJFlpzFF4M0XjvFfIMsk%2Fuploads%2FStSKPS5hbXd7T04VfwW9%2Fbrave_Axub7f9vw4.png?alt=media&amp;token=ccedc59e-3d27-443c-a3d4-771340bc7e98" alt="Subscriptions"><figcaption><p>Step 2: Set the commands after the payment &#x26; expiration.</p></figcaption></figure></div>

***

#### ➗ Multiply Quantity

Use a multiplier based on the quantity the customer selects.

**Prerequisite:**\
Enable “Allow quantity choice” in your product settings.

**Example for a 200-points pack:**

```bash
AddPoints {steam_id} {quantity*200}
```

**If the player buys it 4 times, it becomes:**

```bash
AddPoints 76561198030572988 800
```

***

### ⚖️ Plugin vs RCON Comparison

| Feature                | Plugin                                | RCON                                                      |
| ---------------------- | ------------------------------------- | --------------------------------------------------------- |
| Requires player online | ✅ Yes                                 | ❌ No                                                      |
| Execution source       | Player (in-game)                      | Server (console)                                          |
| Multi-server setup     | One API key for all identical servers | Each server must be connected individually                |
| Command types          | Any console command                   | Limited to `{steam_id}` and `{ue4_id}` supported commands |


# Ark Survival Ascended

This documentation explains how to configure Tip4Serv for handling donations, items, XP, and subscriptions on your ARK: Survival Ascended server.

## For Nitrado servers

Nitrado does not support external plugins. To deliver rewards (items or dinos), you’ll need to use the **ASA Bot Companion** mod together with Tip4Serv. This mod provides a dedicated script command system that works without plugins.

{% content-ref url="/pages/YWN77xk38mb223kuNFEH" %}
[Ark Survival Ascended Nitrado](/games/ark-survival-ascended-nitrado)
{% endcontent-ref %}

***

## For a dedicated server

If you are running your own dedicated ARK: Survival Ascended server, you can use the **ARK Server API** with plugins.&#x20;

Depending on your setup, you will need:

* [ARK Server API](https://ark-server-api.com/resources/asa-server-api.31/) – required to install plugins on your server.
* RCON access – necessary if you plan to use the RCON connection method.
* [ArkShop plugin](https://gameservershub.com/forums/resources/ark-survival-ascended-arkshop-crossplay-supported.714/) or [WShop UI mod](https://www.curseforge.com/ark-survival-ascended/mods/wshop-ui) – allows you to give and manage points.
* [Permissions plugin](https://gameservershub.com/forums/resources/ark-survival-ascended-permissions-crossplay-supported.713/) – used for handling subscriptions and player permissions.
* [Browser button & QR code mod](https://www.curseforge.com/ark-survival-ascended/mods/tip4serv) - usefull to redirect players to your shop **with their EOSID**

***

### Installation

1. **Add Your Server**\
   Go to [My Servers](https://tip4serv.com/dashboard/my-servers) and register your ARK SA server.
2. **Choose a Connection Method**\
   Select either **Plugin** or **RCON**.
3. **Configure Plugins**\
   Follow the setup instructions provided for your chosen connection.

***

### Commands

All commands are configured via the [product editor](/server-commands) in your Tip4Serv dashboard.

#### 📣 Broadcast

Send a public thank-you message in the server chat.

```bash
ServerChat Thank you {arksa_username} for your {total_paid} {currency} donation
```

***

#### 🎁 Sell Items and Experience

Provide items and XP directly to players.

**Note:** Requires Tip4Serv plugin (not compatible with RCON).

**Examples:**

```bash
GiveItem "Blueprint'/Game/PrimalEarth/CoreBlueprints/Items/Structures/Wooden/PrimalItemStructure_WoodFenceFoundation.PrimalItemStructure_WoodFenceFoundation'" 1 1 false
AddExperience 500000 0 0
```

> Use [ARK Command Generator](https://arkids.net/commands)

***

#### 🦖 Spawn Dinos and Items (Enhanced Attributes)

**Plugin:** [Enhanced Spawner](https://ark-server-api.com/resources/srs-enhanced-spawner.74/)

```bash
ES.SpawnItemFor {eosid} "Blueprint'/Game/PrimalEarth/CoreBlueprints/Items/Armor/Saddles/PrimalItemArmor_RexSaddle.PrimalItemArmor_RexSaddle'" "" 5 1 {quantity} 50 500 0 0 0
ES.SpawnDinoFor {eosid} "Blueprint'/Moros_Indomitable_Duo/IndominusRex/IndoRaptor/IndoRaptorBlueprints/MoroRaptor_Character_BP.MoroRaptor_Character_BP'" "'" 0 260 0 0 0 0 0 M
```

***

#### 🧱 Give Resources

**Plugin or RCON**\
Requires [Extended RCON](https://ark-server-api.com/resources/extended-rcon.111/)

```bash
GiveItemToEOSId {eosid} "Blueprint'/Game/PrimalEarth/CoreBlueprints/Resources/PrimalItemResource_Element.PrimalItemResource_Element'" {quantity} 0 0
```

***

#### 💰 Sell Points

Give players points to use with [ArkShop ](https://gameservershub.com/forums/resources/ark-survival-ascended-arkshop-crossplay-supported.714)or [WShop](https://www.curseforge.com/ark-survival-ascended/mods/wshop-ui).

```bash
AddPoints {eosid} 51
```

***

#### 🛡️ Sell Permissions (Subscriptions)

Grant/revoke ranks or roles using the Permissions plugin.

**Examples:**

```bash
Permissions.Add {eosid} VIP
Permissions.Remove {eosid} VIP
```

🛠️ Configure via the [Product Editor](https://docs.tip4serv.com/store-setup/server-commands):

1. Enable Subscriptions
2. Set the command on purchase (Do this after first payment)
3. Set the command on subscription end (Do this if subscription expires)

<div><figure><img src="https://2187496599-files.gitbook.io/~/files/v0/b/gitbook-x-prod.appspot.com/o/spaces%2FrJFlpzFF4M0XjvFfIMsk%2Fuploads%2FQdLTJggqrbyM2vF9q30A%2Fbrave_E2S4pnx6ib.png?alt=media&amp;token=13afbcb2-e466-443a-9acb-7b766c6548ac" alt="Step 1 : Enable subscriptions"><figcaption><p>Step 1 : Enable Subscriptions.</p></figcaption></figure> <figure><img src="https://2187496599-files.gitbook.io/~/files/v0/b/gitbook-x-prod.appspot.com/o/spaces%2FrJFlpzFF4M0XjvFfIMsk%2Fuploads%2Ff5rITs3qTqdw1RB2o005%2Fbrave_ZZFxYLnU56.png?alt=media&amp;token=4104c618-fecc-46f1-a772-af04d3a22efa" alt="Step 2: Set commands after payments &#x26; after expiration."><figcaption><p>Step 2: Set commands after payments &#x26; after expiration.</p></figcaption></figure></div>

***

#### ➗ Multiply Quantity

Allow buyers to scale purchases with a multiplier.

**Enable “Allow quantity choice” in product settings.**

**Example:**

```bash
AddPoints {eosid} {quantity*200}
```

If a player buys 4 units, the final command will be:

```bash
AddPoints 000263b63d2641b080241ce6463a0754 800
```

***

### ⚖️ Plugin vs RCON Comparison

| Feature                | Plugin                                        | RCON                                              |
| ---------------------- | --------------------------------------------- | ------------------------------------------------- |
| Player Required Online | ✅ Yes                                         | ❌ No                                              |
| Supports Self Commands | ✅ Yes (`GiveItem)`                            | ❌ No                                              |
| Executes Commands      | Player (in-game)                              | Server, even when empty                           |
| Multi-server Setup     | One server entry with shared API key possible | Each server must be added and linked individually |

***

### 🔀 Using Plugin and RCON Together

You can use both connection methods simultaneously. For example:

* Use Plugin for item delivery and player-dependent actions
* Use RCON for account-based tasks like points and permissions

This hybrid setup offers maximum flexibility across all your products.


# Ark Survival Ascended Nitrado

> This page explains how to use Tip4Serv **only** with **Nitrado** servers that **do not** support plugins. You will be able to:
>
> * Run **RCON** commands.
> * Offer **in‑game** rewards via a mod (items/dinos/cryo).

***

### 1) Prerequisites

* A **Nitrado** server for **ARK: Survival Ascended**.
* **RCON enabled** and reachable (IP/Port/Password). In the Nitrado panel: enable RCON, set a password, then restart your server.
* [**Browser button & QR code** mod](https://www.curseforge.com/ark-survival-ascended/mods/tip4serv) installed on your server to redirect players to your shop **with their EOSID**.
* [**ASA Bot Companion** mod](https://www.curseforge.com/ark-survival-ascended/mods/asa-bot-companion) or [**Helena** mod](https://www.curseforge.com/ark-survival-ascended/mods/helena-bot-companion) installed on your server to spawn items/dinos/cryo with RCON commands.

***

### 2) Add your server in Tip4Serv (RCON mode)

1. Open **Tip4Serv > Dashboard > My Servers** and **add** your ARK SA server.
2. **Connection method:** choose **RCON**.
3. Enter your **IP, RCON Port and RCON Password** (from your Nitrado panel).
4. Save. Tip4Serv will test the RCON connection.

> ✅ Once connected, you can create **products** that send **RCON commands** to your server after purchase.

***

### 3) Spawn dinos, items & cryo

Since Nitrado does not support server plugins, mods provide a dedicated **ScriptCommand** system instead.\
This allows Tip4Serv to automatically deliver items and dinos by targeting a player’s EOS ID.

{% hint style="info" %}
Always include the `{eosid}` placeholder in your command — Tip4Serv will dynamically replace it with the buyer’s actual EOSID at runtime.
{% endhint %}

You can easily generate the correct syntax using the [**ASA Bot Command Builder**](https://asa-bot.info/#/tools/rcon?mode=build)**.**

#### &#x20;Example commands using the ASA Bot Companion mod:

**Spawn item:**

```
scriptcommand asabot spawnitem {eosid} '/Game/PrimalEarth/CoreBlueprints/Items/Armor/Metal/PrimalItemArmor_MetalBoots.PrimalItemArmor_MetalBoots' quantity=1
```

**Spawn dino:**

```
scriptcommand asabot spawndino {eosid} '/Game/PrimalEarth/Dinos/Argentavis/Argent_Character_BP.Argent_Character_BP' gender=female level=1
```

**Spawn item with stats:**

```
scriptcommand asabot spawnitem {eosid} '/Game/PrimalEarth/CoreBlueprints/Items/Armor/Metal/PrimalItemArmor_MetalBoots.PrimalItemArmor_MetalBoots' quantity=1 armor=25 durability=50 quality=primitive
```

#### Example commands using the [Helena mod](https://www.curseforge.com/ark-survival-ascended/mods/helena-bot-companion):

**Give item (Bed):**

```
scriptcommand hb.giveitemtoeosid {eosid} Blueprint'/Game/PrimalEarth/CoreBlueprints/Items/Structures/Misc/PrimalItemStructure_Bed_Simple.PrimalItemStructure_Bed_Simple 2 0 0 0 0 0 0 0
```

**Give reward (2.500.000 Dedi):**

```
scriptcommand hb.givereward type=instadedi eosid={eosid} path=/Game/PrimalEarth/CoreBlueprints/Resources/PrimalItemResource_Oil.PrimalItemResource_Oil dediquantity=2500000 quantity=1
```

**Give cryo (Rock Golem)**

```
scriptcommand hb.givecryotoeosid {eosid} Blueprint'/Game/ScorchedEarth/Dinos/RockGolem/RockGolem_Character_BP.RockGolem_Character_BP 55,30,30,25,30,55 0 0 0 0
```

#### 4) How to use it in Tip4Serv?

1. In your product editor on [**Server action**](/server-commands) section, insert the desired `scriptcommand...` line(s).
2. Optional: Add a `ServerChat` broadcast to confirm the reward has been delivered:

```
ServerChat Thank you {arksa_username} for your donation of {total_paid} {currency} ❤️
```


# FiveM

Connect your store to your FiveM server. The Tip4Serv script checks if a player has donated, then automatically delivers their order (money, rank, vehicle, items, etc.) using console commands.

### Installation

1. Go to [My Settings](https://tip4serv.com/dashboard/my-settings) and complete your profile
2. Add a **FiveM** server via [My Servers](https://tip4serv.com/dashboard/my-servers) and follow the setup instructions

✅ On successful connection, your console will show:\
`Server has been successfully connected`

🔄 To check the connection later, run this command on your FiveM server console:

```
restart tip4serv
```

***

### How Donations Work

1. The player donates through your Tip4Serv store
2. Their purchase is automatically delivered in-game

Players can also run:

```
/checkdonate
```

to force-check their donation delivery.

***

### Setting Up Commands

Before you set up commands:

* All commands run from the **server console** (not in-game as admin).
* If your framework does not support console commands, you must create them manually (see below).

You can configure your commands from the [product editor](/server-commands).

{% hint style="info" %}
When a player connects to your server, the `{fivem_live_id}` placeholder in your command will automatically be replaced with their actual FiveM Live ID, retrieved using their Steam ID or Discord ID provided at checkout.
{% endhint %}

***

### 📣 In-Game Donation Announcements

Use the built-in `t4s_announce` command:

```bash
t4s_announce [STORE] Thanks to {discord_username} for donating on mystore.tip4serv.com
t4s_announce [STORE] Thanks to {steam_username} for donating on mystore.tip4serv.com
```

***

### 🔧 Commands for ESX Framework

✅ Requires [ESX](https://esx-framework.org) and [es\_extended](https://github.com/ESX-Official/es_extended)

* **Give Money**

  ```
  giveaccountmoney {fivem_live_id} bank 5000
  ```
* **Give Item**

  ```
  giveitem {fivem_live_id} milk 1
  ```
* **Give Weapon**

  ```
  giveweapon {fivem_live_id} WEAPON_STUNGUN 32
  ```
* **Set Group**

  ```
  setgroup {fivem_live_id} vip
  ```
* **Set Job and Grade**

  ```
  setjob {fivem_live_id} police 1
  ```
* **Give Vehicle**\
  Requires: [esx\_givevehicle](https://github.com/minobear/esx_givevehicle)\
  Console prefix is `_`

  ```
  _givecar {fivem_live_id} t20
  ```

***

### 🛠️ Commands for QBCore Framework

✅ Requires [QBCore](https://github.com/qbcore-framework)

Set `Config.enable_custom_command = true` in `config.lua`

These commands are located in this file: `/server/commands.lua`

* **Give Money**

  ```
  giveaccountmoney {fivem_live_id} bank 5000
  ```
* **Set Gang**

  ```
  setplayergang {fivem_live_id} ballas 1
  ```
* **Set Job**

  ```
  setplayerjob {fivem_live_id} police 1
  ```
* **Set Permission**

  ```
  setplayerpermission {fivem_live_id} vip
  ```
* **Remove All Permissions**

  ```
  removeplayerpermission {fivem_live_id}
  ```
* **Give Item**

  ```
  giveinventoryitem {fivem_live_id} WEAPON_KNIFE 1
  ```
* **Give Vehicle**\
  Requires: [HH Vehextras](https://github.com/hhfw1/hh_vehextras)

  ```
  givevehicletoplayer {fivem_live_id} t20
  ```

***

### ➗ Quantity Multiplier

Let customers choose how much they want to buy.

Enable **“Allow quantity choice”** in the product settings.

**Example:**

```bash
giveaccountmoney {fivem_live_id} bank {quantity*100}
```

If a player buys it 4 times:

```bash
giveaccountmoney 14 bank 400
```

***

### Commands also run automatically

Useful if you are creating subscriptions with expiration commands.

Example: if the player unsubscribes, his VIP group will be removed.

To ensure player data is fully loaded, commands with `{fivem_live_id}` will only execute if the player has moved at least once since connecting to the server. This is to ensure that the player is not in the loading screen or in the character choice.

***

### Custom Console-Compatible Commands

If your framework lacks console commands, you can write your own using:

```lua
RegisterCommand(...)
```

Guide: [FiveM Command Docs](https://docs.fivem.net/docs/scripting-manual/migrating-from-deprecated/creating-commands/)

Example from Tip4Serv:\
[Tip4Serv GitHub – commands.lua (line 10)](https://github.com/Murgator/Tip4Serv/blob/master/tip4serv/server/commands.lua)


# Garry's Mod

Connect your store to your Gmod server. The Tip4Serv plugin checks if a player has donated, then automatically delivers their order (money, rank, items, etc.) using console commands.

## Connect your Gmod server

1. **Create a Tip4Serv account:** [Sign up here](https://tip4serv.com/)
2. **Add your Gmod server** from your [Tip4Serv dashboard](https://tip4serv.com/dashboard/my-servers) and copy your API KEY
3. Download and drag and drop the `tip4serv` folder into the `garrysmod/addons` directory
4. Open `garrysmod/data/tip4serv/config.json` and set your `key` to the Tip4Serv API key
5. Restart your server
6. Run the following in your server console:

   ```
   tip4serv connect
   ```

> ✅ You should see: **Server has been successfully connected**

***

## Configure commands to be executed after purchase

> Commands are executed via **server console**, not in-game.\
> You **must have at least one player online** during testing, or commands will not execute.

Set up your commands per product from your [product editor](/server-commands). You can use any console command supported by your installed addons.

***

### Steam ID Variables

* `{steam_id2}` → Example: `STEAM_0:1:12345678`
* `{steam_id64}` → Example: `76561198000000000`

These placeholders will be replaced automatically during command execution.

***

### Command examples

#### Commands from the Tip4Serv Addon

* Give entity:\
  `tip4serv giveid {steam_id2} entity-name`
* Give ammo:\
  `tip4serv giveid {steam_id2} ammo-name quantity`
* Give armor:\
  `tip4serv givearmor {steam_id2} quantity`
* Broadcast message:\
  `tip4serv say Thank you {gmod_username} for your {total_paid} {currency} donation`

🔗 [View all supported entities](https://maurits.tv/data/garrysmod/wiki/wiki.garrysmod.com/index30df.html)

***

### ULX Commands

* Add to group:\
  `ulx adduserid {steam_id2} group-name`
* Remove from group:\
  `ulx removeuserid {steam_id2} group-name`

🔗 [ULX Command Reference](https://ulyssesmod.net/ulx_docs/ulx-commands)

***

### DarkRP Commands

* Give money:\
  `tip4serv addmoneyid {steam_id2} 100000`
* Change job:\
  `tip4serv jobid {steam_id2} job-name`

***

### SAM Admin

* Set rank:\
  `sam setrankid {steam_id2} VIP`
* Remove rank:\
  `sam setrankid {steam_id2} user`

***

### sAdmin

* Add to group:\
  `sa Setrankid {steam_id2} group-name`
* Remove from group:\
  `sa Removeuser {steam_id2} group-name`
* Give ammo:\
  `sa Giveammo {steam_id2} ammo-name amount`
* Give entity:\
  `sa Give {steam_id2} entity-name`

***

### xAdmin

* Set group:\
  `xadmin_setgroup {steam_id2} group-name`

***

### VoidCases – Unboxing System

VoidCases is a sleek unboxing system with trading, marketplace, and in-game config.

* Give item:\
  `voidcases_giveitem {steam_id64} itemid amount`

🔗 [VoidCases on GmodStore](https://www.gmodstore.com/market/view/voidcases-unboxing-system)

***

### Permanent Weapons (SWEPS)

#### Option 1: Permanent SWEPS addon

`perm_sweps_add {steam_id2} swep_class1`\
🔗 [Steam Workshop](https://steamcommunity.com/sharedfiles/filedetails/?id=956066634)

#### Option 2: PermaWeapons addon

* Give: `pw_give {steam_id2} WEAPON_CLASS`
* Remove: `pw_take {steam_id2} WEAPON_CLASS`\
  🔗 [PermaWeapons on GmodStore](https://www.gmodstore.com/market/view/permaweapons-permanent-weapons-shop)

#### Option 3: Tip4Serv Database System (MySQL)

> Recommended for **subscription-based** products.

1. Install **MySQLOO**
2. Edit `garrysmod/data/tip4serv/config.json`:
   * Set `mysql_enabled` to `true`
   * Fill out all `mysql_` fields
3. Run `tip4serv connect` in your console
4. Go to [My Products](https://tip4serv.com/dashboard/my-products) and edit or create a product
5. Under your product, add a command with the option: **Run each time the player spawns**

***

### ➗ Quantity Multiplier

Allow customers to select quantity and scale your commands dynamically:

1. Enable **Allow Quantity Choice** in your product settings
2. Use `{quantity*value}` in your command:

Example:

```bash
tip4serv addmoneyid {steam_id2} {quantity*200}
```

If the customer buys it 4 times, the executed command would be:

```bash
tip4serv addmoneyid STEAM_0:1:35148628 800
```


# Minecraft

Connect your store to your Minecraft server. The Tip4Serv plugin checks if a player has donated, then automatically delivers their order (money, rank, items, etc.) using console commands.

## Connect your Minecraft Server

### 1. Add Your Game Server

1. Navigate to the [**My Servers**](https://tip4serv.com/dashboard/my-servers) section of your Tip4Serv dashboard.
2. Click on **Connect a Game Server**, and choose Minecraft.
3. Enter your **server name.**

***

### 2. Choose Player Identification Method and click Add

Depending on whether your server is online or offline mode:

* **Online mode** (recommended): Select **Check UUID**
* **Offline mode**: Select **Username**

> ⚠️ Using UUID ensures more reliable player identification across name changes.

***

### 3. Download & Configure the Plugin

Tip4Serv supports the following Minecraft server types:

* Spigot
* Bukkit
* Paper
* Forge
* Fabric
* Velocity
* Bungeecord

***

### 4. Set Up the Plugin

1. Copy the **API key** provided in your server configuration panel.
2. Paste the API key into Tip4Serv plugin configuration file: `tip4serv/tip4serv.key`
3. Save the file.

***

### 5. Connect the Plugin to Tip4Serv

To **connect your Minecraft server to the Tip4Serv** store, once the plugin is installed and configured and your tip4serv.key is filled in, run the following command in your server console:

```
tip4serv connect
```

To reload the config.json file and **execute the pending commands**, run the following command:

```
tip4serv reload
```

For **Velocity** and **Bungeecord**, the command is `tip4proxy` to avoid conflicts:

```
tip4proxy connect
tip4proxy reload
```

***

### ✅ You're All Set!

Your server is now ready to receive donations via Tip4Serv. Players will be automatically recognized and rewarded based on your configuration.

***

### Configure commands to be executed after purchase

Next, you’ll need to configure the console commands that the Tip4Serv plugin should execute after each successful purchase.

This is done directly through the [**Command Editor**](/server-commands) in your Tip4Serv dashboard, under each product.

You’ll find some examples below, but feel free to use any standard Minecraft commands or commands from plugins you’ve installed on your server.

#### 📣 Broadcast

Send a public thank-you message in the server chat.

```bash
say Thank you {minecraft_username} for your {total_paid} {currency} donation
```

***

#### 🎁 Give Rank

Give a rank to the player ([LuckPerms ](https://www.spigotmc.org/resources/luckperms.28140/)example)

```bash
lp user {minecraft_uuid} parent add vip
```

***

#### 🧱 Give Item

**Give 5 apples to the player**

```bash
give {minecraft_username} enchanted_golden_apple 5
```

***

#### 💰 Give Money

Give 5000 money to the player account ([EssentialsX ](https://essentialsx.net/)example).

```bash
eco give {minecraft_uuid} 5000
```


# Hytale

Connect and monetize your Hytale server by linking your store to it. The Tip4Serv plugin checks whether a player has donated, then automatically delivers their order (currency, rank, items, etc.)

### Connect your Hytale Server

#### 1. Add Your Game Server

1. Navigate to the [**My Servers**](https://tip4serv.com/dashboard/my-servers) section of your Tip4Serv dashboard.
2. Click **Connect a Game Server**, and choose **Hytale**.
3. Enter your **server name,** then continue and **follow the instructions provided**.

***

#### 2. Set Up the Plugin on your Hytale Server

1. Download the **tip4serv.jar** in the [**My Servers**](https://tip4serv.com/dashboard/my-servers) section
2. Drag & drop **tip4serv.jar** into the `/mods`  folder
3. Restart your Hytale server
4. Execute the **tip4serv connect \<key>** command provided in [My Servers](https://tip4serv.com/dashboard/my-servers).
5. **The server is successfully connected** when you obtain this message in your console:

```txt
Tip4Serv is now connected!
```

***

#### ✅ You're All Set! <a href="#youre-all-set" id="youre-all-set"></a>

Your server is now ready to receive donations via Tip4Serv. Players will be automatically recognized and rewarded based on your configuration.

***

#### Configure commands to be executed after purchase <a href="#configure-commands-to-be-executed-after-purchase" id="configure-commands-to-be-executed-after-purchase"></a>

Next, you’ll need to configure the console commands that the Tip4Serv plugin should execute after each successful purchase.

This is done directly through the [**Command Editor**](https://docs.tip4serv.com/store-setup/server-commands) in your Tip4Serv dashboard, under each product.

You’ll find some examples below, but feel free to use any standard Hytale commands or commands from plugins you’ve installed on your server.

**📣 Broadcast**

Send a public thank-you message in the server chat.

```
say A big thank you to {hytale_username} for their donation of {total_paid} {currency}
```

Display an event title on the player screen.

```
eventtitle --title "You receive your order" --secondary "WebShop"
```

🎁 **Give Item**

**Give 5 pie apple to the player.**

```
give {hytale_username} Food_Pie_Apple --quantity {quantity}
```

#### PLUGIN IN-GAME COMMANDS:​

* /tip4serv connect \<key> — Connect your server to Tip4Serv. *(Admin only)*
* /tip4serv deliver — Force pending deliveries instantly. *(Admin only)*
* /webstore — Show the webstore redirection link.
* /storehub — Open the in-game store hub with purchasable products.


# Palworld

Connect and monetize your Palworld server by linking your store to it. The Tip4Serv mod checks whether a player has donated, then automatically delivers their order (exp, items, etc.)

### Connect your Palworld Server

#### 1. Make sure UE4SS is installed

Tip4Serv requires **UE4SS** to work.&#x20;

If UE4SS is **already installed** on your Palworld server, skip to Step 3.

1. Download [UE4SS-Palworld.zip](https://github.com/Okaetsu/RE-UE4SS/releases/tag/experimental-palworld)
2. Unzip the downloaded file.
3. Open the extracted folder, then **copy the `ue4ss` folder and the `.dll` file** into your server’s `Pal\Binaries\Win64\` folder.

<figure><img src="https://2187496599-files.gitbook.io/~/files/v0/b/gitbook-x-prod.appspot.com/o/spaces%2FrJFlpzFF4M0XjvFfIMsk%2Fuploads%2Fqg79VLXGtt5esPfUhydM%2F0dc7a164658256a7d013bd8f151b4518.png?alt=media&amp;token=8bc2850e-6b66-460b-963f-e4bb1faa9972" alt=""><figcaption></figcaption></figure>

Reboot your server and wait for it to load.

***

#### 2. Connect Your Palworld Server to Tip4Serv

1. Navigate to the [**My Servers**](https://tip4serv.com/dashboard/my-servers) section of your Tip4Serv dashboard.
2. Click **Connect a Game Server**, and choose **Palworld**.
3. Enter your **server name,** then continue and **follow the instructions provided**.

***

### Configure Automatic Reward Delivery

Next, you’ll need to configure the console commands that the Tip4Serv mod should execute after each successful purchase.

This is done directly through the [**Command Editor**](https://docs.tip4serv.com/store-setup/server-commands) in your Tip4Serv dashboard, under each product.

You’ll find some examples below.

**📣 Broadcast**

Send a public thank-you message in the server chat.

```
say A big thank you to {palworld_username} for their donation of {total_paid} {currency}
```

🎁 **Give Item, Pal, XP**

You can retrieve the item IDs here: <https://www.palmods.gg/docs/authors/game-ids/items>

**Give 20 Wood to the player.**

```
give {player_id} Wood 20
```

**Give 1 Pal Sphere to the player.**

```
give {player_id} PalSphere 1
```

**Give 10 Pal Metal Ingot to the player.**

```
give {player_id} StealIngot 10
```

**Gives a male WoolFox (level 52) and places it directly in the player's Palbox.**

```
givepal {player_id} WoolFox 52 male
```

**Give 3000 XP to the player.**

```
givexp {player_id} 3000
```

### How it work?​

The Tip4Serv Palworld mod automatically displays a message in the in-game chat whenever a player joins the server, showing their unique **Palworld Player ID**.

<figure><img src="https://2187496599-files.gitbook.io/~/files/v0/b/gitbook-x-prod.appspot.com/o/spaces%2FrJFlpzFF4M0XjvFfIMsk%2Fuploads%2FRRfQpRlDfw1HpLPkHtkL%2F4fff1e87043e9f6dc8a0df45f6e533f4.png?alt=media&amp;token=60230072-0fad-4cd3-964e-9a816f5e2b63" alt=""><figcaption></figcaption></figure>

When making a purchase, the player simply enters this **Player ID** in the Tip4Serv checkout.

Once the payment is completed, the purchased product is **automatically delivered directly to the player in-game**.

This system also allows **console players to make purchases and receive in-game rewards**, without requiring a Steam account.

Players can type the command `!webstore` to see the link to the store and their player ID:

<figure><img src="https://2187496599-files.gitbook.io/~/files/v0/b/gitbook-x-prod.appspot.com/o/spaces%2FrJFlpzFF4M0XjvFfIMsk%2Fuploads%2FBe1fLmyOhBQb6HKzqk1g%2Fef4d8cd52a7f7243fdb6bb05e55164d6.png?alt=media&amp;token=c7b63197-49ae-40fd-a147-9c380bc85438" alt=""><figcaption></figcaption></figure>

#### Mod configuration

The `config.json` file allows you to customize the Tip4Serv Palworld mod, including messages, delays, your store URL, and other options.

```json
{
  "interval": 1,
  "command_delay": 1,
  "messageSuccess": "[Tip4Serv] You have just received your purchase, thank you!",
  "storeLink": "https://tip4serv.com",
  "storeMessage": "Link to the store: {storeLink}",
  "welcomeEnabled": true,
  "welcomeDelay": 5,
  "welcomeMessage": "===== [ TIP4SERV ] =====\nBuy server items: {storeLink}\nYour Player ID: {playerId}\n========================",
  "log_verbose": false
}
```

**Configuration options:**

* `interval` — How often the mod checks Tip4Serv for new purchases to deliver, in minutes.
* `command_delay` — Delay between the execution of delivery commands, in seconds.
* `messageSuccess` — Message displayed to the player after their purchase has been successfully delivered.
* `storeLink` — URL of your Tip4Serv store.
* `storeMessage` — Message displayed when a player uses the `!webstore` command. Use `{storeLink}` to automatically insert your store URL.
* `welcomeEnabled` — Enables or disables the welcome message when a player joins the server (`true` or `false`).
* `welcomeDelay` — Delay, in seconds, before displaying the welcome message after a player joins.
* `welcomeMessage` — Message displayed when a player joins the server. Use `{storeLink}` to insert your store URL and `{playerId}` to display the player's unique Palworld Player ID. Use `\n` to create a new line.
* `log_verbose` — Enables or disables detailed logging for debugging (`true` or `false`).


# DayZ

Connect and monetize your DayZ server by linking your store to it. The Tip4Serv integration checks whether a player has donated, then automatically delivers their order (currency, rank, items, etc.)

**Two integrations are supported on Tip4Serv:**\
the native Tip4Serv integration, which allows you to give items or send messages to your players, and the LBmaster integration, which provides full compatibility with LBmaster’s amazing mods.\
You are completely free to use both integrations simultaneously on the same server.

<table data-card-size="large" data-view="cards" data-full-width="false"><thead><tr><th align="center"></th><th data-hidden data-card-target data-type="content-ref"></th></tr></thead><tbody><tr><td align="center">Tip4Serv Plugin</td><td><a href="/games/dayz/tip4serv-plugin">Tip4Serv Plugin</a></td></tr><tr><td align="center">LBmaster</td><td><a href="/games/dayz/lbmaster">LBmaster</a></td></tr></tbody></table>


# Tip4Serv Plugin

This document provides a structured list of commands to sell cosmetics and to be able to add a player to the priority list of a DayZ Steam server.

{% hint style="info" %}
To sell content, **you must follow DayZ's TOS and obtain approval** from Bohemia Interactive: <https://www.bohemia.net/monetization>
{% endhint %}

## Setup Guide

### 1. Prerequisites

Before getting started, make sure your **DayZ server** has been added in the [**MY-SERVERS**](https://tip4serv.com/dashboard/my-servers) section of your Tip4Serv panel.

You have **two ways to install the Tip4Serv mod**:

* 🛠️ **Manual installation** → You can install the mod yourself, without using FTP (in-game items delivery only).
* ⚡ **FTP automatic setup (recommended)** → Use FTP to let Tip4Serv automatically install or update the mod, and manage your **priority list** in real time.

Tip4Serv uses a secure FTP connection to:

* Add or remove players from the **priority queue**.
* Automatically **install and update the Tip4Serv mod**, which is required to deliver in-game items to your players.

***

### 2. Enable the Tip4Serv Mod

Follow the steps in MY SERVERS to connect your Dayz server via FTP or manually install the mod.

Then you must enable the Tip4Serv mod and reboot your server:

#### On G-Portal:

1. Go to the **Mods** section.
2. Locate and select **clientMod** in `@Tip4Serv`.
3. Click **INSTALL**.

#### On Nitrado:

1. Go to **Settings > General**.
2. In the **Additional mods** field, add: `@Tip4Serv`.

> On a dedicated server, your mod configuration should look like: `"-mod=@Tip4Serv"`&#x20;

***

### 3. FTP Connection Errors

To prevent common FTP connection issues:

* Make sure your DayZ server is stopped before connecting via FTP.
* The FTP user's root path must begin inside the folder that contains the file `priority.txt`
* Ensure the FTP username has access **only to this folder and its contents**.

***

## All Available Commands

These are the commands you can use in the [**product editor**](/server-commands). They will be executed automatically on your DayZ server after a customer completes a purchase.

#### 🎁 Give an Item to a Player

**Command:**

```
/give {steam_id} [ITEM_NAME] [QUANTITY]
```

**Example:**

```
/give {steam_id} Jeans_Blue 2
```

{% hint style="info" %}
Looking for DayZ Item IDs? You’ll find them [all here](https://gist.github.com/agorushkin/135f75dc8c9fb4d49e264de5d888e4bb).
{% endhint %}

***

#### ⭐ Add or remove a Player from the Priority List (requires FTP connection)

**Commands:**

```
/priority add {steam_id}
```

```
/priority remove {steam_id}
```

Use this to add/remove queue priority for a specific player.

***

#### 💬 Send broadcast to all connected players

**Command:**

```
/say Thanks to {dayz_username} for the donation! Support us at myshop.tip4serv.com
```

***

#### 💬 Edit the Thank-You Message

To customize the thank-you message a player receives when their order is delivered on the server:

1. Go to the following folder on your server:

   ```
   <your config folder>/Tip4Serv
   ```
2. Open the file:

   ```
   config.json
   ```
3. Edit the thank-you message as desired and save the file.
4. Reboot your DayZ server.


# LBmaster

Connect and monetize your DayZ server with the amazing LBmaster mods. The Tip4Serv plugin checks whether a player has donated, then automatically delivers their order (groups, prefix, skins, etc.)

{% hint style="info" %}
To sell content, **you must follow DayZ's TOS and obtain approval** from Bohemia Interactive: <https://www.bohemia.net/monetization>
{% endhint %}

### LBmaster integration

1. Setup [LBmaster mods](https://lbmaster.de/) you wish to integrate on your server.
2. Navigate to the [My Servers](https://tip4serv.com/dashboard/my-servers) section on Tip4Serv.
3. Click connect a **Game Server**, and choose **DayZ** with the **LBmaster integration**.
4. Enter your **server name**, then continue and follow the instruction provided.

✅ Once this is done, everything is configured from the **Tip4Serv Product Editor** using commands.

***

### Advanced Groups

Advanced Groups are used to give players **chat perks** like VIP prefixes and colored tags.

<div><figure><img src="https://2187496599-files.gitbook.io/~/files/v0/b/gitbook-x-prod.appspot.com/o/spaces%2FrJFlpzFF4M0XjvFfIMsk%2Fuploads%2Fj8uyGuHtKh7EdxxbzUnb%2Fvipttag1.png?alt=media&amp;token=e910da29-4e81-41f6-abef-f8829588467f" alt=""><figcaption></figcaption></figure> <figure><img src="https://2187496599-files.gitbook.io/~/files/v0/b/gitbook-x-prod.appspot.com/o/spaces%2FrJFlpzFF4M0XjvFfIMsk%2Fuploads%2FmC6xskCWy6nTgrhs1EOJ%2Fvipttag2.png?alt=media&amp;token=a47e58dc-b63e-4984-bfb3-8a5e63f383d6" alt=""><figcaption></figcaption></figure></div>

#### 💬 Chat Prefix (VIP / Donator / Staff)

A **chat prefix** is a tag shown before the player name in chat.\
Example: `[VIP] PlayerName`

**What players get**

* A visible status in chat
* Instant recognition from the community
* Great perk for VIP and subscriptions

**How to sell it with Tip4Serv**

Create a product like **VIP Chat Prefix** **on Tip4Serv** and set:

✅ Command on purchase (example):

```txt
/chatprefix set {steam_id} "[VIP] " true
```

✅ Command on subscription end (example):

```txt
/chatprefix remove {steam_id} "[VIP] "
```

**Useful tips**

* If your prefix contains spaces, add quotes on it. (e.g: "MVP +" or "VIP ")
* Use this for **VIP ranks**, **donator tags**, **staff tags**, etc.
* If you allow upgrades (VIP → VIP+), use the command bellow to **remove the old prefixes**

***

#### 🧹 Remove All Prefixes (Reset a Player)

This is useful if:

* A player has multiple prefixes by mistake
* You want to fully reset their chat perks

Example:

```txt
/chatprefix removeall {steam_id}
```

***

### Group Chat Tag Color

<div><figure><img src="https://2187496599-files.gitbook.io/~/files/v0/b/gitbook-x-prod.appspot.com/o/spaces%2FrJFlpzFF4M0XjvFfIMsk%2Fuploads%2Fa0NEsCq0HWChdX1nU8Li%2Fcoloredgrouptag1.png?alt=media&amp;token=6723113e-e7bb-43ad-90a6-5fae4614e357" alt=""><figcaption></figcaption></figure> <figure><img src="https://2187496599-files.gitbook.io/~/files/v0/b/gitbook-x-prod.appspot.com/o/spaces%2FrJFlpzFF4M0XjvFfIMsk%2Fuploads%2Fg9e1rHRlVkaPISGxA1wR%2Fcoloredgrouptag2.png?alt=media&amp;token=44f32849-d93d-4a18-b844-3293730e4f4b" alt=""><figcaption></figcaption></figure></div>

This feature lets a player **change the color of their group tag** (VIP tag color, Donator tag color, etc.).

#### What players get

* A custom color for their tag
* A “premium customization” feel
* Perfect for **VIP+** perks

#### How to sell it

You have two options:

**Option 1: One-time color change (recommended)**

Sell a product like **“Change VIP Tag Color (1 use)”**

Example:

```txt
/chattagcolor add {steam_id} 1
```

✅ The player can change their color once, then the permission is removed automatically.

**Option 2: Unlimited color changes**

Sell a product like **“Unlimited Tag Color Changes”** (VIP+ perk)

Example:

```txt
/chattagcolor add {steam_id} -1
```

#### Remove the permission

Only needed if you used unlimited access and want to take it back.

Example:

```txt
/chattagcolor remove {steam_id}
```

***

### Killfeed Color

Killfeed customization lets you change how the player appears in kill notifications.

<div><figure><img src="https://2187496599-files.gitbook.io/~/files/v0/b/gitbook-x-prod.appspot.com/o/spaces%2FrJFlpzFF4M0XjvFfIMsk%2Fuploads%2FITxWl8ZWxoyUmMNCau94%2Fkillfeedcolor1_resized.png?alt=media&amp;token=8a92251d-2e4b-4d45-bd5b-781150feacbd" alt=""><figcaption></figcaption></figure> <figure><img src="https://2187496599-files.gitbook.io/~/files/v0/b/gitbook-x-prod.appspot.com/o/spaces%2FrJFlpzFF4M0XjvFfIMsk%2Fuploads%2FB9bKICLW0Gv7nYWORDvG%2Fkillfeedcolor2_resized.png?alt=media&amp;token=f0186aa7-f050-4627-9ae9-e6d262f365cf" alt=""><figcaption></figcaption></figure></div>

Players can get a **personal killfeed color** (for example VIP kills appear in gold, Donators in blue, etc.).

**What players get**

* A unique identity in PvP events
* A high-value cosmetic perk (no gameplay advantage)

**How to sell it**

Create a product like **“Custom Killfeed Color” on Tip4Serv**

Example:

```txt
/killfeedcolor set {steam_id} {r} {g} {b}
```

Where `{r} {g} {b}` are color values (0–255).\
Example:

```txt
/killfeedcolor set {steam_id} 255 215 0
```

#### Remove custom color (when perk expires)

Example:

```txt
/killfeedcolor remove {steam_id}
```

***

### Skin System

The Skin System lets you give access to **skin packs** or **cosmetic collections**.

<div><figure><img src="https://2187496599-files.gitbook.io/~/files/v0/b/gitbook-x-prod.appspot.com/o/spaces%2FrJFlpzFF4M0XjvFfIMsk%2Fuploads%2FP3cn114NvyYTWsttV6YL%2Fskinsystem_resized.png?alt=media&amp;token=a6f82288-635a-4941-820e-587aee0b3962" alt=""><figcaption></figcaption></figure> <figure><img src="https://2187496599-files.gitbook.io/~/files/v0/b/gitbook-x-prod.appspot.com/o/spaces%2FrJFlpzFF4M0XjvFfIMsk%2Fuploads%2FJaCsbyQXOQteiyhjQZmW%2Fskinsystem2_resized.png?alt=media&amp;token=aa145f04-2c36-4010-8402-84f47eda121c" alt=""><figcaption></figcaption></figure></div>

#### 🎭 Give Skin Access to a Player

This is the best way to sell:

* Donator skins
* VIP cosmetic packs
* Premium outfits / weapon skins

**What players get**

* Access to a cosmetic group (example: “Donator”)
* Skins become available in-game through LBmaster systems

**How to sell it**

Create a product like **“Donator Skins Access” on Tip4Serv**

Example:

```txt
/skinpermissions add player {steam_id} Donator
```

#### Remove skin access (subscription end / refund)

Example:

```txt
/skinpermissions remove player {steam_id} Donator
```

***

#### 👥 Give Skin Access to a Group (VIP Rank)

If your server uses groups/ranks, you can give skin access to an entire group.

Example:

```txt
/skinpermissions add group {group_shortname} Donator
```

Remove it later:

```txt
/skinpermissions remove group {group_shortname} Donator
```

***

### Recommended Product Ideas (Best Sellers)

✅ **VIP Chat Prefix** (subscription)\
✅ **VIP+ Custom Tag Color** (1 use or unlimited)\
✅ **Custom Killfeed Color** (one-time cosmetic)\
✅ **Donator Skin Pack Access** (subscription or lifetime)\
✅ **Premium Group Skins** (bundle per rank)


# TB Mods

Connect and monetize your DayZ server with the amazing mods from TB Mods. The Tip4Serv plugin checks whether a player has donated, then automatically delivers their order.

{% hint style="danger" %}
To sell content, **you must follow DayZ's TOS and obtain approval** from Bohemia Interactive: <https://www.bohemia.net/monetization>
{% endhint %}

### TB Mods integration

1. Setup [TB mods](https://www.themodbase.com/?c_ref_code=5ab26afd-510a-4fb4-93de-1979a83b92f9) on your server.
2. Navigate to the [My Servers](https://tip4serv.com/dashboard/my-servers) section on Tip4Serv.
3. Click connect a **Game Server**, and choose **DayZ** with the **TB mods integration**.
4. Enter your **server name**, then continue and follow the instruction provided.

✅ Once this is done, everything is configured from the **Tip4Serv Product Editor** using commands.

***

### The command system

The command system is really simple to understand and use; there is only 1 command that allows you to set everything up. Each mod from TB mods has a premium system; you can give temporary premium access to any player with this simple command:

```
/premium add {steam_id} MOD_NAME NUMBER_OF_DAYS
```

ou can find the list of mods you can grant premium access to here:

* Global (Add to all mods Premium Status)
* CarDealer
* DailyReward
* DeathInsurance
* DynamicTrader
* Revive
* SecondHand

The number of days you can give premium access can be set between 1 and 999.

{% hint style="warning" %}
We also recommend setting up refund commands; in case a player ends their subscription or manages to get a refund, you can execute a "remove premium" command
{% endhint %}

```
/premium remove {steam_id} MOD_NAME
```

***

### Recommended Product Ideas (Best Sellers)

✅ Give players option to buy special items at Dynamic or Car Dealer, like special outfits or special variations of cars and items.\
✅ Give player the opportunity to get  other item variations as rewaird in Daily Reward Mod.\
✅ Give player the chance to get more options on insurance types at Death Insurance Mod.\
✅ Give player different looking stalls as normal players.\
✅ Give players the chance to select the hospital position instead of a random one.


# Rust & 7 Days to Die

This plugin connects your Tip4serv.com store to your Rust or 7 Days To Die Oxide server. It checks if a player has made a donation on your store and delivers the order (group, items, permissions...)

### Plugin Installation

1. Add a **Rust** or **7 Days To Die** server in [MY SERVERS](https://tip4serv.com/dashboard/my-servers)
2. Upload `tip4serv.cs` to your server's `oxide/plugins/` directory
3. Run this command on your server console:

   ```
   oxide.reload Tip4serv
   ```
4. Edit the config file `tip4serv.json` and set your Tip4Serv API key
5. Reload the plugin again:

   ```
   oxide.reload Tip4serv
   ```

✅ **Expected console message:**\
`Server has been successfully connected`

***

### RCON Setup (Rust only)

1. Add a **Rust** server in [MY SERVERS](https://tip4serv.com/dashboard/my-servers)
2. Click **Connect with RCON**
3. Fill in:
   * Server IP
   * RCON Port
   * RCON Password

✅ **Expected console message:**\
`Server has been successfully connected`

***

### Setting Up Commands

Before adding commands to your products, remember:\
**Commands are executed in the server console, not in-game.**

> Add your commands directly into each product as in [this tutorial](/server-commands).

***

### 💬 Broadcast Donation Message

```bash
say Thank you {rust_username} for your donation of {total_paid} {currency}
```

**With colors:**

```bash
say {rust_username} just purchased <color=red>VIP</color> from <color=orange>tip4serv.com</color>
```

***

### 👥 Group and Permissions

#### Add player to a group:

```bash
oxide.usergroup add {steam_id} group-name
```

#### Remove player from a group:

```bash
oxide.usergroup remove {steam_id} group-name
```

#### Grant a permission:

```bash
oxide.grant user {steam_id} permission-name
```

#### Revoke a permission:

```bash
oxide.revoke user {steam_id} permission-name
```

***

### 🎒 Give Inventory Item (Rust only)

#### By Steam ID

✅ Must enable **“Player must be online”** in the commands editor settings.

```bash
inventory.giveto {steam_id} item-short-name quantity
```

**Example:**

```bash
inventory.giveto {steam_id} scientist 5
```

🔗 [Rust item list](https://www.corrosionhour.com/rust-item-list/)

***

#### By Username

✅ Must enable **“Player must be online”**

```bash
inventory.giveto {rust_username} item-short-name quantity
```

***

### 🎁 Give Items/Kits with *Give* Plugin

Required plugin: [Give (uMod)](https://umod.org/plugins/give)

#### Give item:

```bash
giveto {steam_id} item-short-name quantity
```

#### Give kit:

```bash
givekitto {steam_id} kit-name
```

***

### 💸 Give Money

Required plugin: [Economics](https://umod.org/plugins/economics)

```bash
deposit {steam_id} amount
```

***

### 🏆 Give Points (Rust only)

Required plugin: [Server Rewards](https://umod.org/plugins/server-rewards)

```bash
sr add {rust_username} amount
```

***

### ➗ Quantity Multiplier

Let customers choose quantities and calculate totals dynamically.

Activate **“Allow quantity choice”** in product settings.

**Example for selling $200 bundles:**

```bash
deposit {steam_id} {quantity*200}
```

If customer buys 4x, the result is:

```bash
deposit 76561198181797231 800
```


# Rust Console Edition

Integration and delivery is handled by Discord bots, you can choose between our partners Veretech and Kaos


# Veretech Discord Bot

This document provides a structured list of commands for sellers using the Veretech Discord Bot to sell items, kits, and other in-game assets.

The commands below can be configured in Tip4Serv and will be executed by the **Veretech bot** on your Rust server to automatically deliver purchases to your players.

### How to setup Veretech for Tip4Serv?

{% embed url="<https://docs.veretech.systems/books/veretech-rce-bot/chapter/tip4serv-integrations>" %}

### Connect Your Rust Server (Console Edition)

Follow these steps to connect your Rust Console Edition server to Tip4Serv using the Veretech bot:

#### 1. Add Your Server to Tip4Serv

* Go to the [**My Servers**](https://tip4serv.com/dashboard/my-servers) section in your Tip4Serv dashboard
* Click on **Connect a Game Server**
* Enter your server name
* Select **Rust** game
* Select the **Veretech** integration type

<figure><img src="https://2187496599-files.gitbook.io/~/files/v0/b/gitbook-x-prod.appspot.com/o/spaces%2FrJFlpzFF4M0XjvFfIMsk%2Fuploads%2FN686XoS5JAhKD6OnCNu4%2F143d57117fa20346082a9e7acc8ec619.png?alt=media&amp;token=a7221be7-5af2-474a-9f1c-84cf7df52e7a" alt=""><figcaption><p>Add your Rust Console Edition server</p></figcaption></figure>

<figure><img src="https://2187496599-files.gitbook.io/~/files/v0/b/gitbook-x-prod.appspot.com/o/spaces%2FrJFlpzFF4M0XjvFfIMsk%2Fuploads%2FoeTAIb6o0IBgWFLHe5dB%2F597ae1a8e4d80831a84e3dbca0c50c92.png?alt=media&amp;token=f70ef5ff-b80b-4d9f-b954-048619ead991" alt=""><figcaption><p>Veretech connection</p></figcaption></figure>

#### 2. Invite the Veretech Bot

* [Invite the Veretech bot](https://discord.com/oauth2/authorize?client_id=1183388897384874094\&permissions=402653184\&scope=bot%20applications.commands) to your Discord server
* Refer to the [Veretech documentation](https://docs.veretech.systems/books/veretech-rce-bot/page/adding-your-gameserver) for detailed setup instructions.

#### 3. Link Your Server to Tip4Serv Using a Command

In your Discord server:

1. Type `/tip key`
2. In the `gameserver` field, **select your Rust server** from the list
3. In the `apikey` field, **paste the API key** you received in the [**My Servers** ](https://tip4serv.com/dashboard/my-servers)section of Tip4Serv
4. Confirm to complete the connection

✅ Once this is done, your server is successfully linked and ready to deliver purchases!

### **How to give Items, VIP and Discord Currency after purchase?**

To ensure your players receive their orders after a purchase, you must configure the delivery commands for each product in the [**product editor**](/server-commands)**.**

**Give an Item to the player:**

```
inventory.giveto "{PlayerName}" item-name quantity
```

```
Example you can use on Tip4Serv command editor:
inventory.giveto "{PlayerName}" rifle.ak {quantity}
```

**Give or remove VIP from a player:**

```
VIPID "{PlayerName}"
```

```
RemoveVIP "{PlayerName}"
```

**Give a kit to the player:**

```
kit givetoplayer "name-of-kit" "{PlayerName}"
```

<pre><code><strong>Example you can use on Tip4Serv command editor:
</strong>kit givetoplayer "vip" "{PlayerName}"
</code></pre>

**Give currency to the player:**

<pre><code><strong>Example you can use on Tip4Serv command editor:
</strong>vt.give 10000 bank
</code></pre>

```
Example with the quantity multiplier:
vt.give {quantity*10000} bank
```

### 🛠️ Delivery Issues

If a purchase is not delivered, it’s usually due to missing permissions or a misconfigured server connection. Here's how to check and fix the problem:

#### 🔍 Common Causes

* **Veretech no longer has permission** to connect to your gameserver (e.g., GPORTAL permissions were removed).
* The server connection has been **disabled**.

***

#### ✅ Quick Fix Steps

1. On Discord, type:

   ```
   /gs enable yes
   ```
2. Wait **5 minutes**
3. Run:

   ```
   /gs test
   ```

   * If it shows **disabled** again:
     * Go to your GPORTAL account
     * **Remove and re-add Tip4Serv/Veretech permissions**
     * This often resolves bugs with the connection

***

#### ⚠️ If Payment Status is "PENDING"

Delivery will not occur while the order is still marked as *pending*. To force reconnection:

1. Run:

   ```
   /gs enable no
   ```
2. Then:

   ```
   /gs enable yes
   ```

***

#### 🛡️ Prevention Tips

To ensure orders are delivered smoothly:

* ✅ Make sure the player is linked by running the `/link` command on your Discord server
* ✅ The player must use `/claim` **without an order ID** to automatically detect their recent purchase
* ✅ The purchase must be made using the **same Discord account** the player uses to run `/claim`
* ✅ Ensure the payment status is **not marked as pending**


# KAOS Discord Bot

This document provides a structured list of commands for sellers using the KAOS system on Tip4Serv to sell items, kits, and other in-game assets.

{% embed url="<https://bot.ka0s.uk/docs/log-parser/>" %}

## How to Connect Kaos with Tip4Serv?

1. Add a Rust Console Edition server in [My Servers](https://tip4serv.com/dashboard/my-servers) by clicking: **Connect a Game Server** and connect your Discord server by following the instructions.
2. Create a new Discord channel for deliveries and logs (for example: `kaos-parser`).
3. Make sure the [Tip4Serv bot has permission to give a role](https://docs.tip4serv.com/discord-setup/discord-bot#why-are-the-messages-not-sent-in-the-chanel) to a member.
4. Execute this KAOS BOT command: `/admin-channels`
5. Click "**Set Channel"** button.
6. Select the **"Transactions"** channel when asked.
7. Provide the **channel name or channel id** when asked, then click **submit**.
8. To finish, execute this KAOS BOT command: `/set config_name:parser_use option:on server:All Servers`

Tip4Serv transaction logs will appear in this channel.

{% hint style="info" %}
*The above procedure is only required once. Once the transactions channel has been set, it does not need setting again.*
{% endhint %}

### **How to give Items, Kits, and Points?**

You can configure any of the commands below in the [product command editor](/server-commands). Simply add your Discord server to the product and enter the desired command in the **"CMD"** field. It will then be executed automatically after each purchase.

The **KAOSBOT Log Parser Generator** helps you generate commands for **Tip4Serv** more easily:

{% embed url="<https://bot.ka0s.uk/parser-generator/>" %}

### Here are some examples:

#### Give an item

Replace `rifle.ak` with your desired item name.

```
[KAOS][ADD][<@{discord_id}>][1]=[ITEM][rifle.ak][{quantity}]
```

#### Give a kit

Replace `elitekit5` with your kit name.

```
[KAOS][ADD][<@{discord_id}>][1]=[KIT][elitekit5][{quantity}]
```

#### Give points

Replace `5000` with the number of points to give per purchased quantity.

```
[KAOS][ADD][<@{discord_id}>][1]=[POINTS][{quantity*5000}]
```

#### ZORPLIST

**Add to ZORPLIST**

```
[KAOS][ADD][<@{discord_id}>][1]=[ZORPLIST]
```

**Remove from ZORPLIST**

```
[KAOS][DEL][<@{discord_id}>][1]=[ZORPLIST]
```

#### KITLIST

Replace `elitekit` with your kit name.

**Add to KITLIST**

```
[KAOS][ADD][<@{discord_id}>][1]=[KITLIST][elitekit]
```

**Remove from KITLIST**

```
[KAOS][DEL][<@{discord_id}>][1]=[KITLIST][elitekit]
```

#### RIDERSLIST

**Add to RIDERSLIST**

```
[KAOS][ADD][<@{discord_id}>][1]=[RIDER]
```

**Remove from RIDERSLIST**

```
[KAOS][DEL][<@{discord_id}>][1]=[RIDER]
```

### Wipe Claims

#### Wipe KITLIST Claims

Replace `elitekit` with your kit name.

```
[KAOS][ADD][<@{discord_id}>][1]=[CLAIMWIPE][elitekit]
```

### VIP

#### Add VIP

```
[KAOS][ADD][<@{discord_id}>][1]=[VIP]
```

#### Remove VIP

```
[KAOS][DEL][<@{discord_id}>][1]=[VIP]
```

### **Supported Arguments**

**\[SERVER]**

* **Specific Server:** `[1]`
* **All Servers:** `[ALL]`
* **Multiple Servers:** `[1,2,3,6]`

**\[KIT\_NAME]**

* Example: `[elitekit]`, `[elitekit5]`
* Arrays also work: `[elitekit, elitekit2, elitekit7]`

**\[ALL]**

* Use `[ALL]` where applicable to target everything.


# Intellectual Property Policy

Tip4Serv is committed to protecting intellectual property (IP) rights and ensuring that our platform is not used to infringe on the rights of others. This policy outlines what intellectual property is and how we expect our sellers to comply with applicable laws.

#### What is Intellectual Property (IP)?

Intellectual property refers to creations of the mind such as:

* **Copyrighted content** (e.g., code, plugins, music, videos, text)
* **Trademarks** (e.g., names, logos, branding)
* **Patents** and **design rights**
* Any other creative work that is protected by law

#### Using IP on Tip4Serv

As a seller on Tip4Serv, you must ensure that:

* You either own the content you are selling or have explicit permission from the rightful owner.
* You do not list products or services that use content owned by someone else (including game publishers, mod developers, etc.) without proper authorization.
* You do not use brand names, logos, or assets that are trademarked unless permitted.

Examples of violations:

* Selling plugins or content copied from another developer
* Using logos or branding from games (e.g., Minecraft, GTA) without permission
* Distributing or reselling copyrighted music, videos, or images

#### Reporting Infringement

If you are a rights holder and believe that content on Tip4Serv infringes your intellectual property, please contact us at **<contact@tip4serv.com>** with details. We will promptly investigate and, if necessary, remove the content or suspend the seller.

#### Consequences of IP Violations

Tip4Serv may take action against accounts that violate IP rights, including:

* Removal of infringing content
* Temporary or permanent account suspension
* Legal reporting if required by law

#### Acknowledgment

By registering and selling on Tip4Serv, you agree to comply with this Intellectual Property Policy. You are responsible for ensuring all your listings are lawful and respect the rights of others.


# Prohibited Business

Seller Compliance Guide

Before activating Stripe or PayPal, you must ensure that your store complies with [Tip4Serv’s Terms of Use](https://tip4serv.com/terms-of-use) and the Prohibited and Restricted Business policies of [Stripe](https://stripe.com/legal/restricted-businesses) and [PayPal](https://www.paypal.com/us/legalhub/paypal/acceptableuse-full?country.x=US\&locale.x=en_US).

Non-compliance may result in **payment restrictions, suspension, or termination of your store.**

{% hint style="info" %}
Tip4Serv will not be responsible if your Stripe or Paypal account is blocked due to non-compliance.
{% endhint %}

### Prohibited & Authorized sales

{% tabs %}
{% tab title="Prohibited sales" %}

* *<mark style="color:red;">**Donations and empty product**</mark>*\
  *<mark style="color:red;">Always include at least one Discord role in your product offering, and opt for value-driven names like VIP Supporter instead of terms like donation.</mark>*
* <mark style="color:red;">**Gambling, Lottery tickets, Casino chips**</mark>\
  *<mark style="color:red;">Loot boxes appear to be tolerated for now, but the product description must clearly list all possible items.</mark>*
* <mark style="color:red;">**Virtual currencies that can be exchanged for real money**</mark>\
  *<mark style="color:red;">Do not use any images of real currency (such as banknotes or coins) to represent your virtual money. Do</mark> <mark style="color:red;"></mark><mark style="color:red;">**not**</mark> <mark style="color:red;"></mark><mark style="color:red;">use terms like money, coin, currency, or crypto, which may imply financial value or convertibility. Instead, use</mark> <mark style="color:red;"></mark><mark style="color:red;">**fictional names**</mark> <mark style="color:red;"></mark><mark style="color:red;">such as FizzyPoints, SnowStars, Gems, Crystals, Energy, Units to describe your digital rewards.</mark>*
* *<mark style="color:red;">**Native In-Game Item/Entity Images**</mark>*\
  *<mark style="color:red;">When showcasing native items or entities from games (e.g., Rust weapons, ARK dinosaurs, GTA vehicles), use AI-generated or original artwork, or a direct screenshot from the in-game inventory.</mark>*
* <mark style="color:red;">**Registered trademarks**</mark> <mark style="color:red;"></mark><mark style="color:red;">(e.g., Nintendo, Pokemon, BMW cars, GUCCI clothing, etc.)</mark>\
  *<mark style="color:red;">The use of logos, branded products, branded name or any representation of registered trademarks is prohibited.</mark>*
* <mark style="color:red;">**Drugs, sexual content, and illicit products**</mark>\
  *<mark style="color:red;">Any imagery depicting drugs, real weapons, sexually explicit content, or illegal products is strictly forbidden.</mark>*
  {% endtab %}

{% tab title="Authorized sales" %}

* <mark style="color:green;">**Unbranded assets**</mark> <mark style="color:green;"></mark><mark style="color:green;">(e.g., vehicles, aircraft, dinosaurs, character skins, clothing, etc.)</mark>
* <mark style="color:green;">**Other virtual items**</mark> <mark style="color:green;"></mark><mark style="color:green;">(e.g., inventory objects, cosmetic skins, weapons (should not look like a real weapon), accessories, etc.)</mark>
* <mark style="color:green;">**Ranks and advantages**</mark> <mark style="color:green;"></mark><mark style="color:green;">(e.g., priority queue access, special permissions, etc.)</mark>
* <mark style="color:green;">**Kits**</mark> <mark style="color:green;"></mark><mark style="color:green;">(e.g., a bundle containing multiple virtual items)</mark>
* <mark style="color:green;">**Virtual currency**</mark> *<mark style="color:green;">(only use fictional image and name like Gems, Crystals, FizzyPoints...)</mark>*
* <mark style="color:green;">**Constructions**</mark> <mark style="color:green;"></mark><mark style="color:green;">(e.g., a Rust monument, maps, bases, etc.)</mark>
  {% endtab %}
  {% endtabs %}

### Product Image Guidelines

Product images must not infringe intellectual property rights or depict prohibited content.

Do not use:

* Copyrighted or trademarked brand images.
* Real-world brands (e.g., BMW, Gucci, Mercedes).
* Images of drugs, weapons, or illegal products.
* Photos of real money (banknotes or coins).

Even virtual representations of illegal or regulated items may trigger compliance reviews.

Only use original, licensed, or royalty-free visuals.

{% hint style="info" %}
**A good practice is to use AI-generated images exclusively.**
{% endhint %}

### Prohibited or Sensitive Keywords

Sellers must avoid using misleading, regulated, or trademarked terms in product titles and descriptions.

For example:

* Do not advertise virtual currency using real-world currency values (e.g., “1000€” or “€500 package”).
* Do not use registered brand names or trademarks without authorization (e.g., “Mercedes”, “PlayStation”, etc.).
* Do not imply affiliation with third-party companies unless you are officially authorized.

Instead, use generic or fictional names for your digital products. For example, if your community is called “Rusty”, you may name your virtual currency “RustyCoins”.

Tip4Serv may use automated monitoring tools and manual reviews to ensure compliance with our Acceptable Use Policy and payment provider requirements.

Non-compliant products may be removed and the seller account may be restricted or suspended.

### Best Practice for Selling Virtual Currency

Virtual items or digital rewards offered on Tip4Serv must not be presented as real money, financial assets, investment products, or transferable monetary instruments.

Sellers must not:

* Represent virtual items as having real-world monetary value.
* Suggest that virtual items are redeemable, refundable, exchangeable, or convertible into real currency.
* Use imagery of real-world banknotes, coins, or financial instruments.
* Imply that virtual items function as cryptocurrency, securities, or financial investments.

Virtual rewards must operate strictly within a closed-loop gaming environment and must be used solely for entertainment purposes.

Sellers are encouraged to use clearly fictional, non-monetary naming conventions (e.g., Gems, Crystals, Energy, Stars, Points, Units, etc.) to avoid confusion with real-world currency.

Each product description must clearly state: “Non-redeemable digital rewards used exclusively within our gaming environment for entertainment purposes. These items have no real-world monetary value.”

### Donations and Empty Products Policy

Tip4Serv is a digital goods platform and not a fundraising or money-transfer service.

All products listed on a Tip4Serv store must correspond to a clearly defined digital product, service, or in-game benefit.

Pure monetary transfers, empty products, symbolic listings, or “donation-only” payments without a clearly described digital benefit are strictly prohibited.

Sellers must not create products with no defined content, vague descriptions, or no associated virtual benefit.

Each listing must clearly describe the digital item, access level, role, or in-game advantage provided to the buyer.

Stores that attempt to use Tip4Serv for personal fundraising, cash transfers, or undefined payments may be restricted or suspended.


# How do webhooks work?

Designed for developers, custom webhooks allow your application or web server to be notified in real time when an event occurs (payment, subscription, expiration, etc.).

Instead of constantly polling the API, you automatically receive an **HTTP POST** request containing a **JSON payload** describing the event.

With webhooks, you can for example:

* Automatically grant items/roles after a successful payment
* Remove access when a subscription expires
* Send a message on a Discord server
* Trigger your own custom business logic

***

### How it works

1. You set up an **HTTP endpoint** (URL) in your application.
2. When an event occurs, our system sends a **payload** to this URL.
3. Your server must respond with a **2xx HTTP code** to confirm receipt.
4. You process the data as needed (database, integrations, logs, etc.).

***

### Example events

* `payment.success` → A payment was successfully completed
* `payment.failed` → A payment attempt failed
* `payment.refund` → A payment was refunded
* `subscription.created` → A new subscription was created
* `subscription.renewed` → A subscription was renewed
* `subscription.expired` → A subscription expired


# Configure a Webhook

To start receiving real-time notifications, you need to configure a webhook in your dashboard.

### Steps to create a webhook

1. Go to the [Webhook dashboard](https://tip4serv.com/dashboard/webhooks).
2. Click on **Create Webhook**.
3. Fill in the following fields:
   * **Name** → For your reference only (helps you identify the webhook in your dashboard).
   * **Webhook URL** → The public endpoint on your server that will receive webhook payloads (must accept `POST` requests).
   * **Events** → Select the events you want to be notified about (e.g., `payment.success`, `subscription.expired`).
4. Save your webhook.

***

### Multiple webhooks

* You can create **multiple webhooks** if needed.
* Each webhook can listen to **different events** and point to **different URLs**.
* This allows you to separate integrations (for example: one webhook for Discord, another one for your internal database).

***

### Good practices

* Use a **unique URL** for each integration (don’t reuse the same webhook for unrelated services).
* Make sure your server always responds with an **HTTP 200** code to acknowledge receipt.
* Log received payloads for debugging purposes.

***

👉 Once configured, your webhook will immediately start receiving events when they occur.


# Handle Webhook

This guide shows how to receive, validate, and process webhook events using your prefered language

### Requirements

* An HTTPS endpoint that accepts `POST`
* PHP, Python, NodeJS, Java...

***

## Secure & Handle Webhook

When your server receives a webhook, you should **verify the signature** before processing it.\
This ensures the request really comes from the platform and not from someone else.

***

### Example payload (short)

Here is an example of the data you will receive, it contains all the necessary data related to the payment: user identifiers, basket contents, price, payment ID...

```json
{
  "mode": "live",
  "event": "payment.success",
  "created_at": "2025-09-04T13:45:44-04:00",
  "request_id": "51b97ba5891ec220e8b64385a00c3826",
  "webhook_id": "458",
  "store_id": "7541",
  "data": {
    "id": 71134,
    "transaction_id": "68B9D0471D02A",
    "gateway": "paypal",
    "amount": { "total_paid": 12, "currency": "EUR" },
    "user": { "email": "user@example.com", "discord_id": "123", "username": "Player" },
    "basket": [{ "id": 183, "name": "VIP Rank", "price": 10, "quantity": 1 }],
    "actions": { "...": "..." }
  }
}
```

***

### Create an endpoint

Create a file in your chosen language and start a server that listens for **POST requests** using the following examples:

{% tabs %}
{% tab title="PHP" %}
{% code title="endpoint.php" %}

```php
<?php
// Secret key (Tip4serv Dashboard -> Webhook -> Custom Webhook)
$webhookSecretBase64 = "y2x3...==";

// 1. Read the raw request body (JSON string)
$requestBody = file_get_contents('php://input');

// 2. Read headers sent by the platform
$timestampHeader = $_SERVER['HTTP_X_PAY_TIMESTAMP'] ?? '';
$signatureHeader = $_SERVER['HTTP_X_PAY_SIGNATURE'] ?? '';

// 3. Reject if the webhook is too old (max 5 minutes)
if (abs(time() - intval($timestampHeader)) > 300) {
  http_response_code(401);
  exit("invalid timestamp");
}

// 4. Recalculate the expected signature
$baseString = $timestampHeader . "." . $requestBody;
$secretBinary = base64_decode($webhookSecretBase64);
$expectedSignature = hash_hmac('sha256', $baseString, $secretBinary);

// 5. Compare signatures
if (!hash_equals($expectedSignature, $signatureHeader)) {
  http_response_code(401);
  exit("invalid signature");
}

// 6. If we’re here, the webhook is authentic
$event = json_decode($requestBody, true);

// Example: handle payment update
if ($event['event'] === 'payment.success') {
  $paymentId = $event['data']['id'];
  $discord_id = $event['data']['user']['discord_id'];
  // TODO: update your database here
}

http_response_code(200);
```

{% endcode %}

### How it works

* **Read the body** → the raw JSON payload sent by the platform.
* **Get headers** → `X-Pay-Timestamp` and `X-Pay-Signature` (provided in every request).
* **Check freshness** → reject if older than 5 minutes.
* **Recalculate signature** → `HMAC-SHA256(timestamp.body, secret)`.
* **Compare signatures** → use `hash_equals` to prevent timing attacks.
* **Process event** → decode JSON and handle it (e.g., update DB).
  {% endtab %}

{% tab title="Node.js + Express" %}
{% code title="endpoint.js" %}

```javascript
import express from "express";
import crypto from "crypto";

const app = express();
const PORT = 3000;

// Secret key (Tip4serv Dashboard -> Webhook -> Custom Webhook)
const WEBHOOK_SECRET = "y2x3...==";

// Middleware to capture raw body (important for signature verification)
app.use(express.raw({ type: "application/json" }));

app.post("/webhook", (req, res) => {
  const body = req.body.toString("utf8");
  const timestamp = req.header("X-Pay-Timestamp") || "";
  const signature = req.header("X-Pay-Signature") || "";

  // 1) Check freshness (max 5 minutes)
  if (Math.abs(Date.now() / 1000 - parseInt(timestamp)) > 300) {
    return res.status(401).send("Invalid timestamp");
  }

  // 2) Recalculate expected signature
  const baseString = `${timestamp}.${body}`;
  const secret = Buffer.from(WEBHOOK_SECRET, "base64");
  const expected = crypto
    .createHmac("sha256", secret)
    .update(baseString)
    .digest("hex");

  // 3) Verify signature
  if (!crypto.timingSafeEqual(Buffer.from(expected), Buffer.from(signature))) {
    return res.status(401).send("Invalid signature");
  }

  // 4) Parse JSON
  const event = JSON.parse(body);

  // Example: handle payment status update
  if (event.event === "payment.success") {
    const paymentId = event.data.id;
    const discord_id = event.data.user.discord_id;
    // TODO: update your database here
  }

  res.status(200).send("ok");
});

app.listen(PORT, () => {
  console.log(`Webhook server running on http://localhost:${PORT}`);
});
```

{% endcode %}

### How it works

* **Raw body** is required — don’t use `express.json()` directly, otherwise the signature check will fail.
* **Check timestamp** (`X-Pay-Timestamp`) — reject if older than 5 minutes.
* **Recalculate signature**: `HMAC-SHA256(timestamp.body, secret)` with the base64-decoded secret.
* **Compare with `X-Pay-Signature`** using `crypto.timingSafeEqual` for safety.
* **Process the event** (decode JSON and apply business logic).
  {% endtab %}

{% tab title="Python + Flask" %}
{% code title="endpoint.py" %}

```python
from flask import Flask, request, abort
import time, hmac, hashlib, base64, json

app = Flask(__name__)

# Secret key (Tip4serv Dashboard -> Webhook -> Custom Webhook)
WEBHOOK_SECRET_BASE64 = "y2x3...=="

@app.route("/webhook", methods=["POST"])
def webhook():
    # 1) Read the raw request body (JSON string)
    body = request.data.decode("utf-8")

    # 2) Read headers sent by the platform
    timestamp = request.headers.get("X-Pay-Timestamp", "")
    signature = request.headers.get("X-Pay-Signature", "")

    # 3) Reject if the webhook is too old (max 5 minutes)
    if abs(time.time() - int(timestamp)) > 300:
        abort(401, "invalid timestamp")

    # 4) Recalculate the expected signature
    base_string = f"{timestamp}.{body}"
    secret_binary = base64.b64decode(WEBHOOK_SECRET_BASE64)
    expected_signature = hmac.new(secret_binary, base_string.encode(), hashlib.sha256).hexdigest()

    # 5) Compare signatures
    if not hmac.compare_digest(expected_signature, signature):
        abort(401, "invalid signature")

    # 6) If we’re here, the webhook is authentic
    event = json.loads(body)

    # Example: handle payment update
    if event.get("event") == "payment.success":
        payment_id = event["data"]["id"]
        discord_id = event["data"]["user"]["discord_id"]
        # TODO: update your database here

    return "ok", 200

if __name__ == "__main__":
    app.run(port=3000, debug=True)
```

{% endcode %}

### How it works

1. **Read the body** → the raw JSON payload sent by Tip4Serv.
2. **Get headers** → `X-Pay-Timestamp` and `X-Pay-Signature` (sent with every request).
3. **Check freshness** → reject if the webhook is older than 5 minutes.
4. **Recalculate signature** → `HMAC-SHA256(timestamp.body, secret)` using your Base64-decoded secret.
5. **Compare signatures** → use `hmac.compare_digest` to avoid timing attacks.
6. **Process event** → decode JSON and handle it (e.g., update your database).
   {% endtab %}

{% tab title="Java + Spring Boot" %}
{% code title="endpoint.java" %}

```java
import org.springframework.web.bind.annotation.*;
import org.springframework.http.ResponseEntity;

import javax.crypto.Mac;
import javax.crypto.spec.SecretKeySpec;
import java.util.Base64;
import java.util.Map;

@RestController
public class WebhookController {

    // Secret key (Tip4serv Dashboard -> Webhook -> Custom Webhook)
    private static final String WEBHOOK_SECRET_BASE64 = "y2x3...==";

    @PostMapping("/webhook")
    public ResponseEntity<String> handleWebhook(
            @RequestBody String body,
            @RequestHeader(value = "X-Pay-Timestamp", required = false) String timestamp,
            @RequestHeader(value = "X-Pay-Signature", required = false) String signature
    ) {
        try {
            // 1) Reject if timestamp missing or too old (max 5 min)
            if (timestamp == null || Math.abs(System.currentTimeMillis() / 1000 - Long.parseLong(timestamp)) > 300) {
                return ResponseEntity.status(401).body("invalid timestamp");
            }

            // 2) Recalculate expected signature
            String baseString = timestamp + "." + body;
            byte[] secret = Base64.getDecoder().decode(WEBHOOK_SECRET_BASE64);

            Mac hmac = Mac.getInstance("HmacSHA256");
            hmac.init(new SecretKeySpec(secret, "HmacSHA256"));
            String expected = bytesToHex(hmac.doFinal(baseString.getBytes()));

            // 3) Compare signatures
            if (signature == null || !expected.equals(signature)) {
                return ResponseEntity.status(401).body("invalid signature");
            }

            // 4) Webhook is authentic → parse JSON
            com.fasterxml.jackson.databind.ObjectMapper mapper = new com.fasterxml.jackson.databind.ObjectMapper();
            Map<String, Object> event = mapper.readValue(body, Map.class);

            // Example: handle payment.success
            if ("payment.success".equals(event.get("event"))) {
                Map<String, Object> data = (Map<String, Object>) event.get("data");
                String paymentId = String.valueOf(data.get("id"));
                // TODO: update your database
            }

            return ResponseEntity.ok("ok");

        } catch (Exception e) {
            e.printStackTrace();
            return ResponseEntity.status(500).body("error");
        }
    }

    // Helper: convert bytes to hex string
    private static String bytesToHex(byte[] bytes) {
        StringBuilder sb = new StringBuilder();
        for (byte b : bytes) sb.append(String.format("%02x", b));
        return sb.toString();
    }
}

```

{% endcode %}

### How it works

* **Read the body** → `@RequestBody String body` contains the raw JSON payload.
* **Get headers** → `X-Pay-Timestamp` and `X-Pay-Signature` are extracted with `@RequestHeader`.
* **Check freshness** → reject if the timestamp is more than 5 minutes old.
* **Recalculate signature** → compute `HMAC-SHA256(timestamp.body, secret)` with your Base64-decoded secret.
* **Compare signatures** → ensure `expected == signature` before processing.
* **Process event** → parse JSON with Jackson (`ObjectMapper`) and act on the `event`.
  {% endtab %}
  {% endtabs %}

### Tips & best practices

* **Respond fast** (under a few seconds). Offload heavy work to a queue/worker.
* Treat optional fields defensively: not every `user` identifier or `custom_fields` will be present.
* Log the **raw payload** (with privacy in mind) to help debugging.


# Webhook Data Structure

When your webhook receives a payment or subscription event, a JSON payload is sent.

This document explains the structure and meaning of each field.

### Example Payload

```json
{
  "event": "payment.success",
  "created_at": "2025-09-04T13:45:44-04:00",
  "request_id": "51b97ba5891ec220e8b64385a00c3826",  
  "webhook_id": "458",
  "store_id": "7541",
  "mode": "live", // live or test
  "data": {
    "id": 71134,
    "type": 1, // 1 = payment | 2 = subscription
    "transaction_id": "68B9D0471D02A",
    "gateway": "paypal", // stripe, paypal or free
    "amount": {
      "total_paid": 12,
      "currency": "EUR"
    },
    "user": {
      "email": "example@gmail.com",
      "username": "Murga",
      "steam_id": "76561198030562915",
      "steam_username": "Murgator",
      "discord_id": "376442921087995901",
      "discord_username": "murgator"
    },
    "basket": [
      {
        "id": 183,
        "sub_key": "762szqztj",
        "name": "Gold Sword",
        "price": 10,
        "quantity": 1,
        "custom_fields": {
          "1": {
            "field_id": 1,
            "name": "Level",
            "value": {
              "option_id": 2,
              "name": "Maximum",
              "value": "800", // value selected by the customer
              "price": 2.00
            },
            "total_price": 2,
            "type": "selection"
          }
        }
      }
    ],
    "actions": [
      {
        "server_id": "20861",
        "commands": [
          {
            "str": "give apple {minecraft_uuid} 1",
            "event": "0",
            "item_key": 0,
            "product_id": "183"
          },
          {
            "str": "give hook{minecraft_uuid} 1",
            "event": "0",
            "item_key": 0,
            "product_id": "185"
          }
        ]
      },
      {
        "server_id": "20859",
        "commands": [
          {
            "str": "give apple {minecraft_uuid} 1",
            "event": "0",
            "item_key": 0,
            "product_id": "183"
          },
          {
            "str": "give hook{minecraft_uuid} 1",
            "event": "0",
            "item_key": 0,
            "product_id": "185"
          }
        ]
      }
    ],
  }
}
```

***

### 🧾Main Fields

<table><thead><tr><th>Field</th><th>Type</th><th width="213">Example</th><th>Description</th></tr></thead><tbody><tr><td><code>event</code></td><td>string</td><td><code>payment.success</code>, <code>payment.refused</code>, <code>payment.refunded</code>, <code>subscription.created</code>, <code>subscription.renewed</code>, <code>subscription.expired</code></td><td>Event name</td></tr><tr><td><code>created_at</code></td><td>string (ISO 8601)</td><td><code>2025-09-04T13:45:44-04:00</code></td><td>Date and time of the event</td></tr><tr><td><code>request_id</code></td><td>string</td><td><code>51b97ba5891ec220e8b64385a00c3826</code></td><td>Unique webhook ID (useful for logs/debug)</td></tr><tr><td><code>webhook_id</code></td><td>int</td><td><code>458</code></td><td>Webhook ID</td></tr><tr><td><code>store_id</code></td><td>int</td><td><code>7541</code></td><td>Your shop ID</td></tr><tr><td><code>data</code></td><td>object</td><td><code>{...}</code></td><td>Event-related data</td></tr><tr><td><code>mode</code></td><td>string</td><td><code>test</code>, <code>live</code></td><td>Payment mode</td></tr></tbody></table>

***

### 💳 `Data` Object

| Field            | Type   | Example                                   | Description                                             |
| ---------------- | ------ | ----------------------------------------- | ------------------------------------------------------- |
| `id`             | int    | `71134`                                   | Internal payment ID or subscription ID                  |
| `transaction_id` | string | `68B9D0471D02A`                           | Transaction ID                                          |
| `gateway`        | string | `free`, `paypal`, `stripe`                | Payment gateway used or free order                      |
| `amount`         | object | `{ "total_paid": 12, "currency": "EUR" }` | Paid amount and currency                                |
| `user`           | object | `{...}`                                   | User information (multi-game + Discord/Steam/etc.)      |
| `basket`         | array  | `[ {...} ]`                               | Purchased products                                      |
| `actions`        | object | `{...}`                                   | Commands related to the payment (Discord, server, etc.) |
| `type`           | int    | `1`, `2`                                  | 1 = payment, 2 = subscription                           |

***

### 👤 `user` Object

Contains identifiers of the user, which may vary depending on the configuration:

* `email` → User email
* `username` → Display name
* `steam_id`, `steam_username` → Steam identity
* `minecraft_username`, `minecraft_uuid` → Minecraft identity
* `eosid` → ARK:SA ID
* `fivem_citizen_id` → FiveM identifier
* `discord_id`, `discord_username` → Discord identity

⚠️ Some fields may be missing if the user has not linked that service.

***

### 🛒 `basket` Object

Each purchased product is listed here:

| Field           | Example     | Description                                                               |
| --------------- | ----------- | ------------------------------------------------------------------------- |
| `id`            | `183`       | Product ID                                                                |
| `sub_key`       | `762szqztj` | Tip4Serv product key                                                      |
| `name`          | `VIP Rank`  | Product name                                                              |
| `price`         | `10.00`     | Unit price                                                                |
| `quantity`      | `1`         | Quantity purchased                                                        |
| `custom_fields` | `{...}`     | [Custom fields](/product-setup/custom-fields) associated with the product |

***

### ⚙️ `commands` Object

The `commands` object contains **all servers (API type only) and actions** configured by the seller in the product editor.\
For each server you will find one or more groups of commands which depends on what you have configured in the products ordered by the customer.

| Field        | Example                   | Description                                                                                                                    |
| ------------ | ------------------------- | ------------------------------------------------------------------------------------------------------------------------------ |
| `str`        | `give {steam_id} apple 1` | The actual command string to execute.                                                                                          |
| `event`      | `0 or 1`                  | <p>Option selected by the seller in the product editor:<br>0 → Always execute<br>1  → Execute only if the player is online</p> |
| `product_id` | `183`                     | The Tip4Serv product ID linked to this command.                                                                                |
| `item_key`   | `0`, `1`, `2`...          | <p>Index of the item in the buyer’s basket. </p><p>0 = first product, 1 = second product...</p>                                |
| `server_id`  | `XXXXXX`                  | Server ID on which these commands should be executed                                                                           |


# Payment Validation

This guide explains how you can reply to Tip4Serv webhooks and how to control the validation (DELIVERED) of orders, either server-wide or per individual command.

### Response Semantics

#### A) `200 OK` response with no body

**Effect:**

* All orders contained in the event are marked as **DELIVERED**.
* The related financial object (payment or subscription) is marked as **processed**.

> This is the default behavior: simple and global. Code example: [Handle Webhook](/webhooks-developers-only/handle-webhook#create-an-endpoint)

***

#### B) `200 OK` response with a targeted JSON

To validate only specific servers and/or commands, return `application/json` in the following format:

```json
{
  "ok": true,
  "results": [
    {
      "server_id": "20859",
      "commands": [
        { "command_id": "0", "delivered": true },
        { "command_id": "1", "delivered": false, "error": "server unreachable" }
      ]
    },
    {
      "server_id": "20861",
      "delivered": true
    }
  ]
}
```

***

#### Priority Rules

1. Servers/commands absent from the JSON are **not modified** (they remain undelivered).
2. If `delivered: false` + `error` is provided, the platform logs the error and **does not attempt to mark the command as delivered**.

***

#### Headers & Content-Type

* `Content-Type: application/json; charset=utf-8`
* Always return **HTTP 200** if the request was authenticated and functionally processed (even if you reject some commands with `delivered: false`).
* Use **401** only for invalid signature/timestamp: [Handle Webhook](/webhooks-developers-only/handle-webhook#secure-and-handle-webhook)

***

### 3) Usage Examples

#### Example 1 — Validate everything (global)

Response:

```
HTTP/1.1 200 OK
Content-Length: 2

ok
```

***

#### Example 2 — Validate only some commands of a server

```json
{
  "ok": true,
  "results": [
    {
      "server_id": "20859",
      "commands": [
        { "command_id": "0", "delivered": true },
        { "command_id": "1", "delivered": false, "error": "server unreachable" }
      ]
    }
  ]
}
```

***

#### Example 3 — Validate an entire server at once

```json
{
  "ok": true,
  "results": [
    { "server_id": "20861", "delivered": true }
  ]
}
```

***

#### Example 4 — Validate nothing (acknowledged but functionally refused)

```json
{
  "ok": true
}
```


# How to get a refund?

You bought a product on a store and you want to be reimbursed

**Tip4Serv does not make refunds** because it does not collect your money.&#x20;

You paid directly to the store owner, you must **contact your server administrator** or your community manager.

If you don't have a way to contact the store owner: [contact us](https://tip4serv.com/contact) **and mention your payment ID.**


# How to unsubscribe?

To cancel your subscription follow these steps:

1. Log in to your account and go to [MY SUBSCRIPTIONS](https://tip4serv.com/dashboard/my-subscriptions).
2. Click on the **EYE** button of the subscription concerned.
3. Click the **UNSUBSCRIBE** button.

{% hint style="info" %}
You get a message that you have been successfully unsubscribed.
{% endhint %}

### Why i can't unsubscribe?

The unsubscribe button is located at the top of the page for easy access. If you're unable to find it, or if you receive an error, please follow these steps:
<details>

<summary>Maybe it's a one-time payment</summary>

**If you see the ONE-TIME badge** in the subscription details, it means you are not subscribed, it is not a recurring subscription, you have paid for 1 single cycle. You will no longer be charged.

</details>

<details>

<summary>I see a Paypal subscription ID in the subscription details</summary>

* **If you have a Paypal account**, simply log in to your PayPal account and [cancel the subscription](https://www.paypal.com/us/cshelp/article/what-is-an-automatic-payment-and-how-do-i-update-or-cancel-one-help240).
* **If you subscribed as a guest**, contact the seller directly for assistance with cancellation.
* **If you can't contact the seller**, you can also [reach out to PayPal support](https://www.paypal.com/us/cshelp/contact-us) and request cancellation of the subscription.

</details>


# Where can i find my ARK:SA eosid?

{% hint style="info" %}
Please follow theses steps:

1. Connect to the ARK server
2. Press Escape to open the pause menu
3. Click on the store button
   {% endhint %}

<figure><img src="https://2187496599-files.gitbook.io/~/files/v0/b/gitbook-x-prod.appspot.com/o/spaces%2FrJFlpzFF4M0XjvFfIMsk%2Fuploads%2FaIF6FJlBhlSPZzKUSBrW%2Farkascended_bywbywid3r.webp?alt=media&amp;token=53a5512e-e16f-4a26-9ffc-728650a918d4" alt=""><figcaption><p>Screenshot from pause menu</p></figcaption></figure>

You will be redirected to the store and your username and eosid will be automatically filled in.